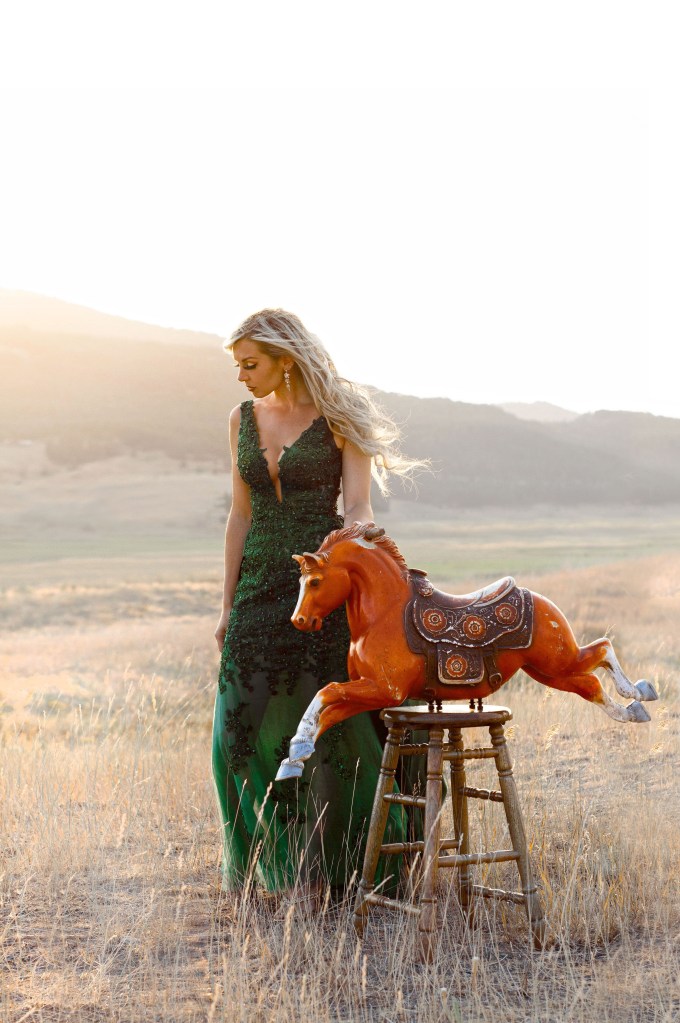
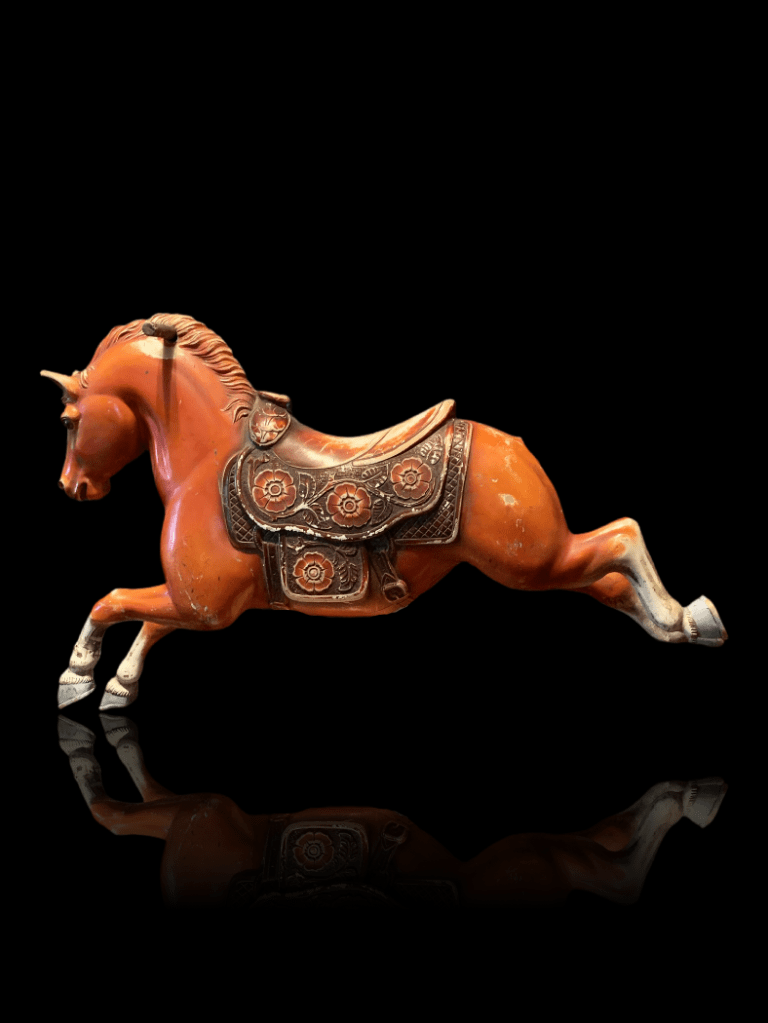
– FOR THE SILVER HERON ART GALLERY AUCTION AND FUND RAISER
-Before--After-
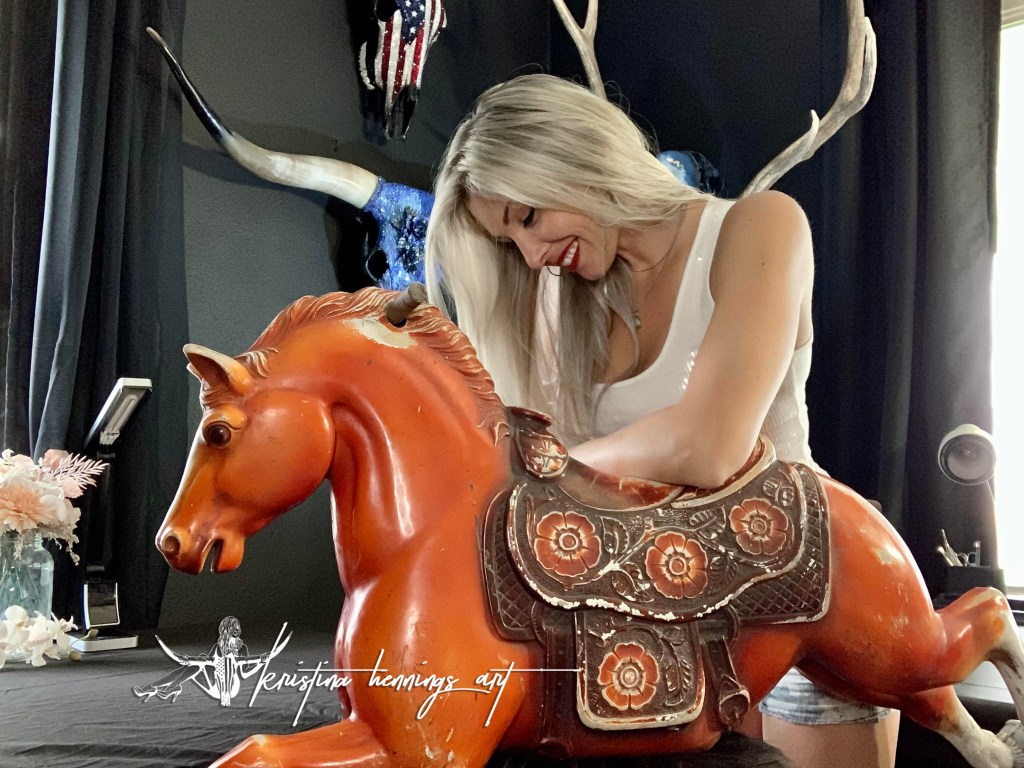
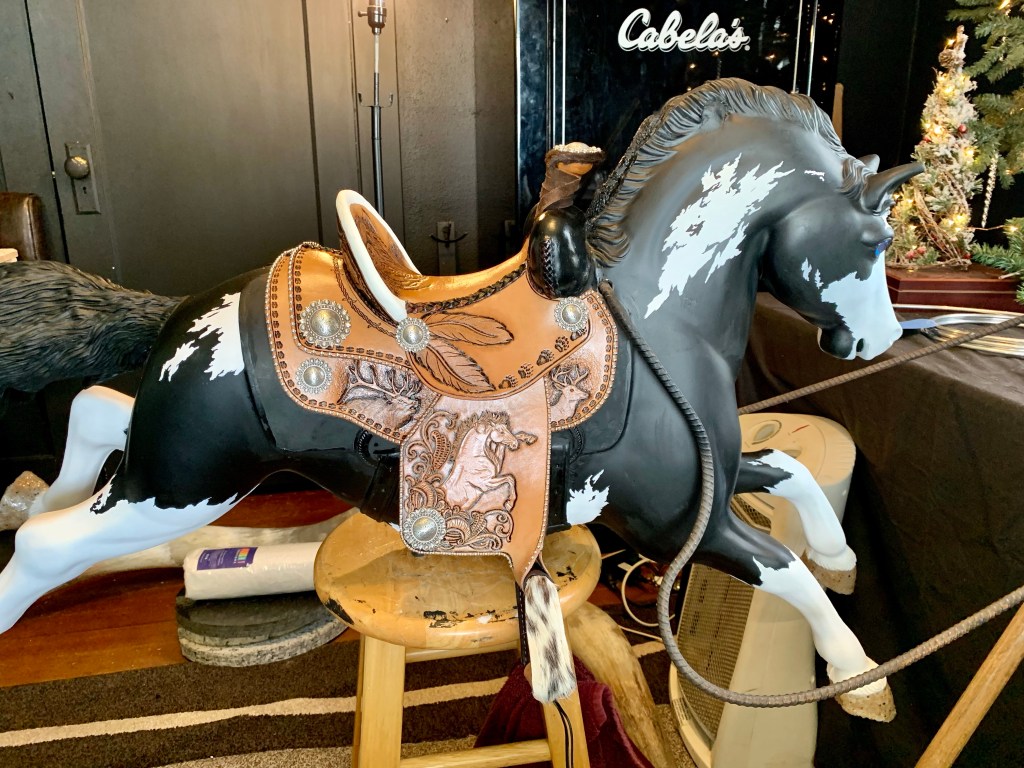
See more of the final pony reveal photos and videos at the bottom of this page! This is the little quarter pony when he arrived, before I started working on him Got him in the studio
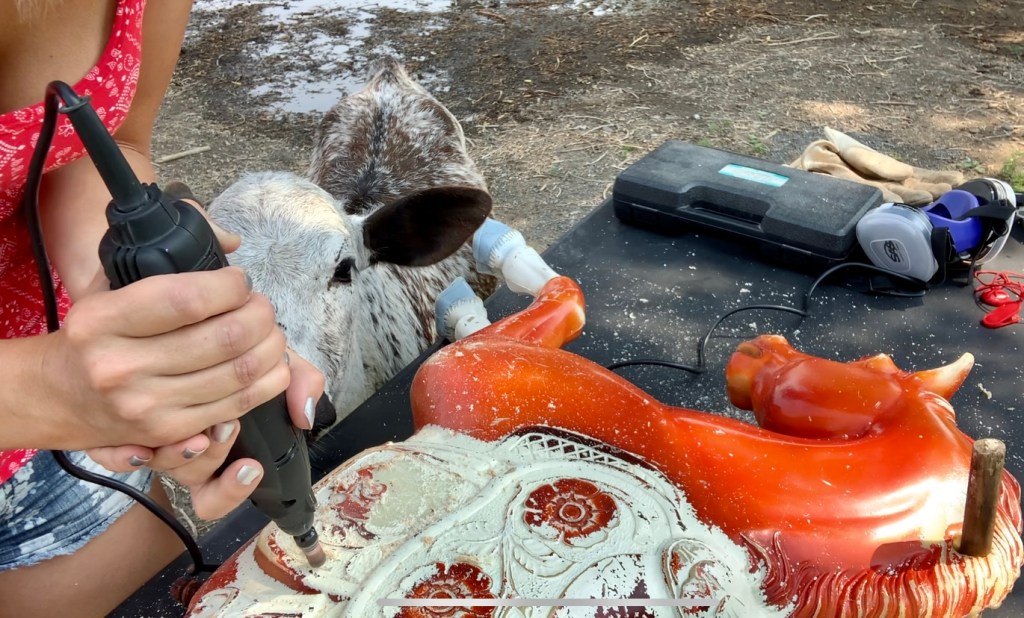
Blizzard, our bottle calf, so involved, so cute!
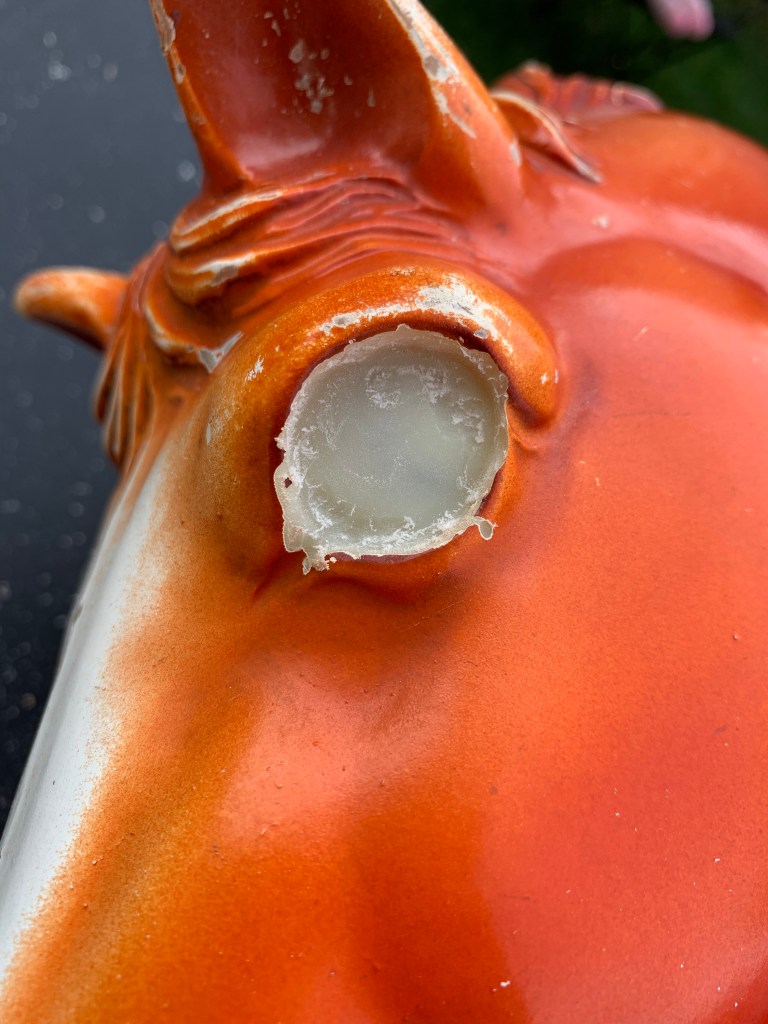
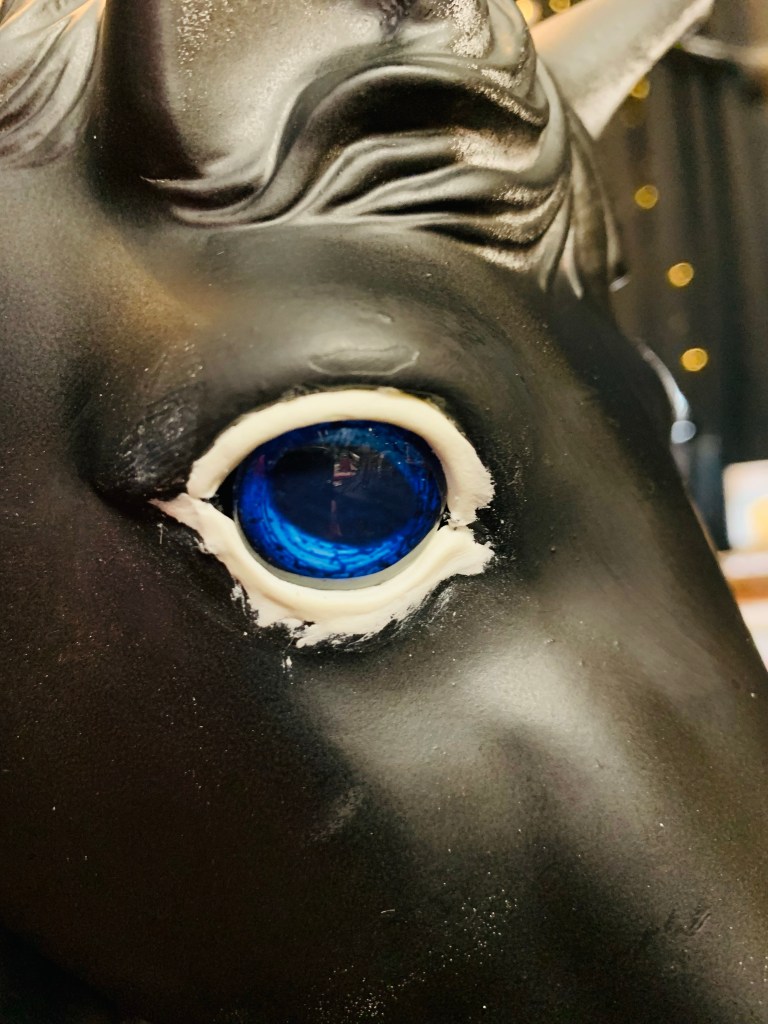
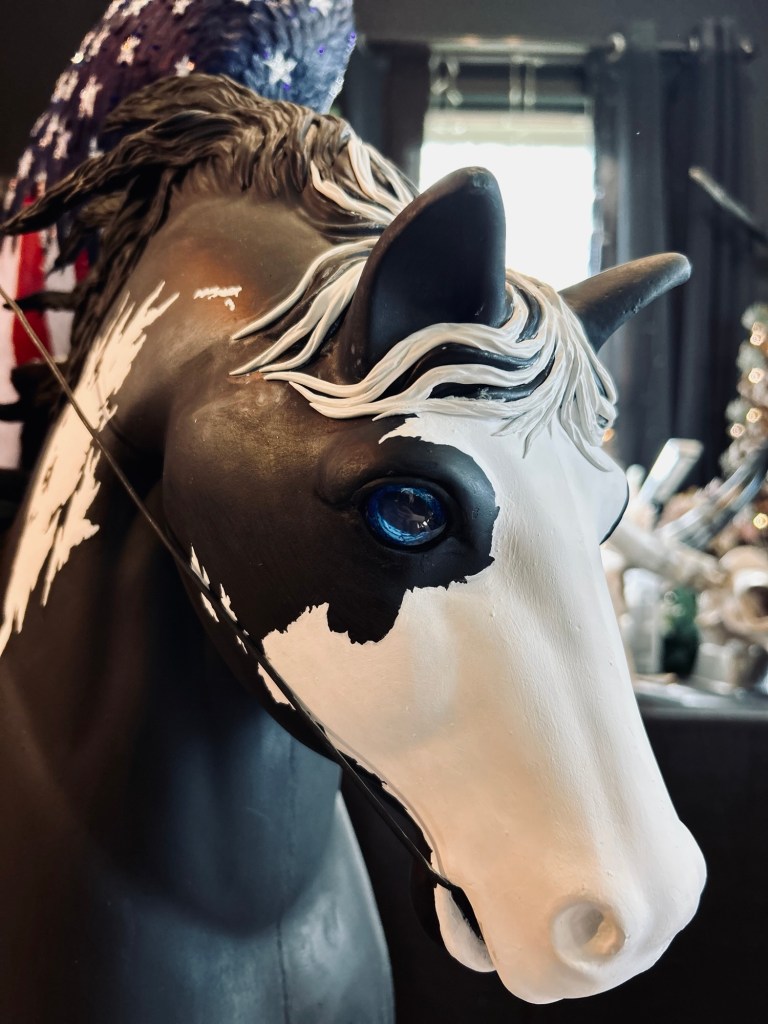
Prepping for new eyes
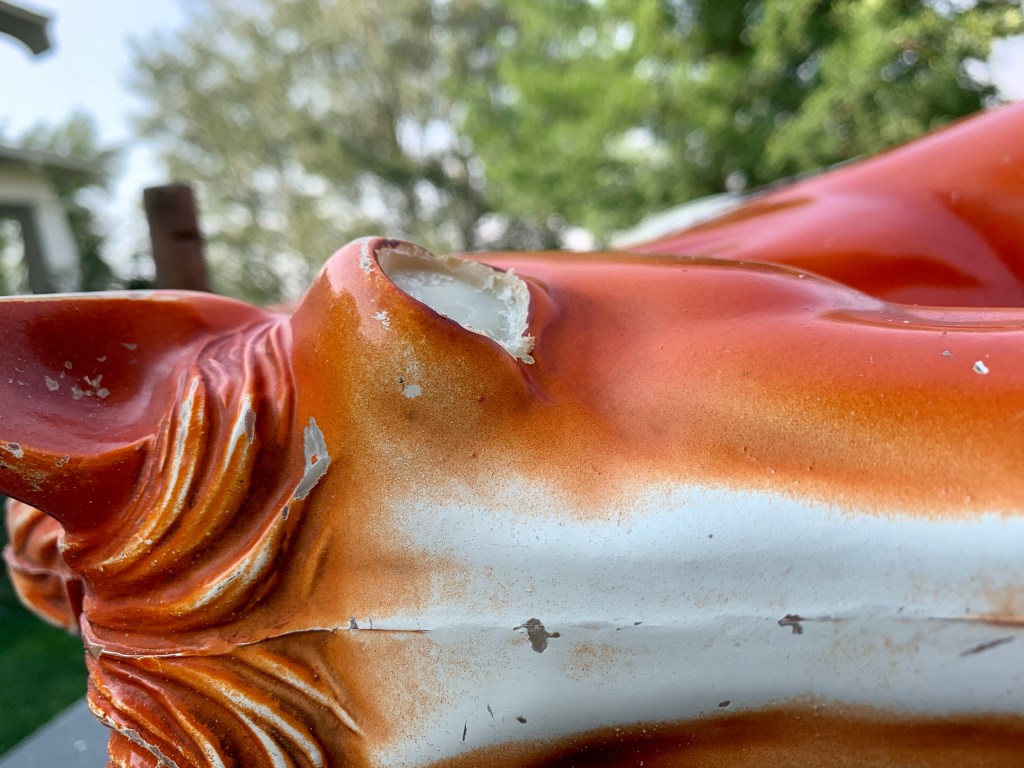
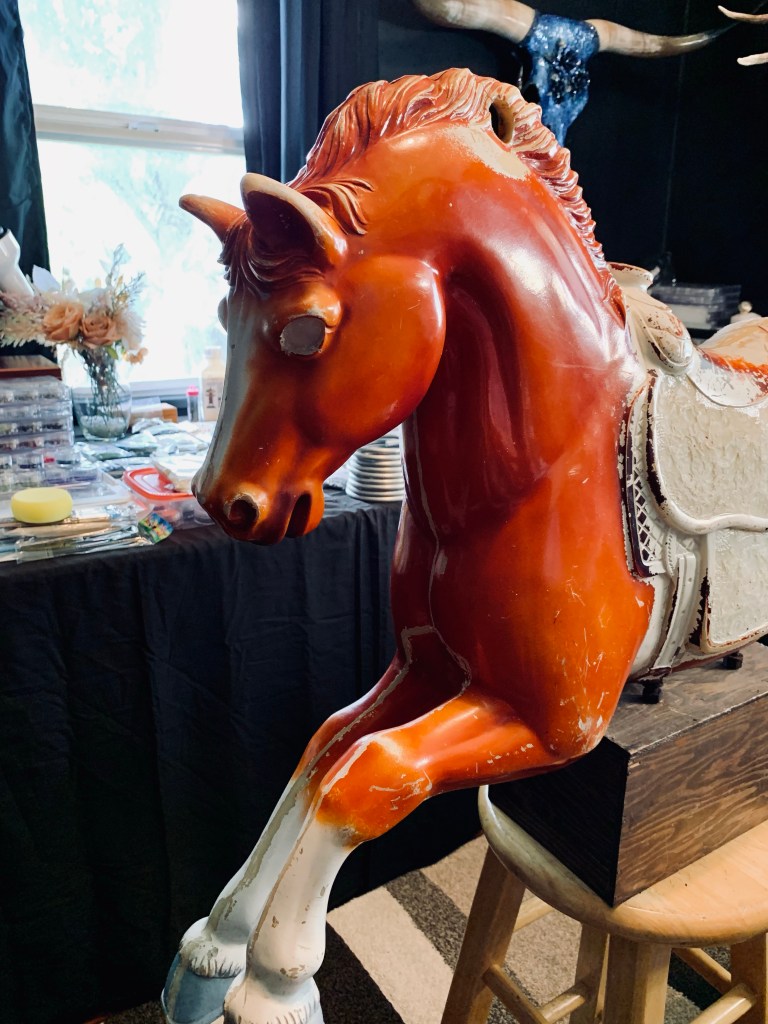
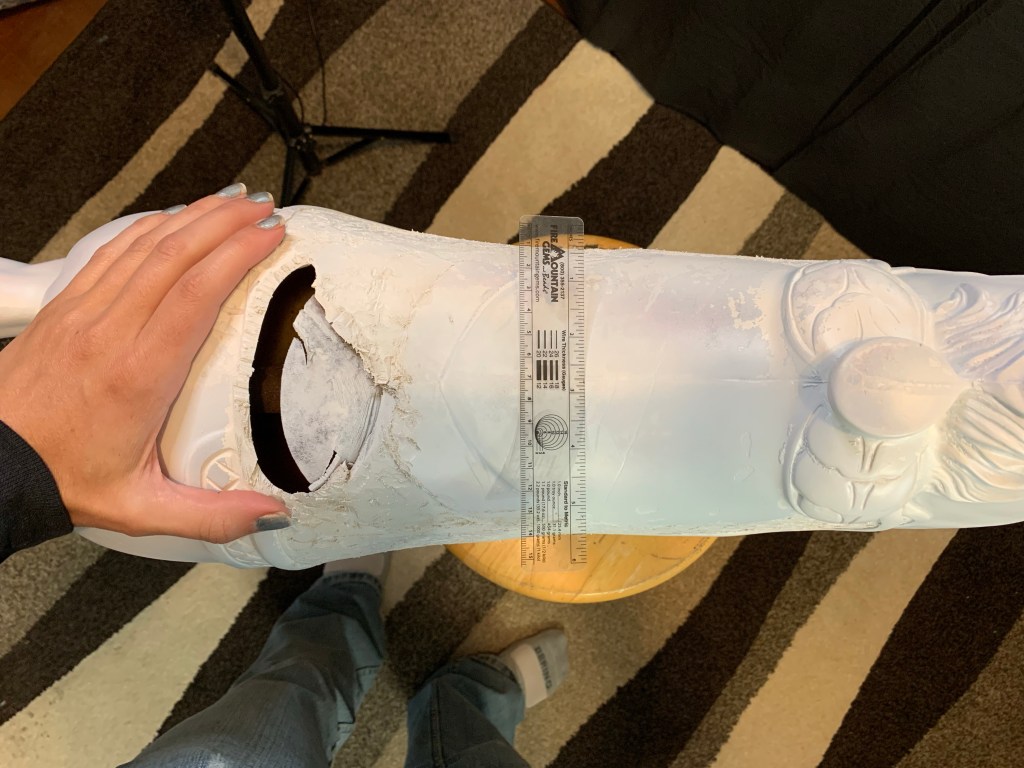
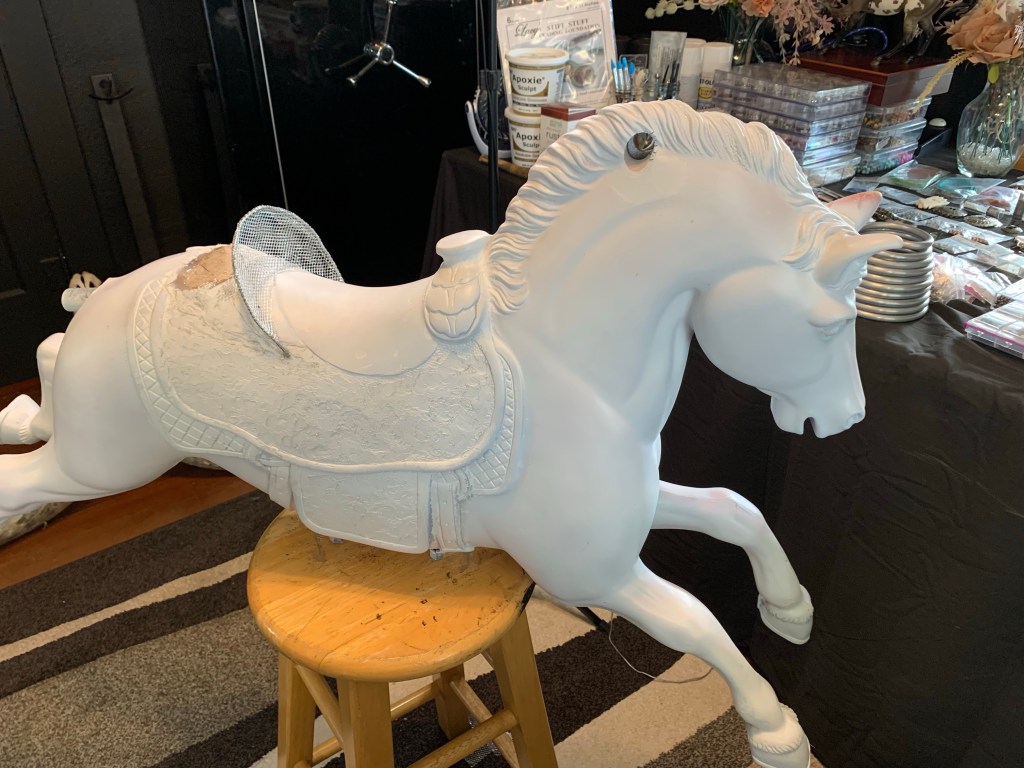
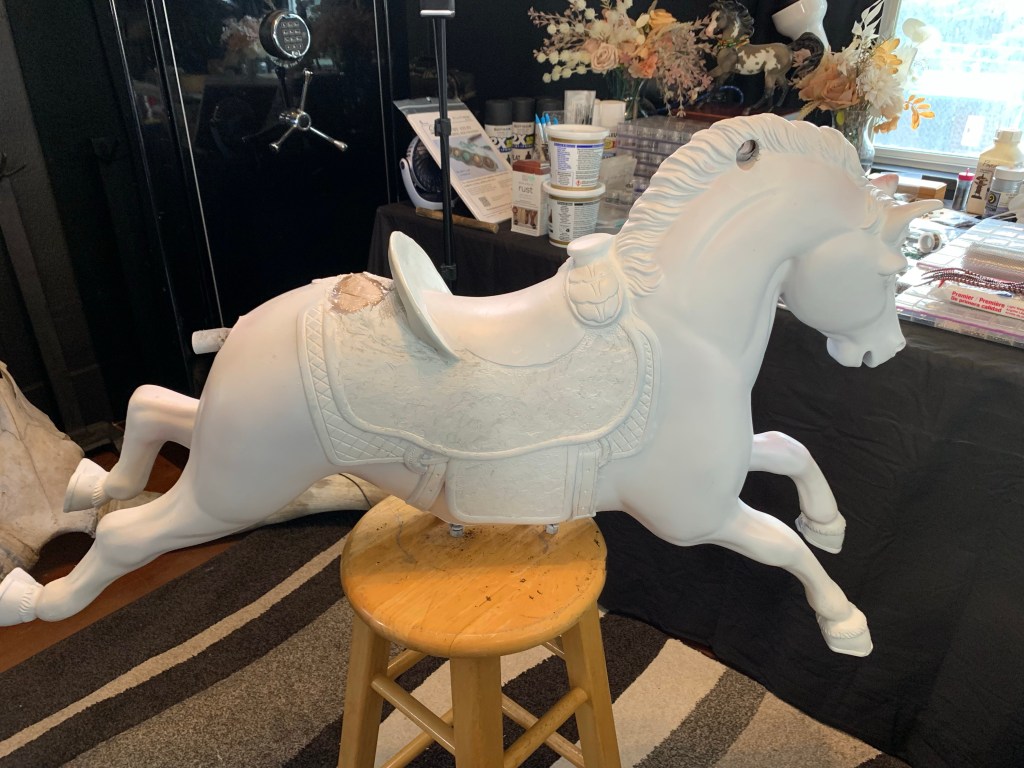
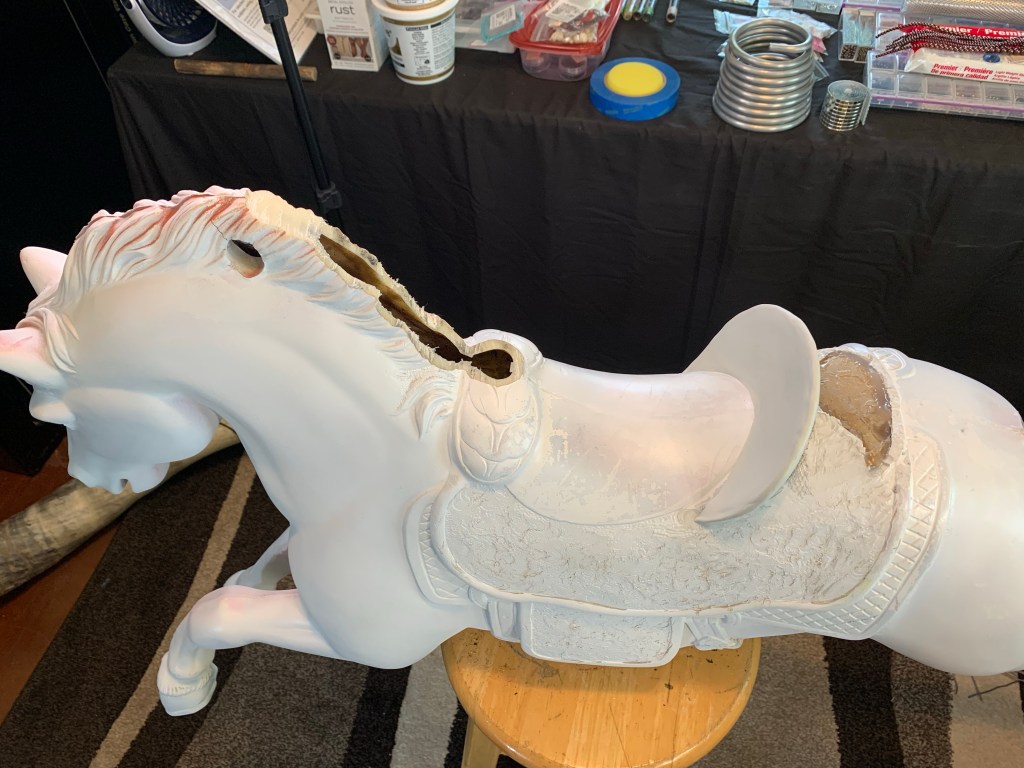
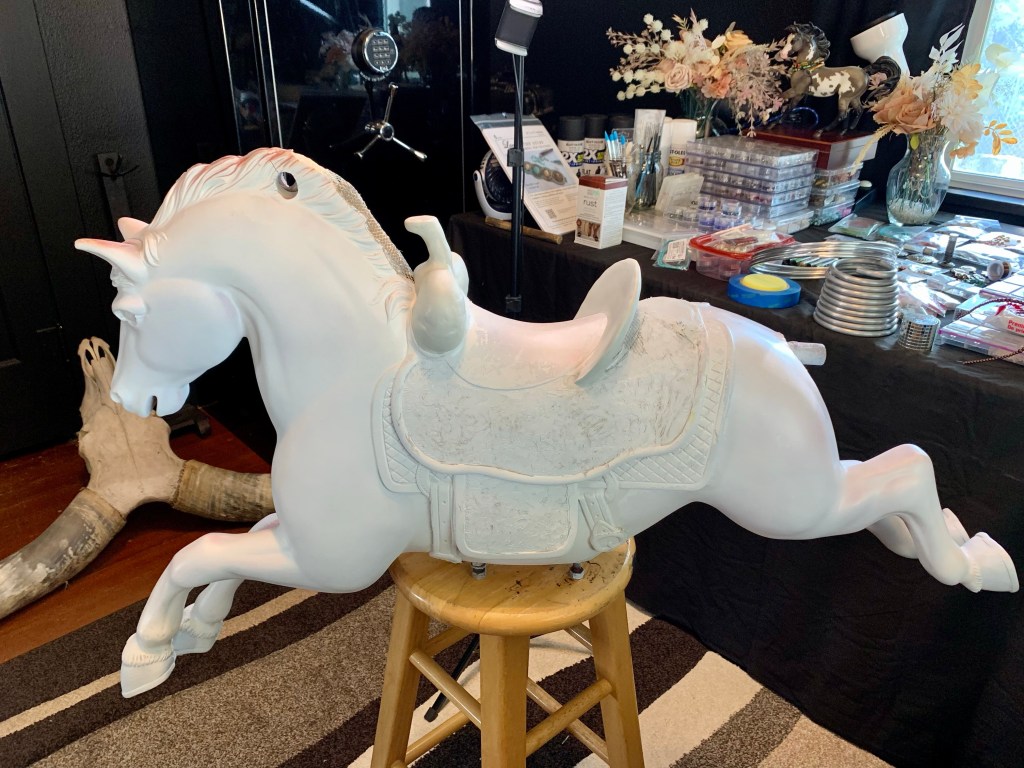
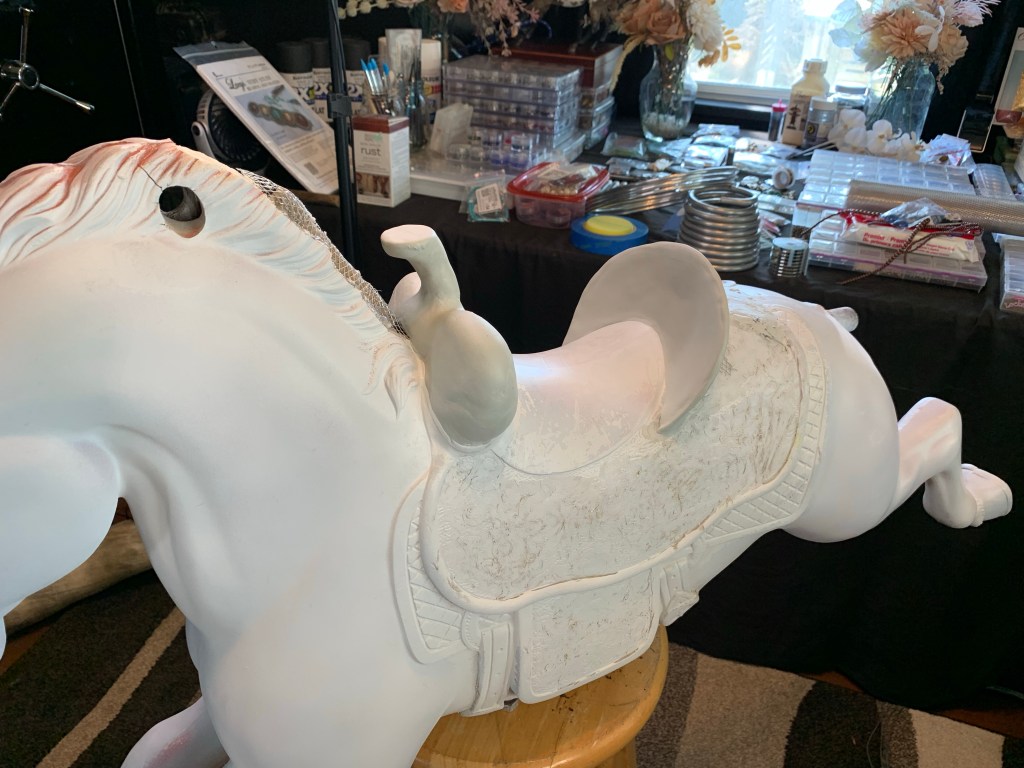
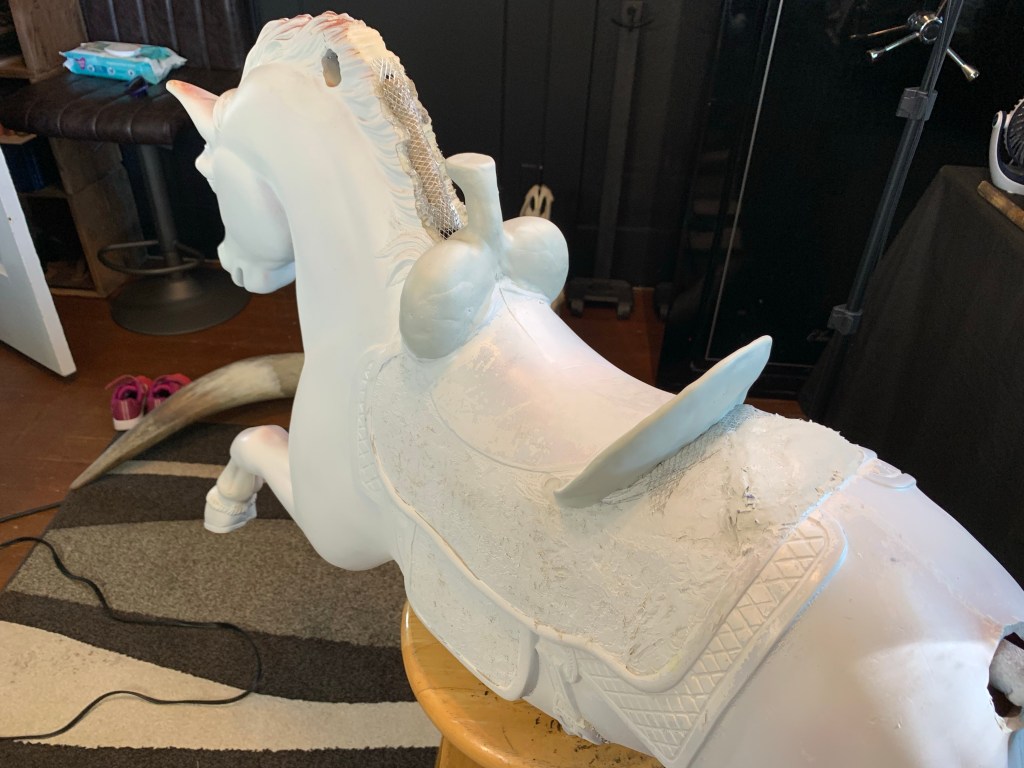
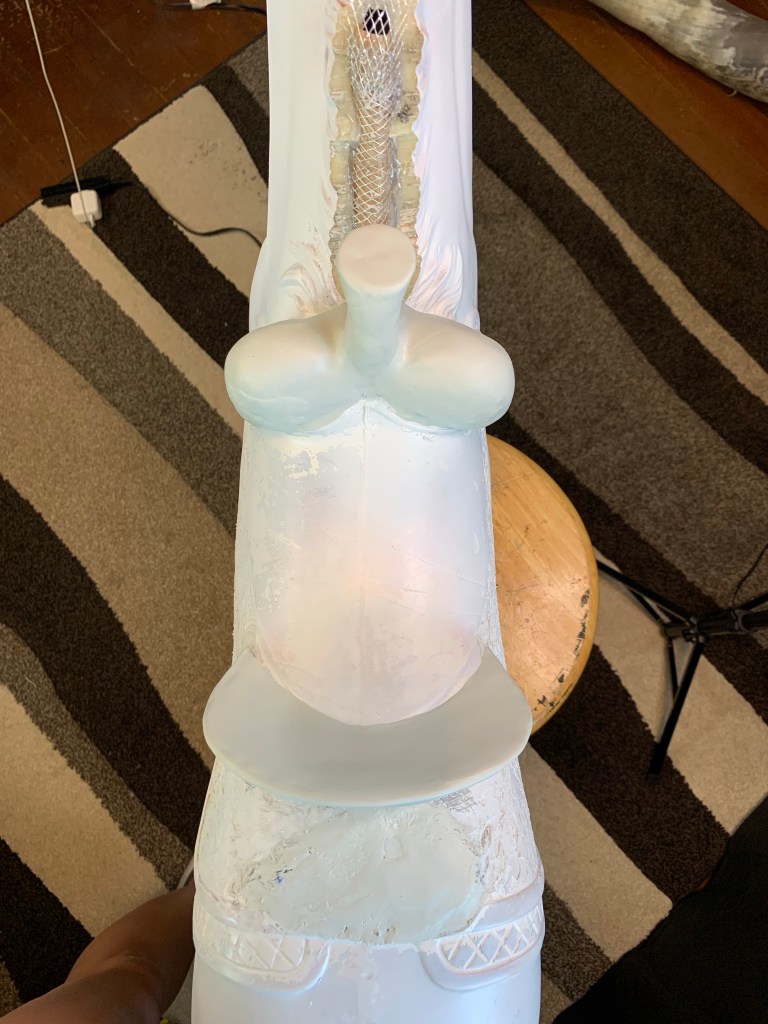
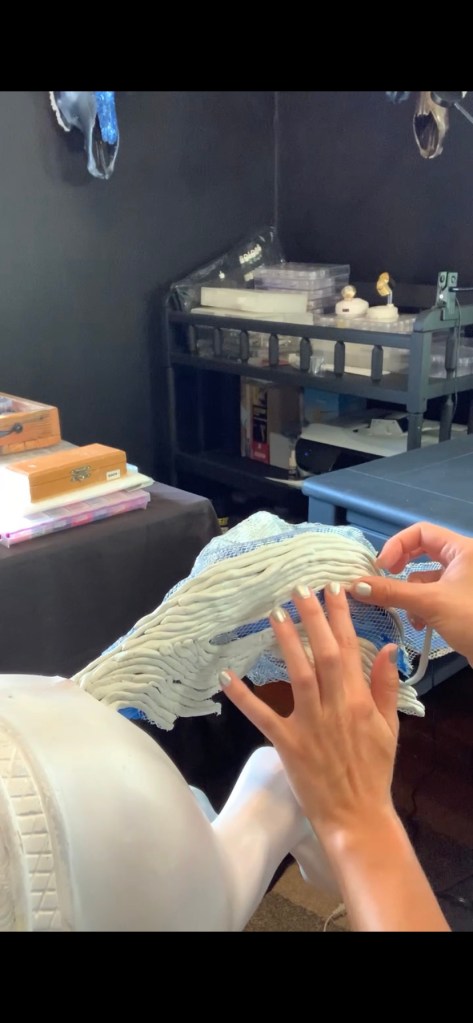
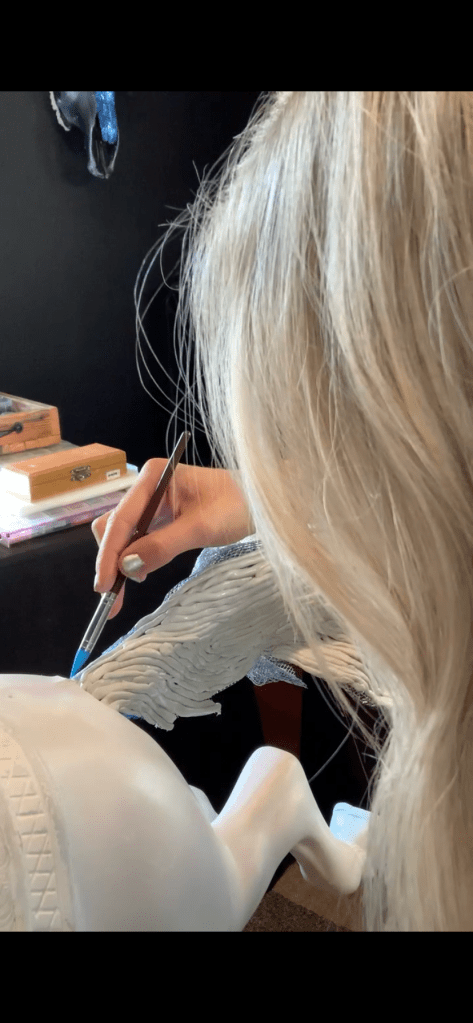
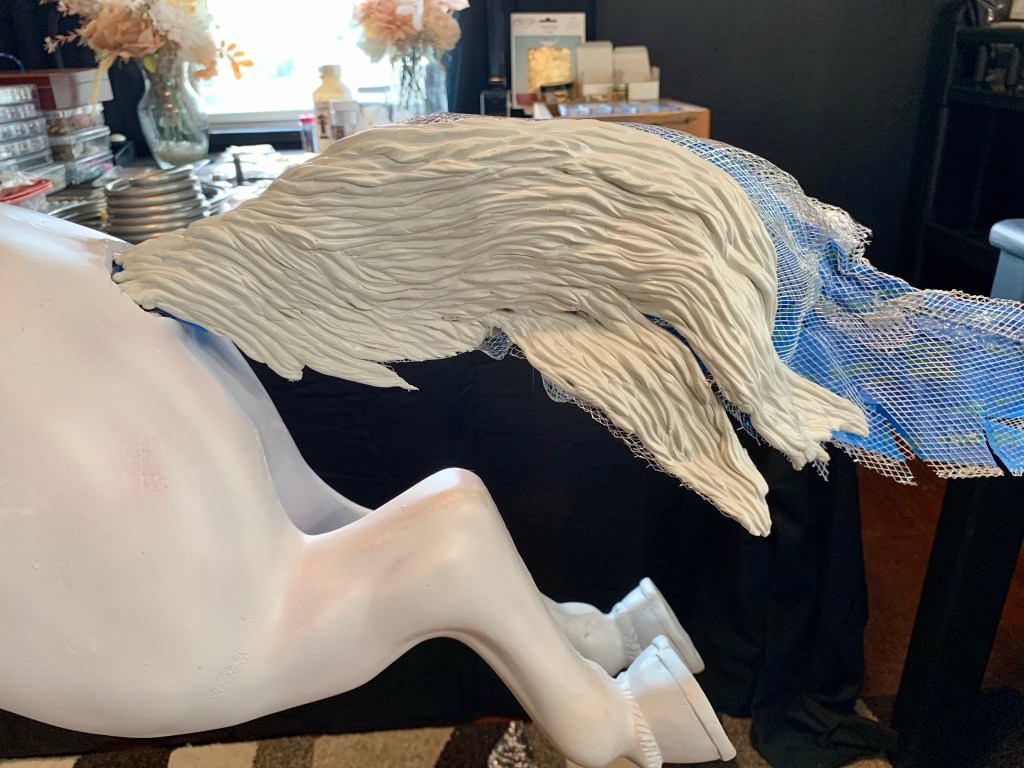
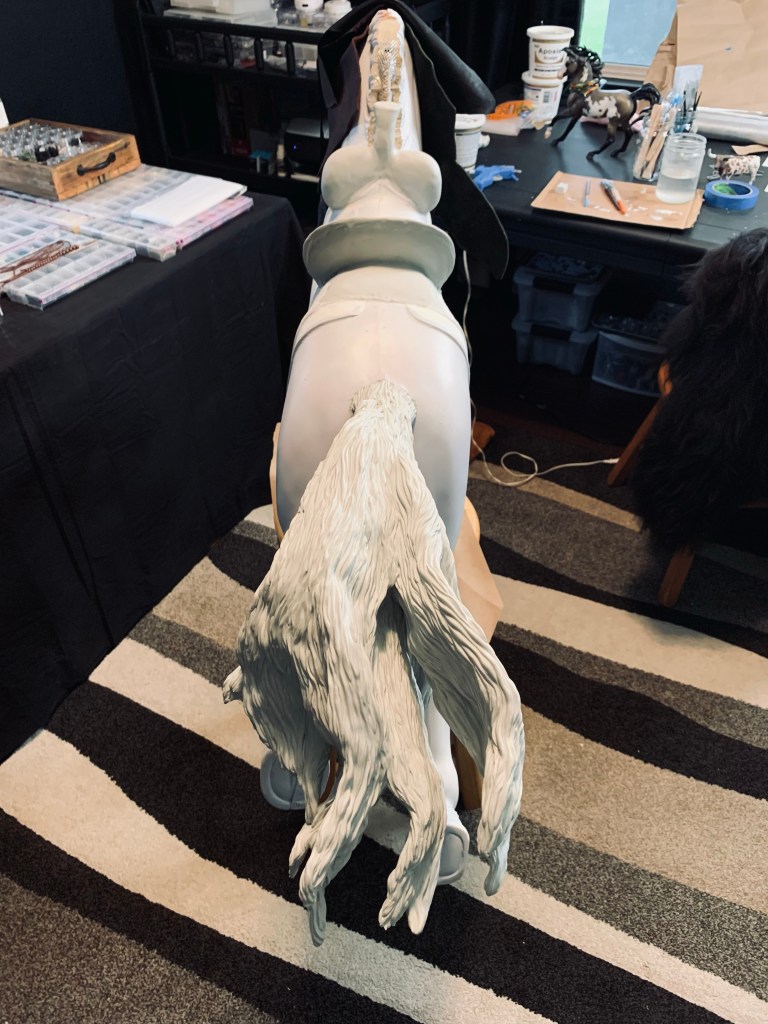
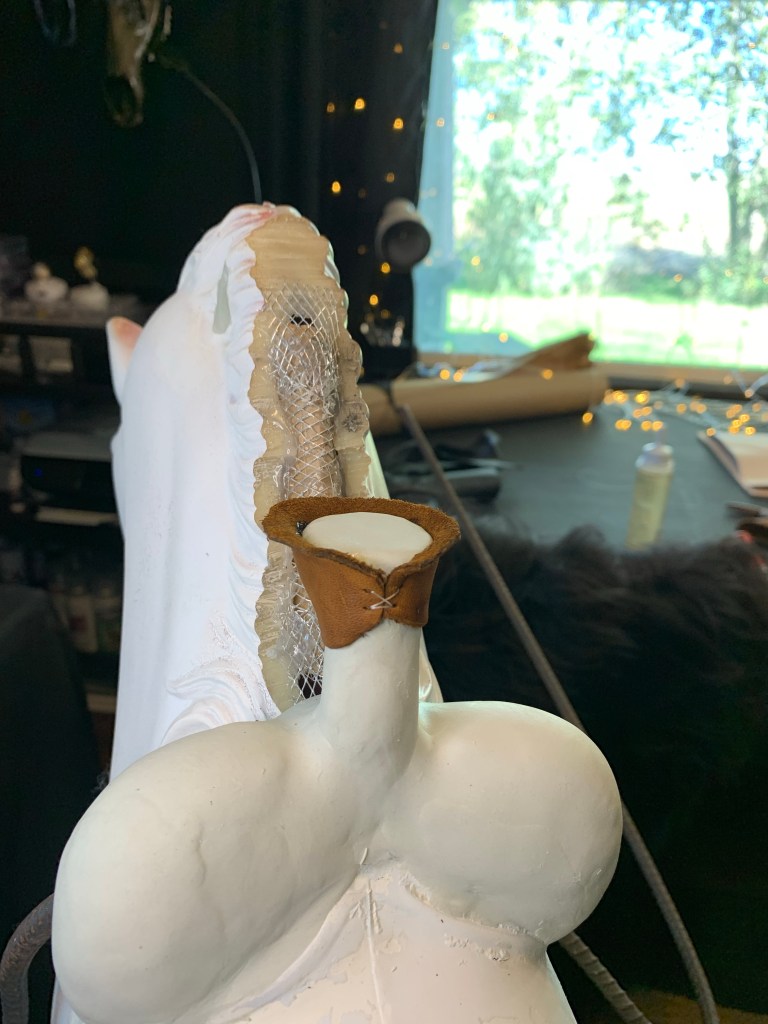
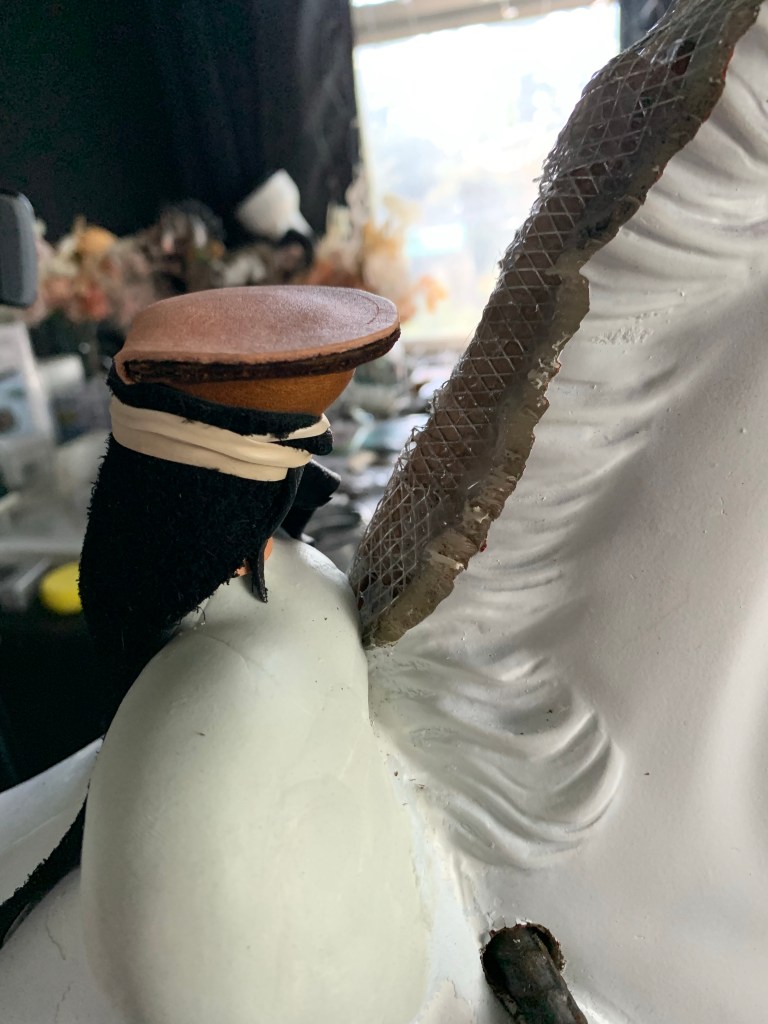
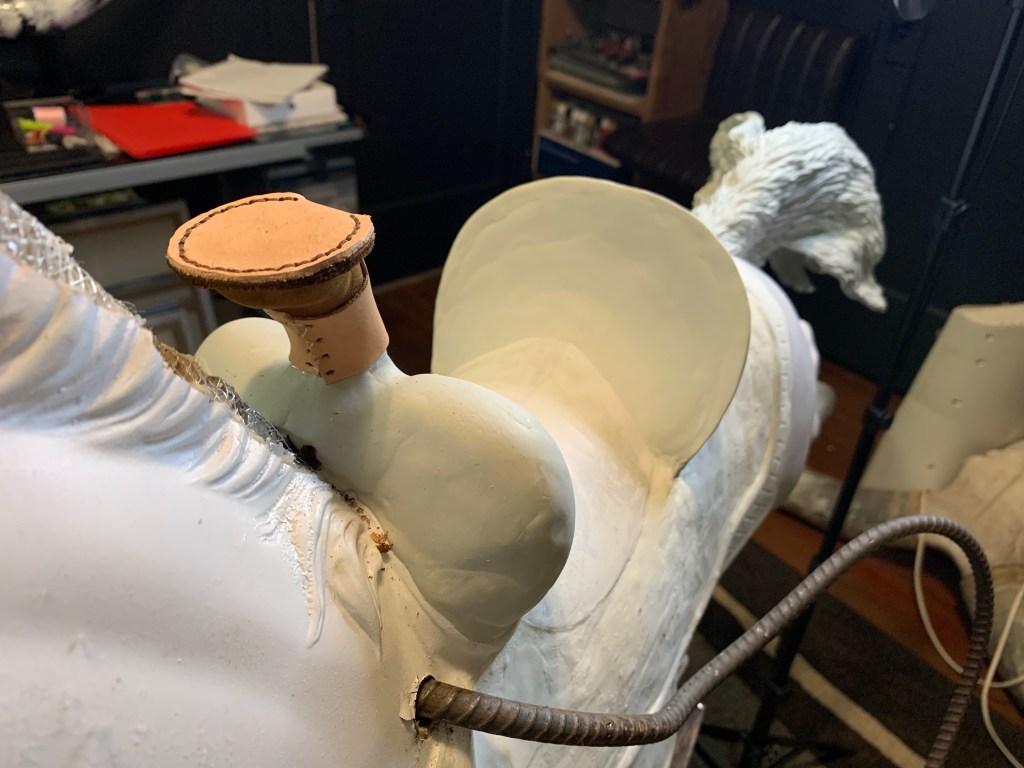
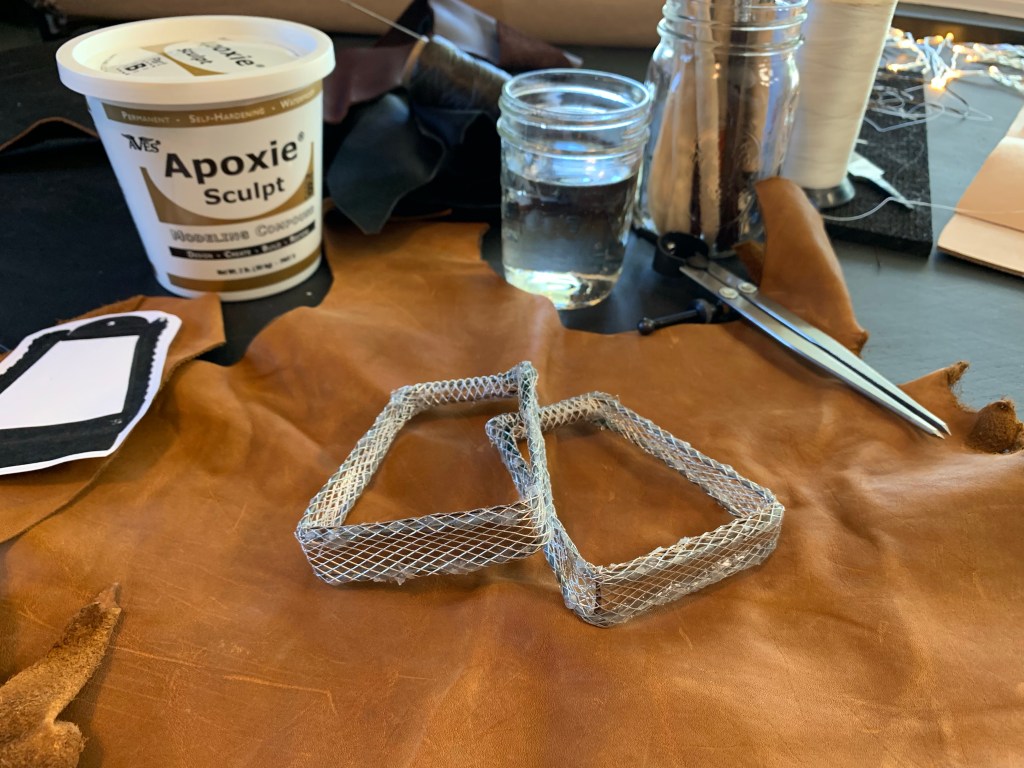
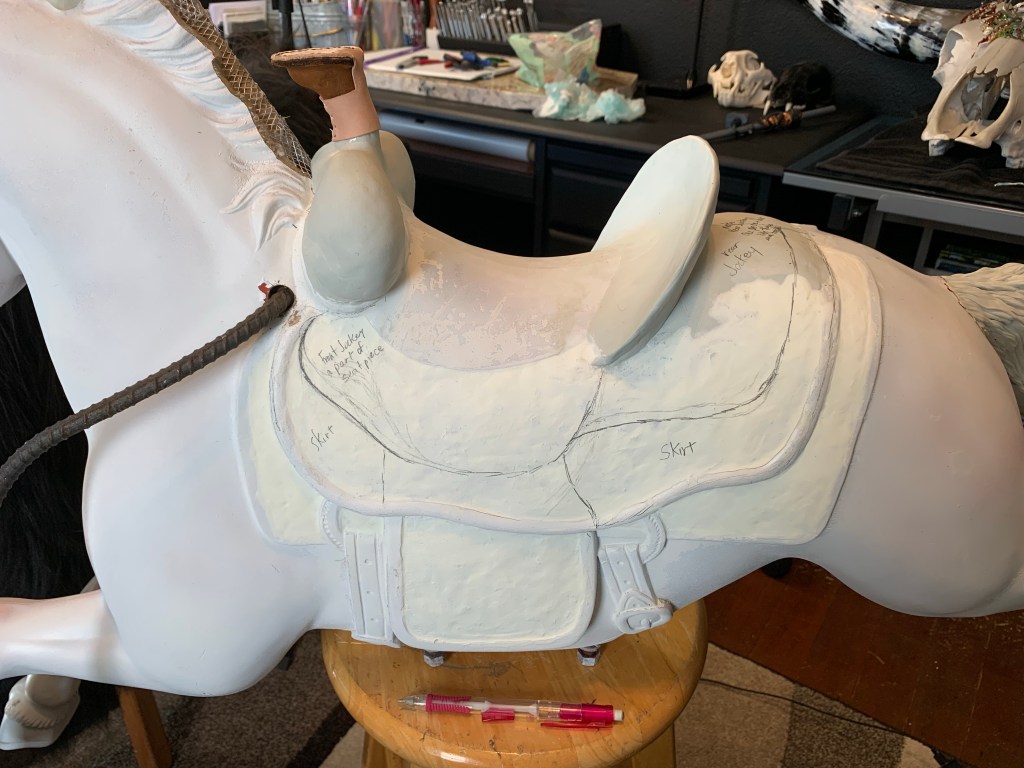
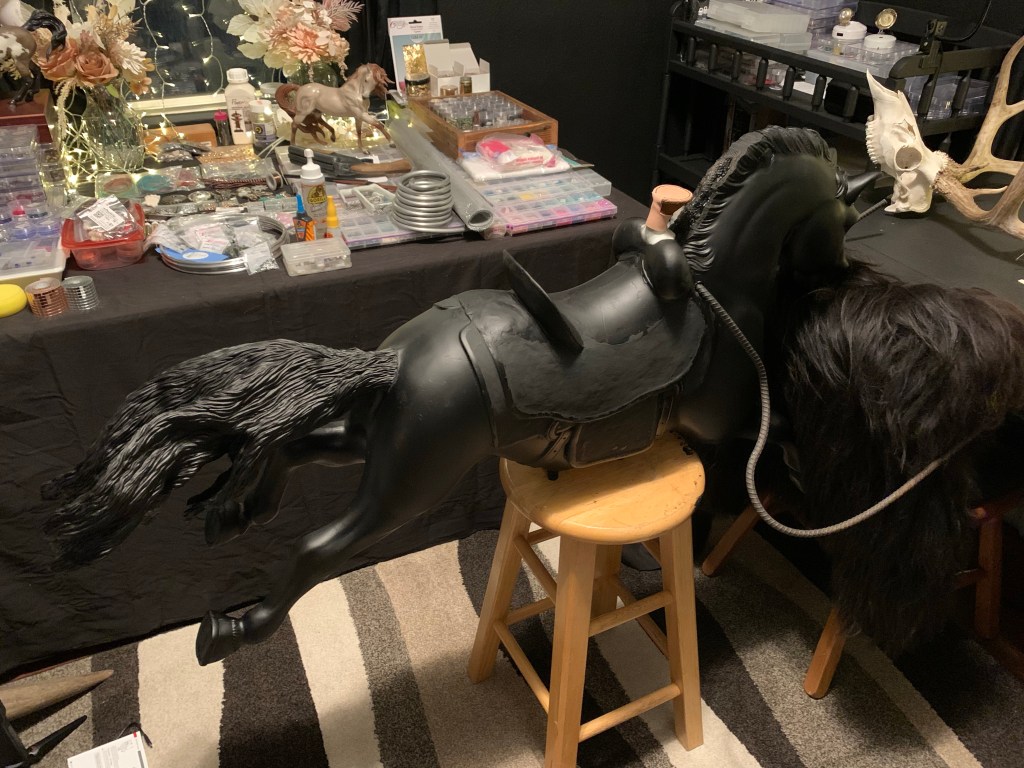
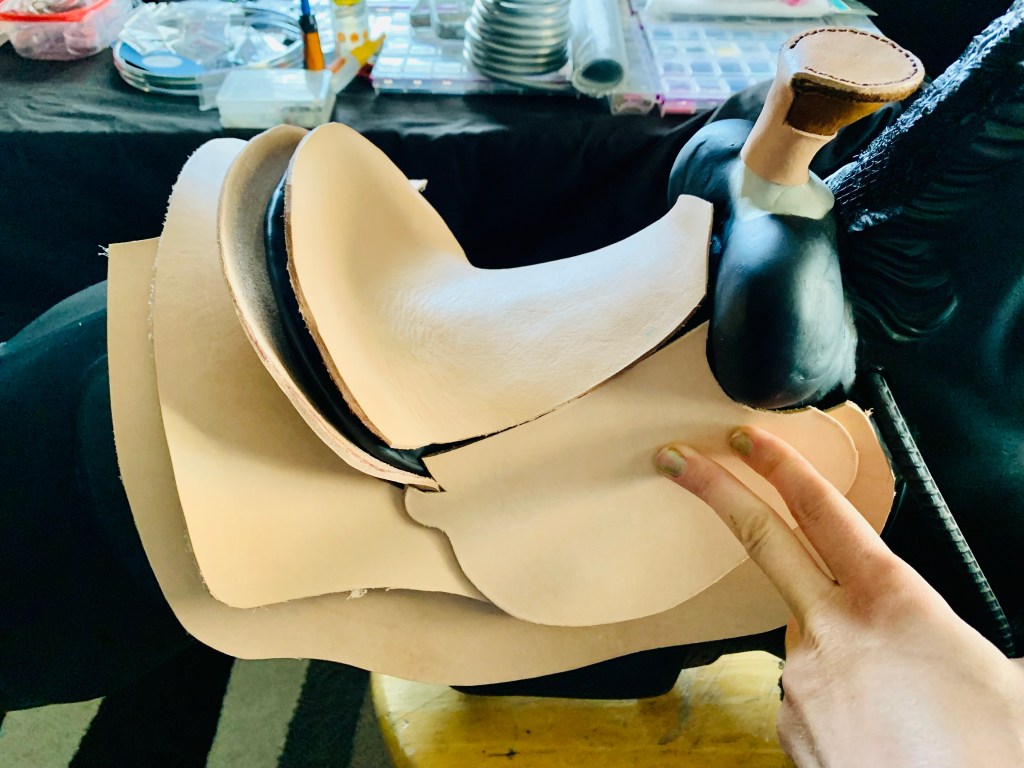
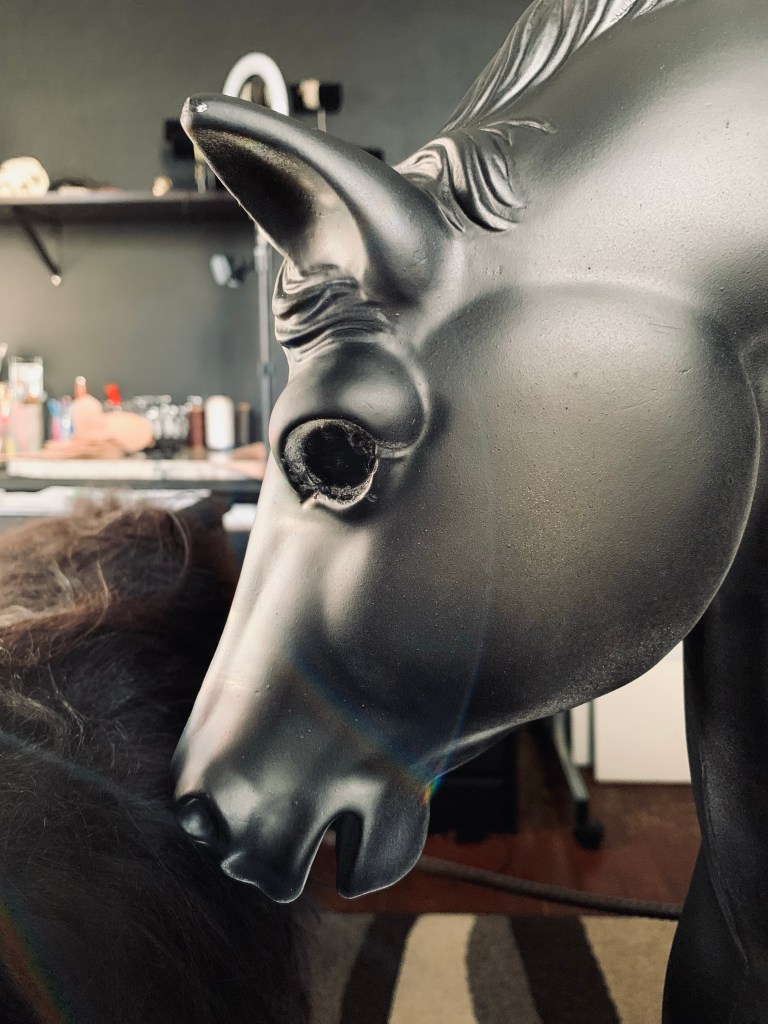
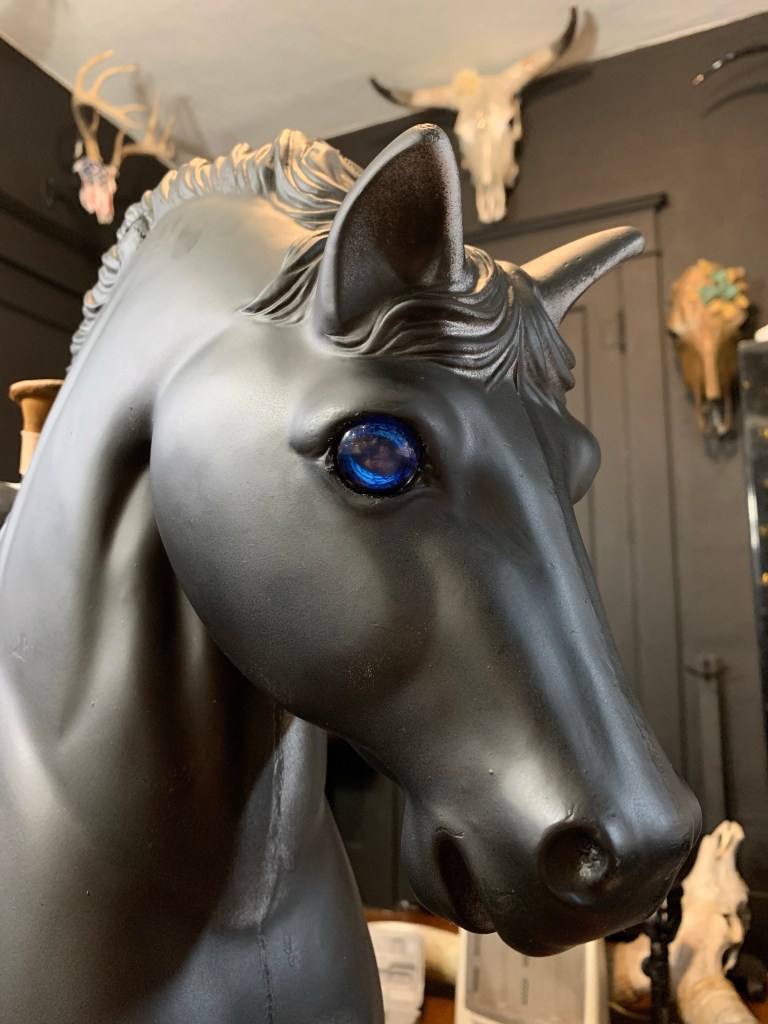
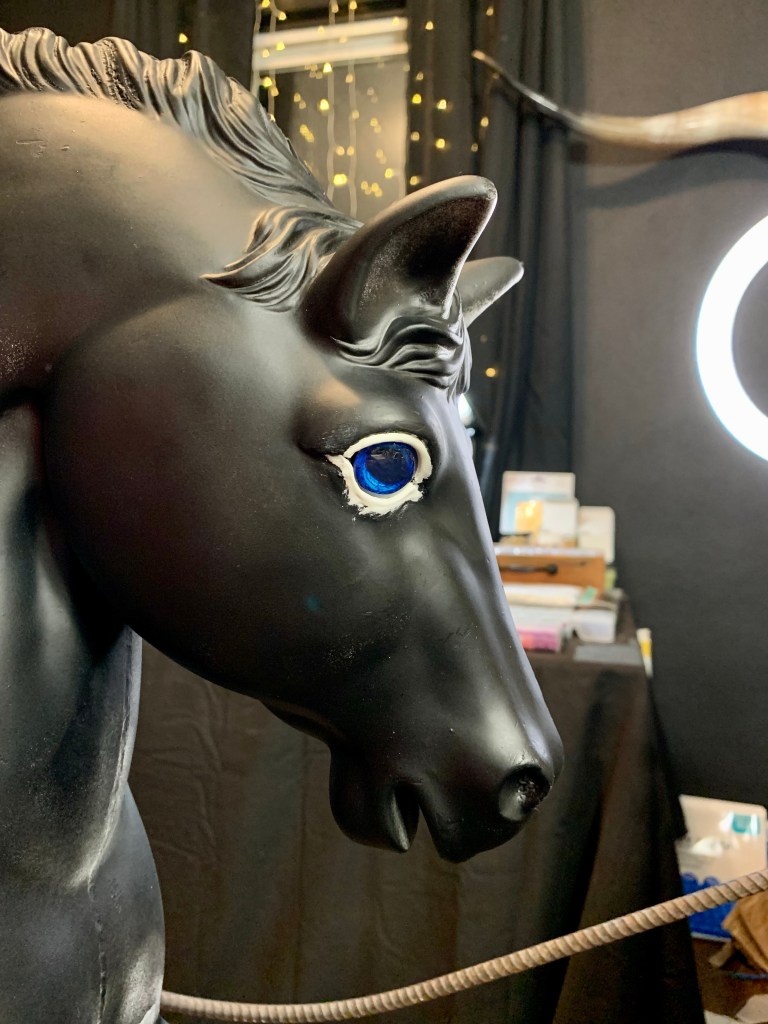
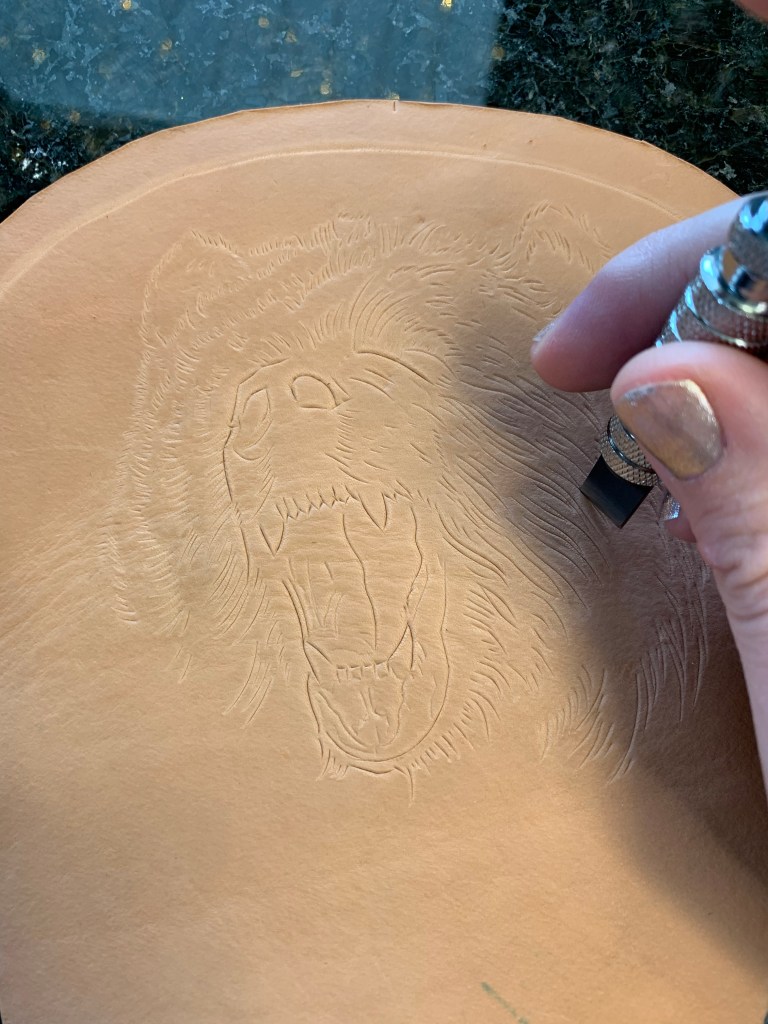
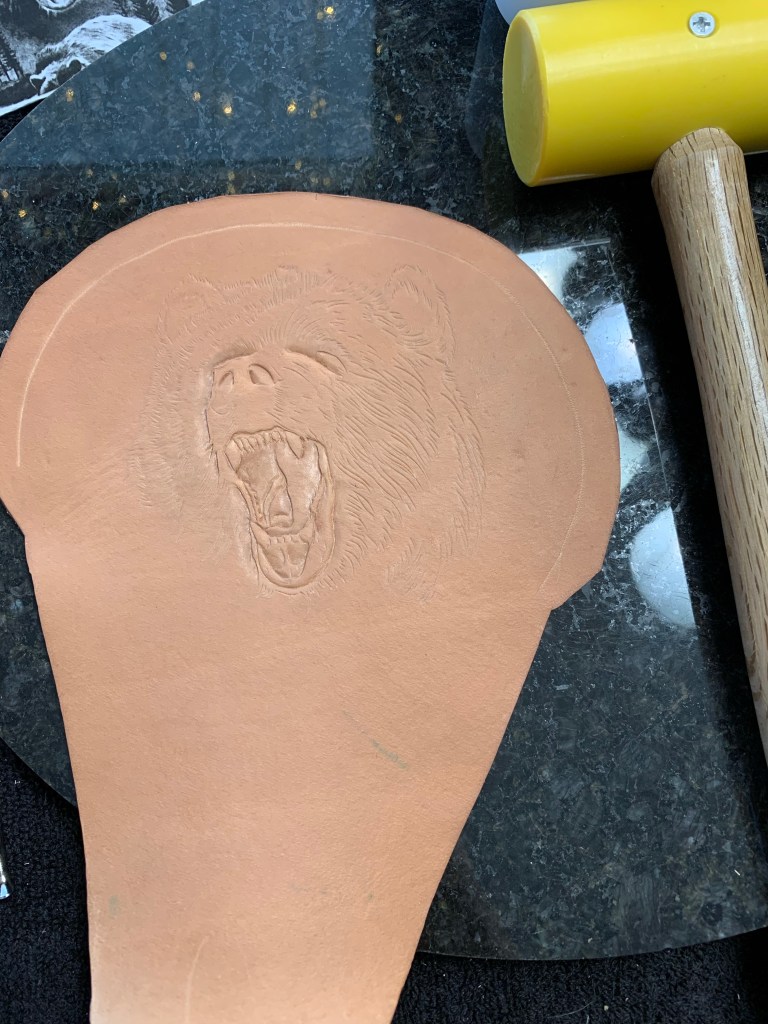
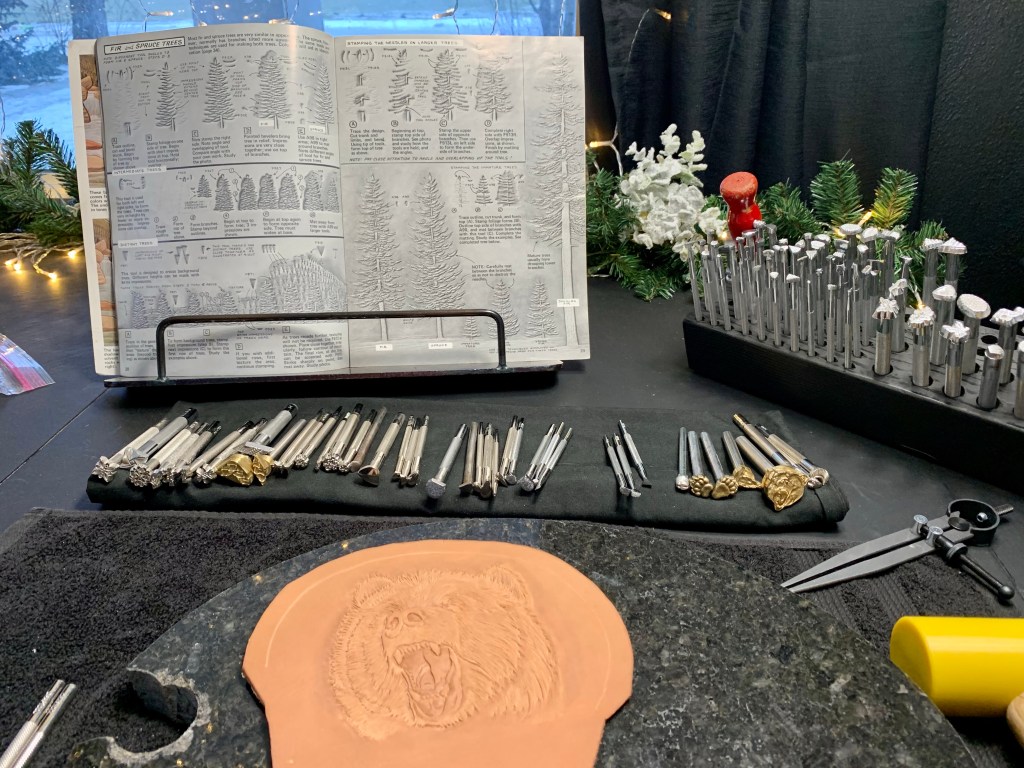
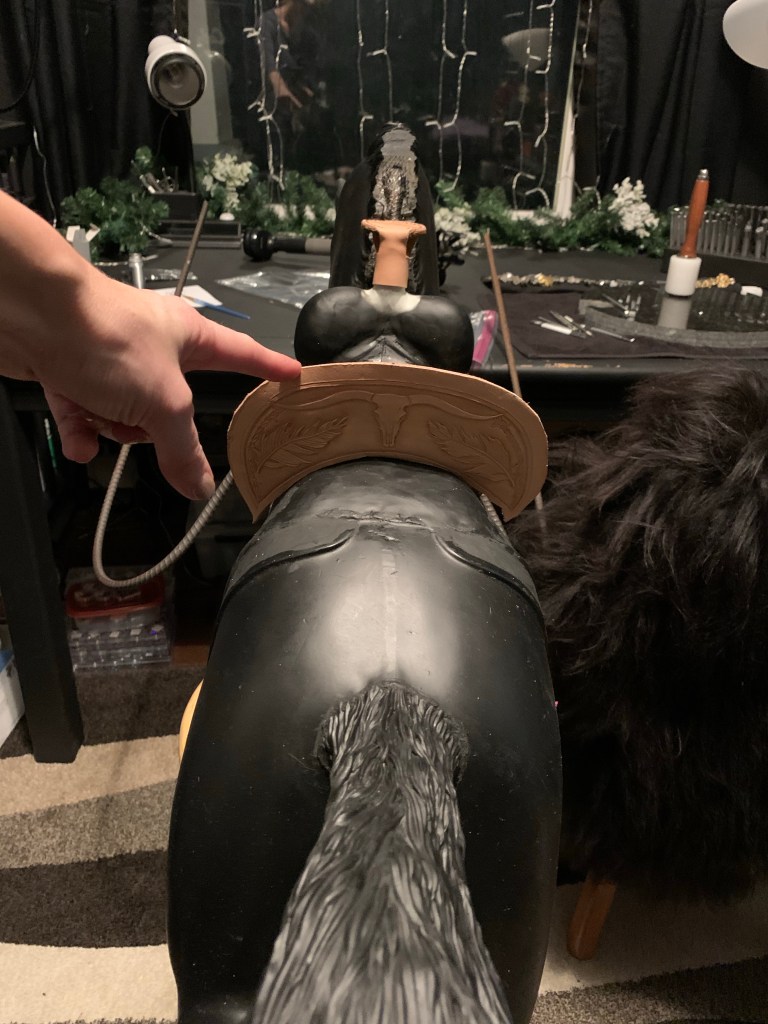
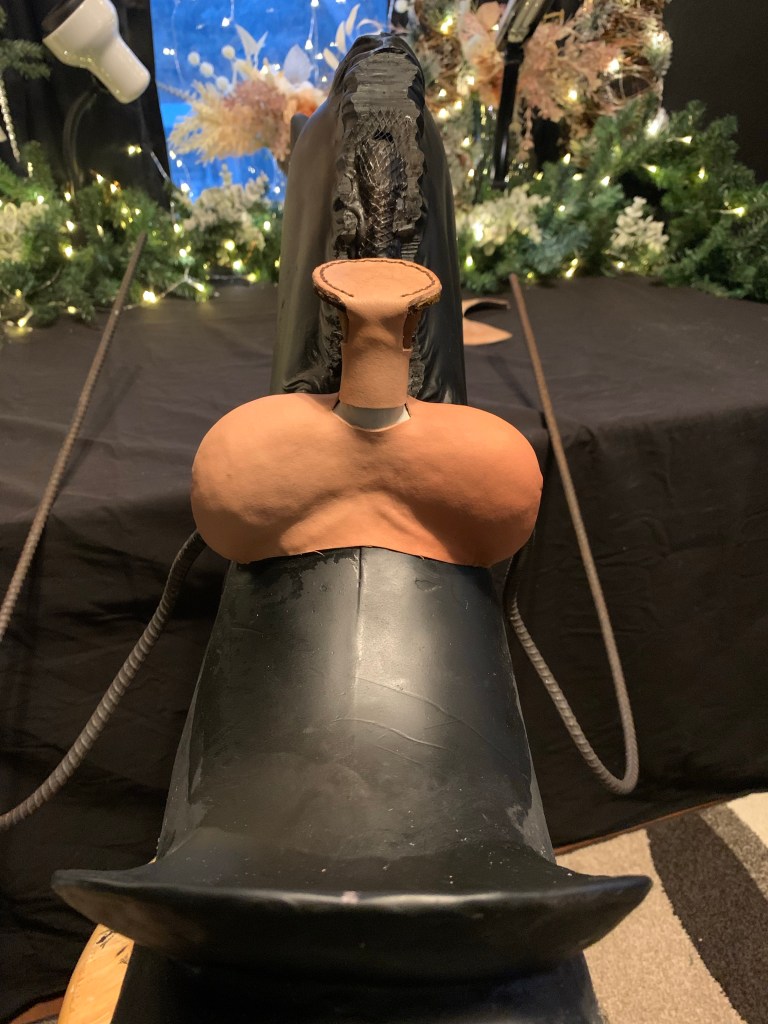
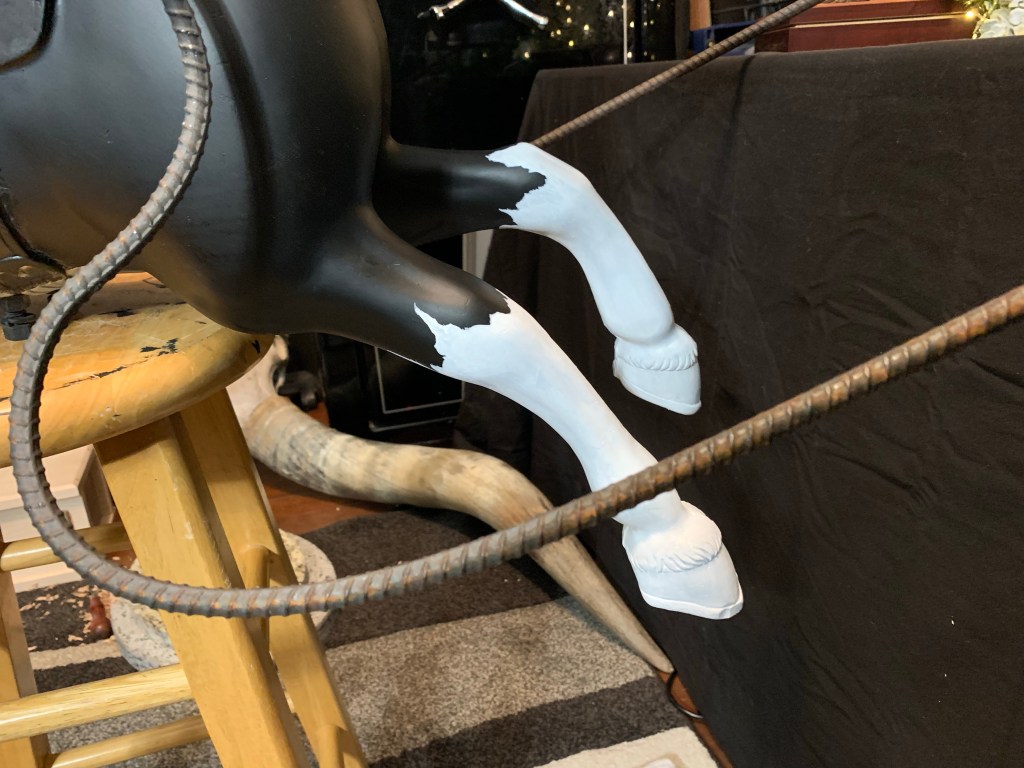
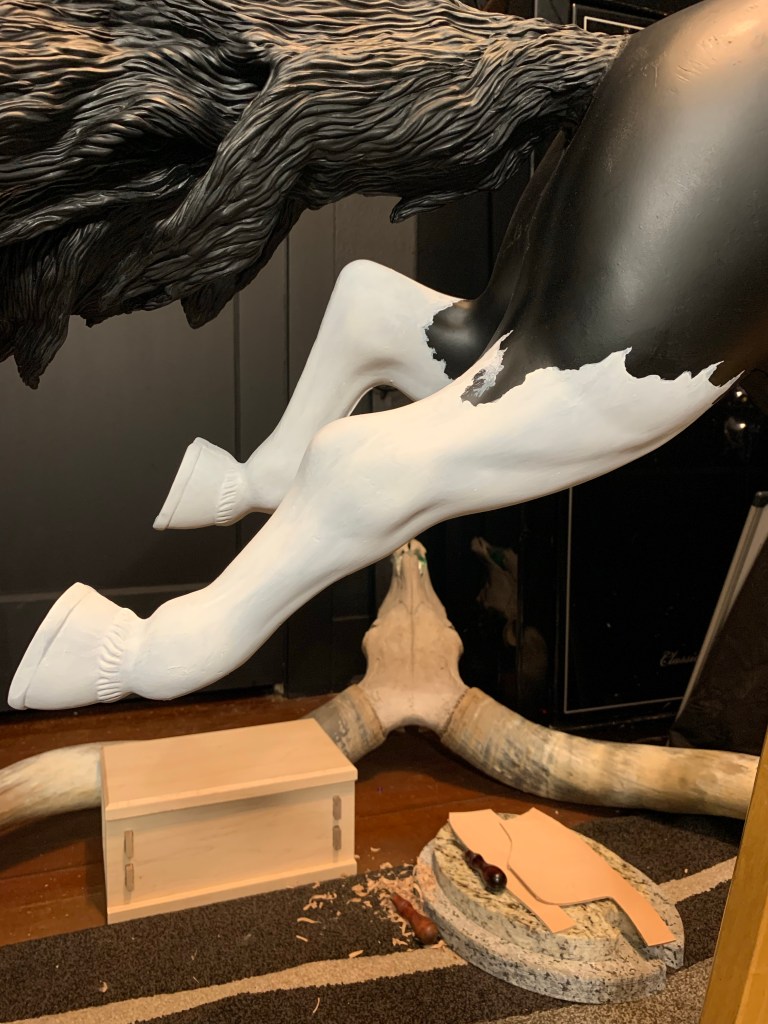
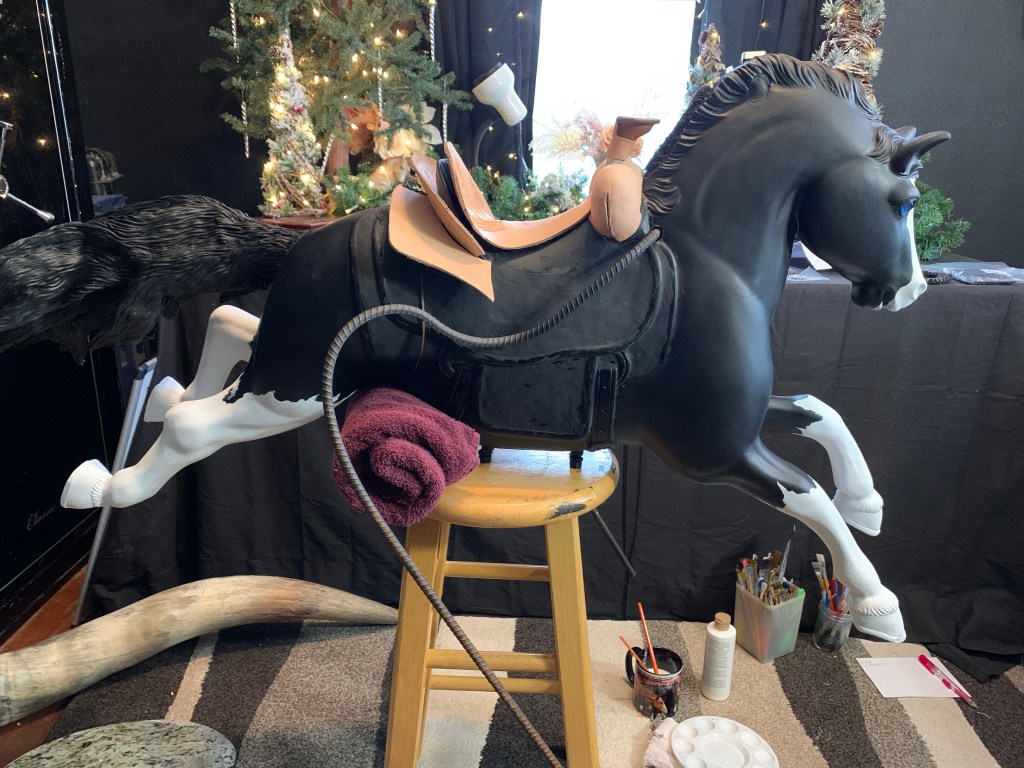
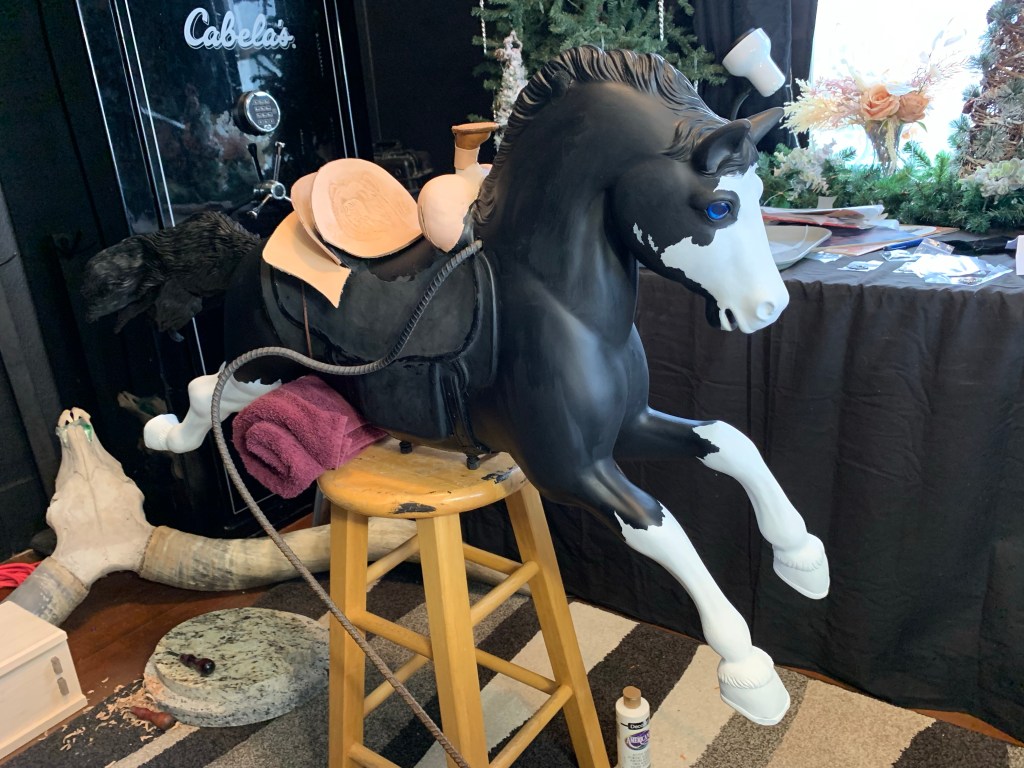
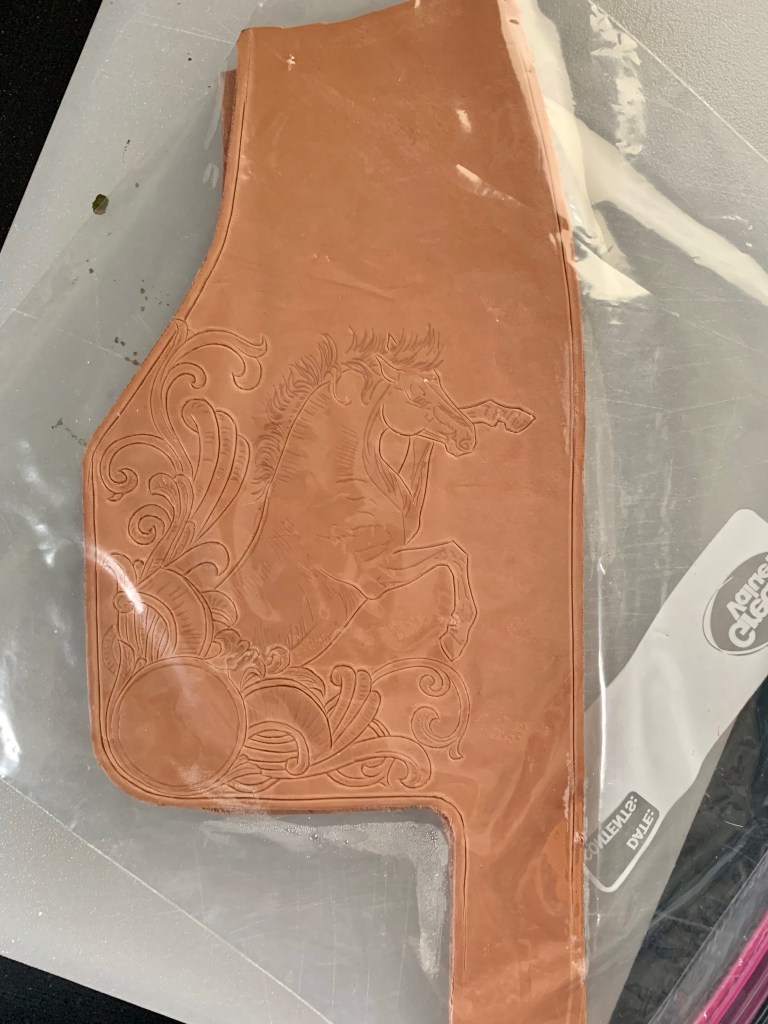
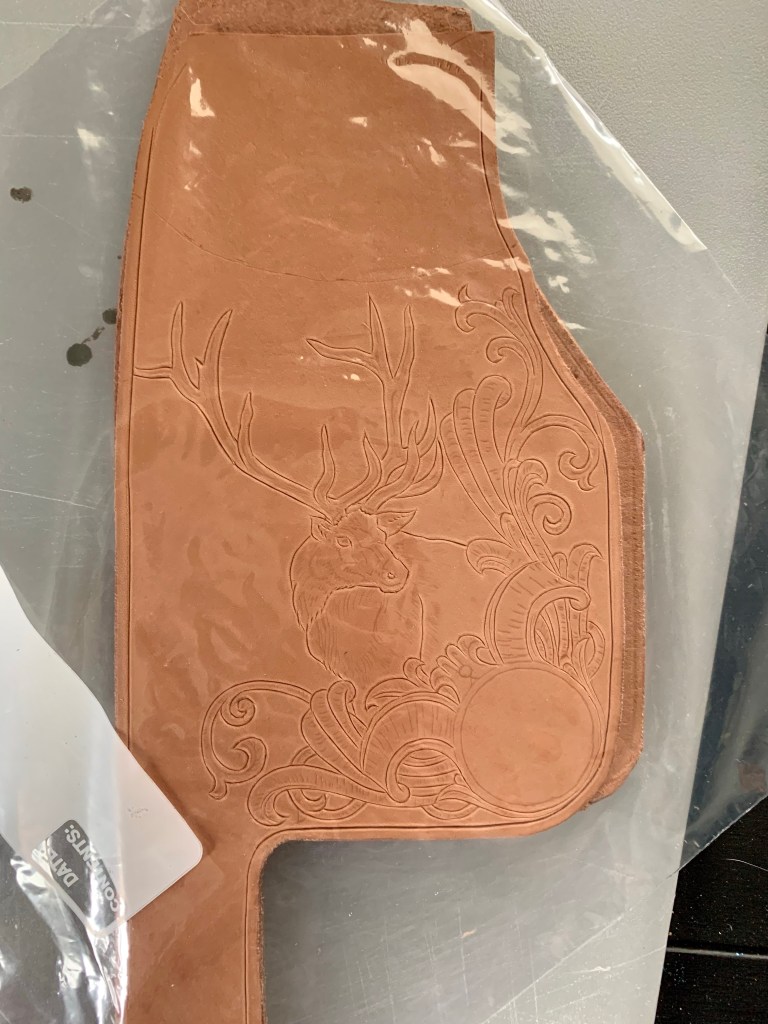
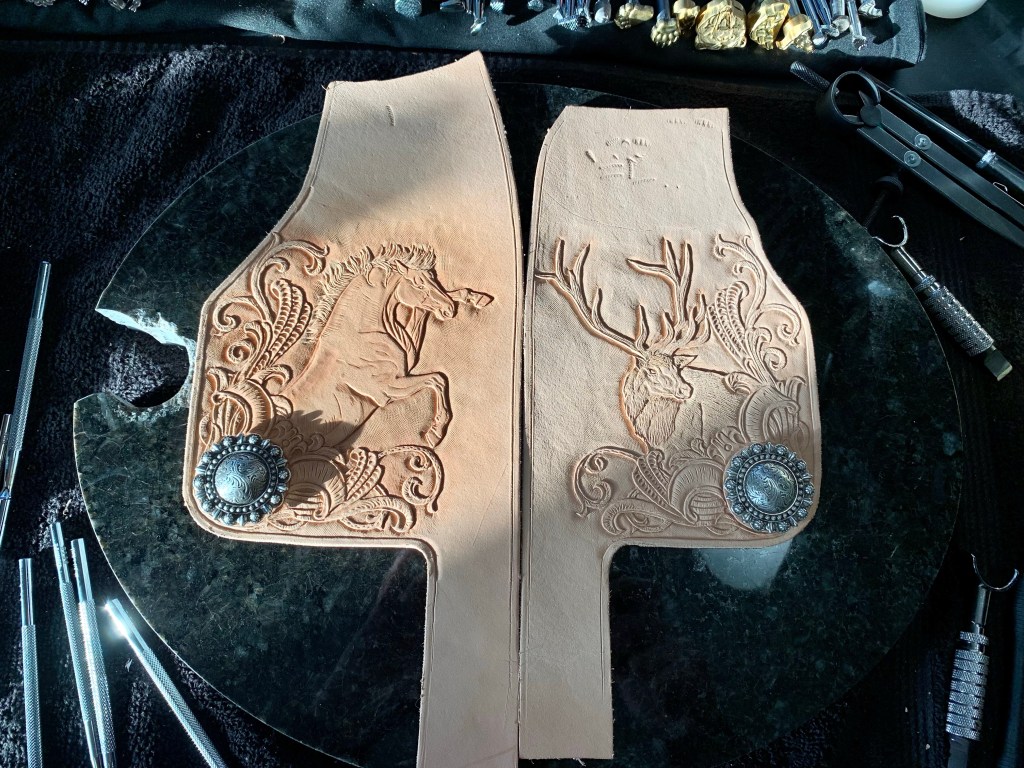
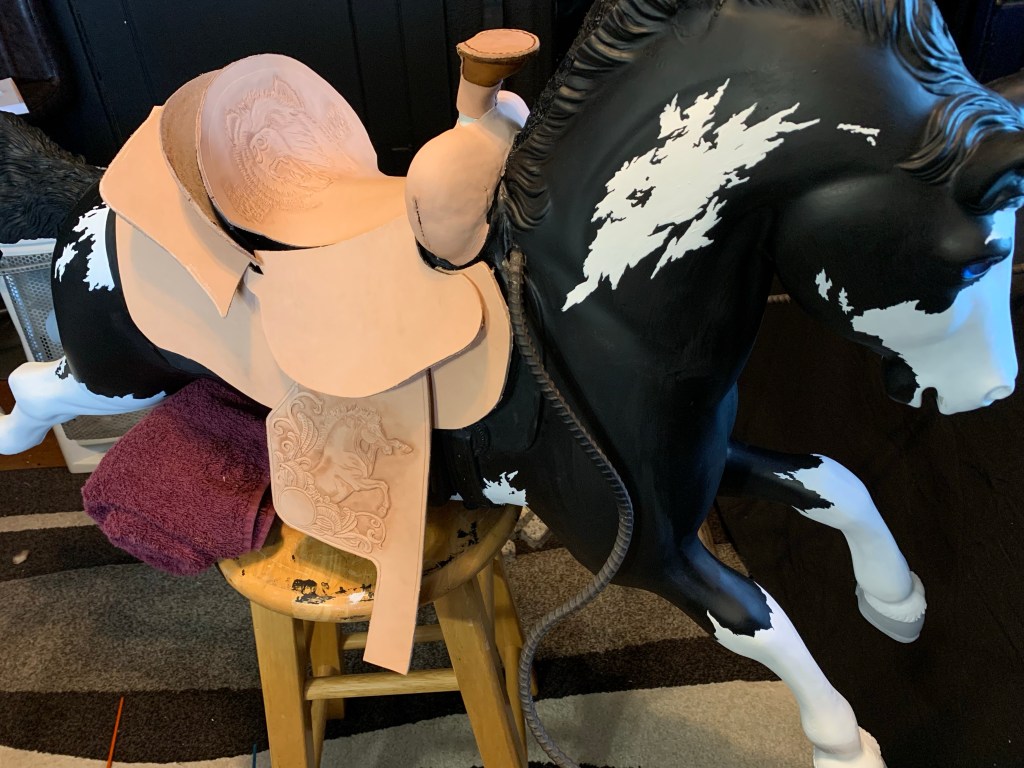
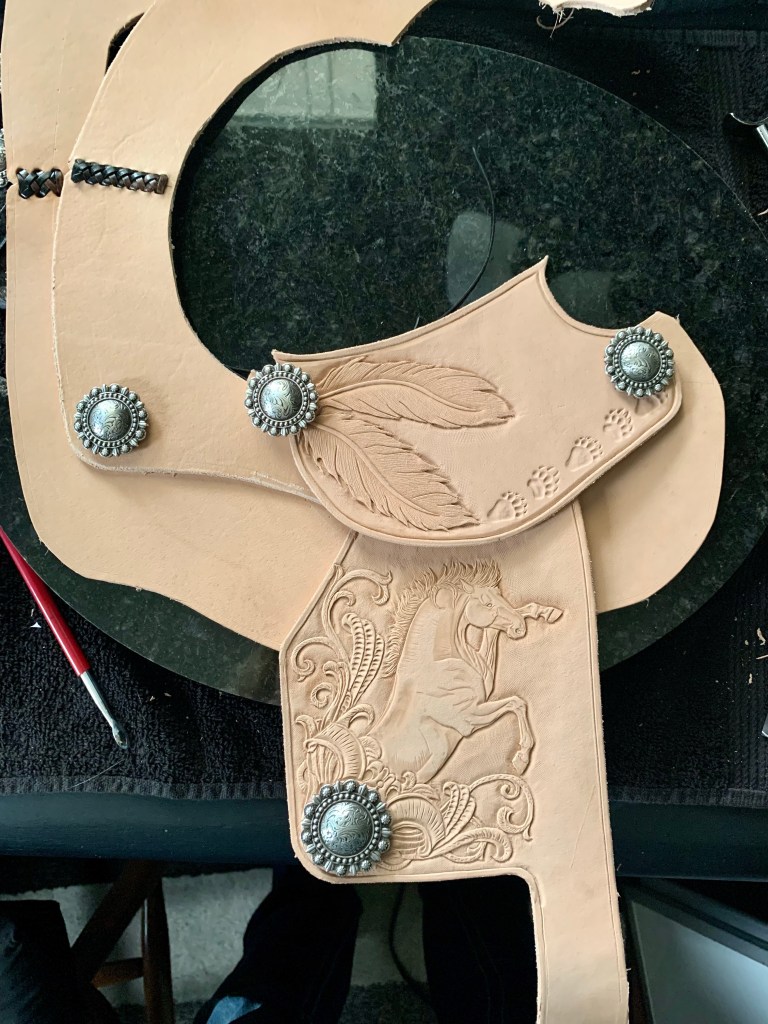
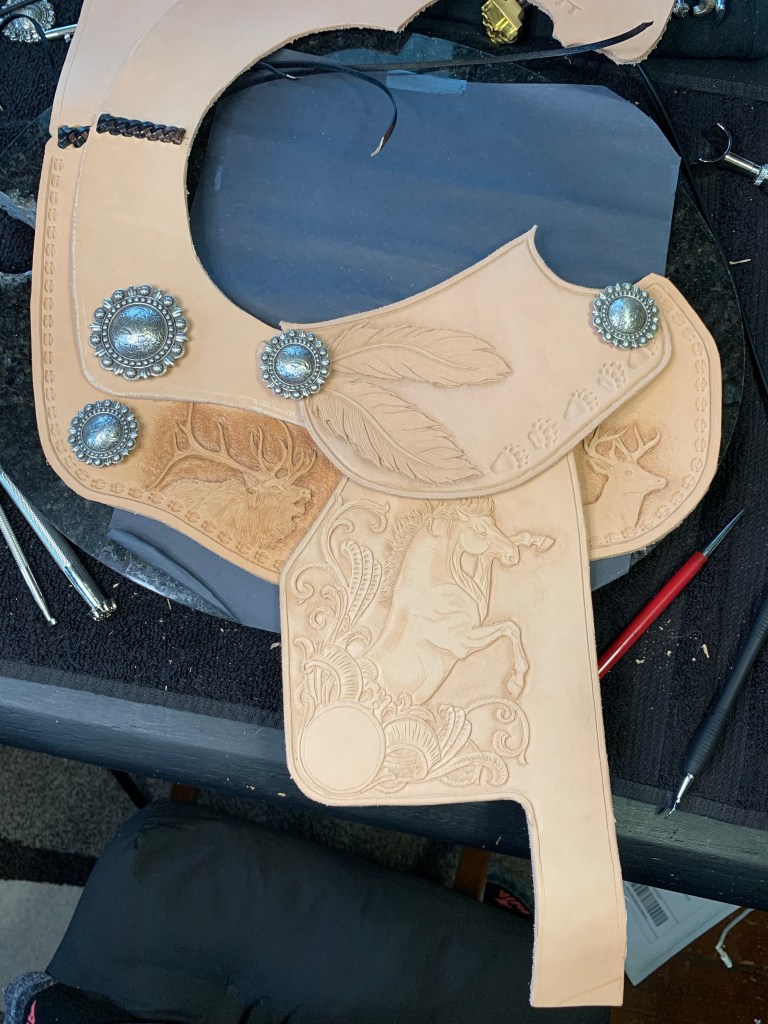
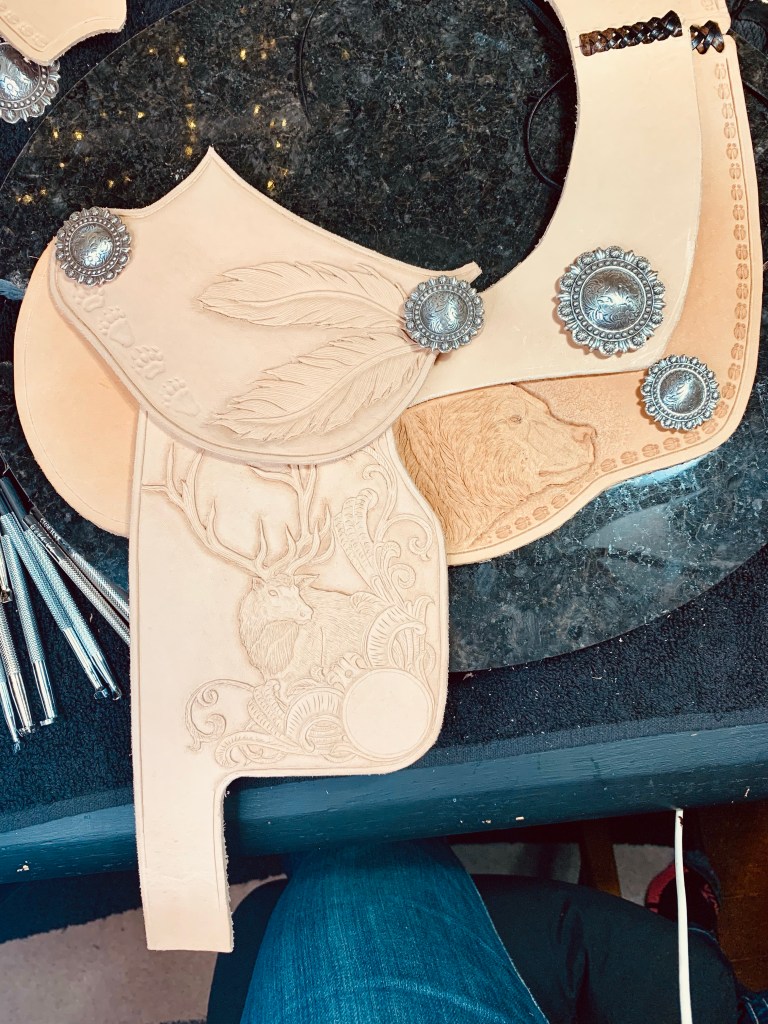
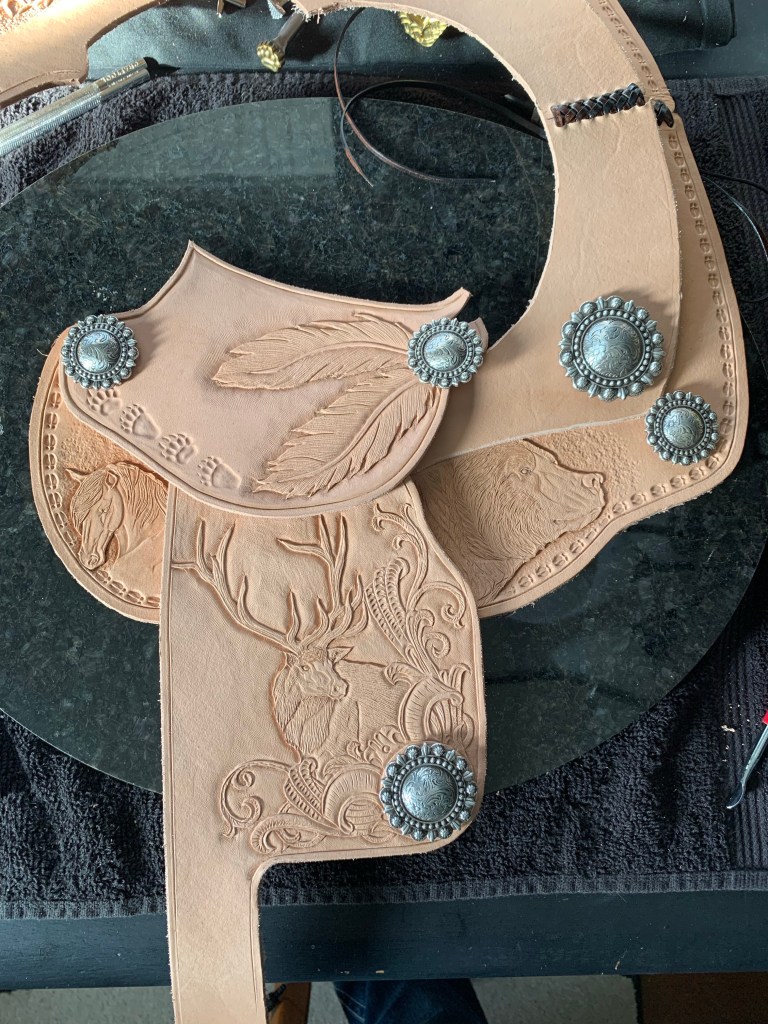
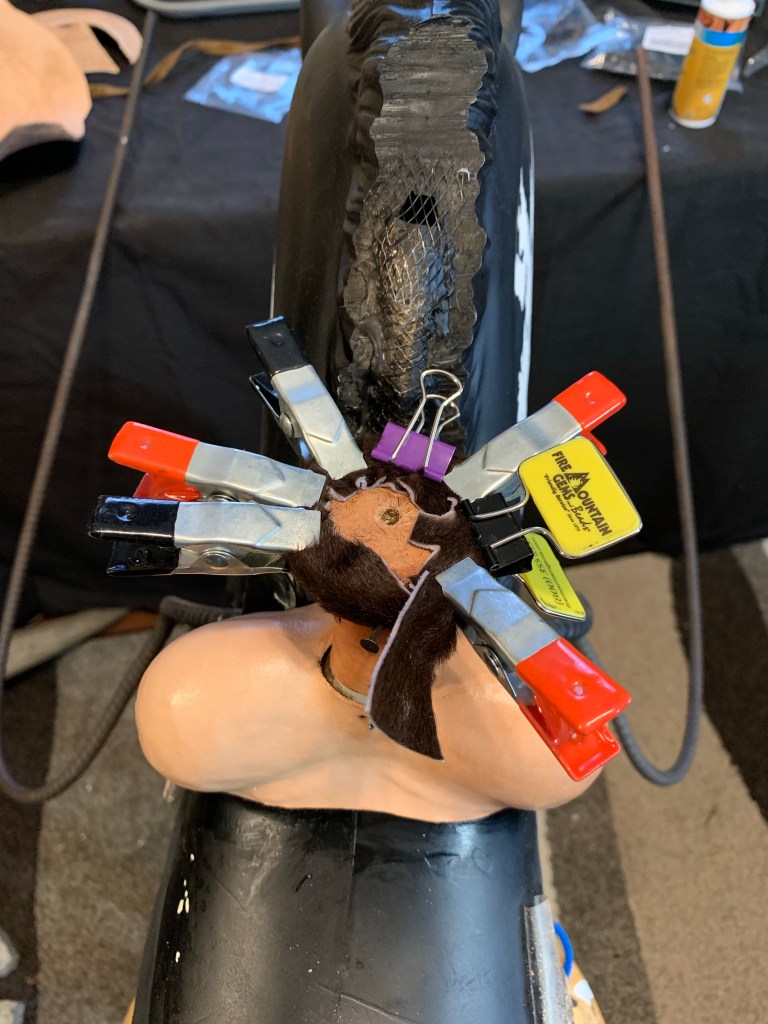
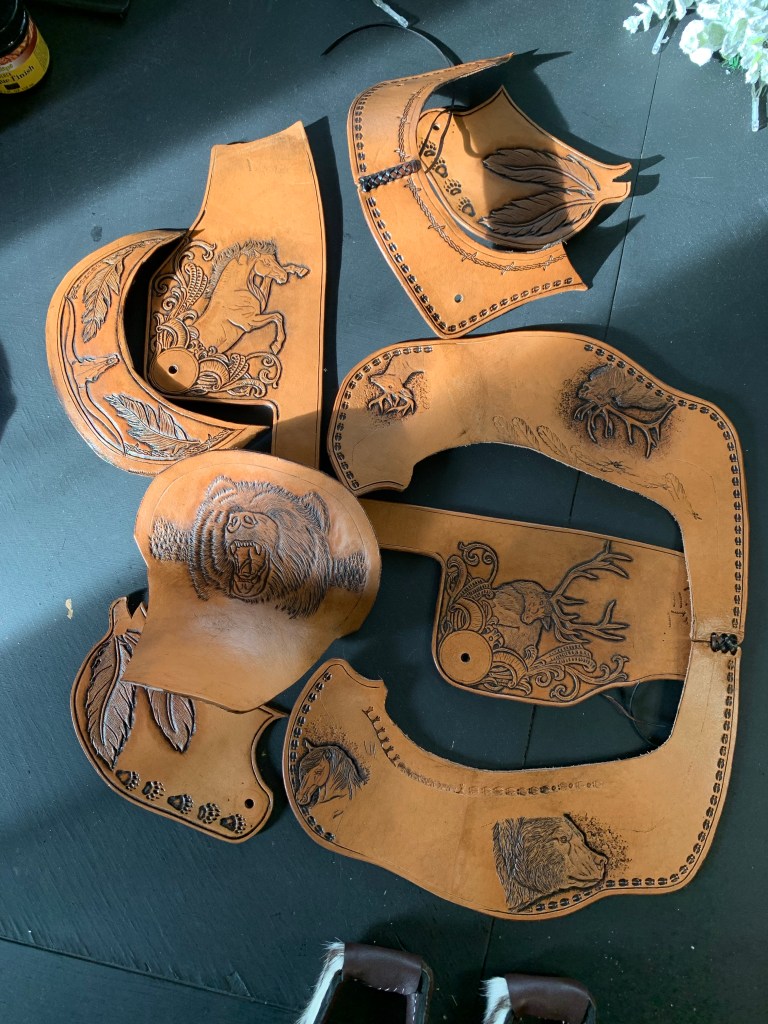
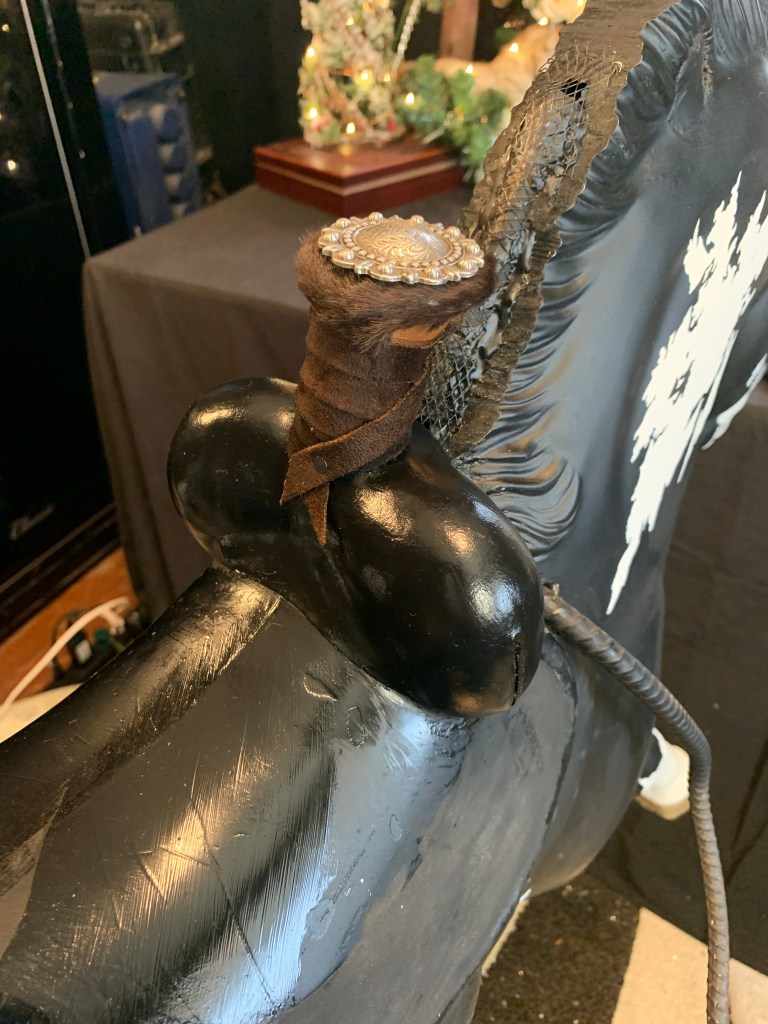
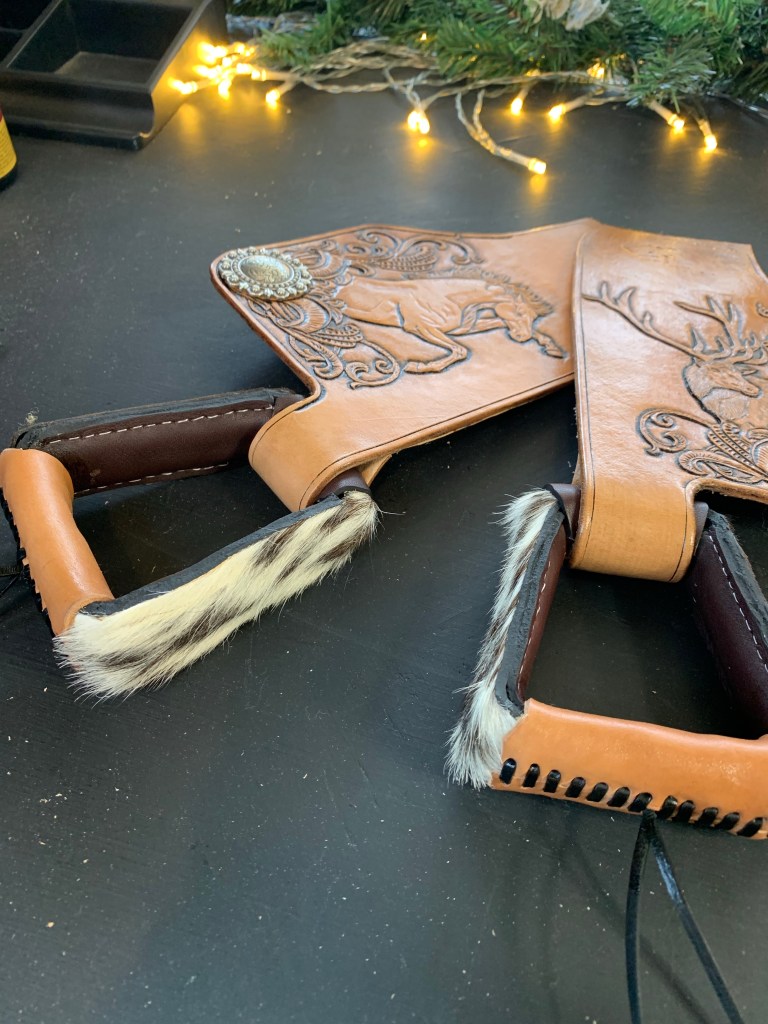
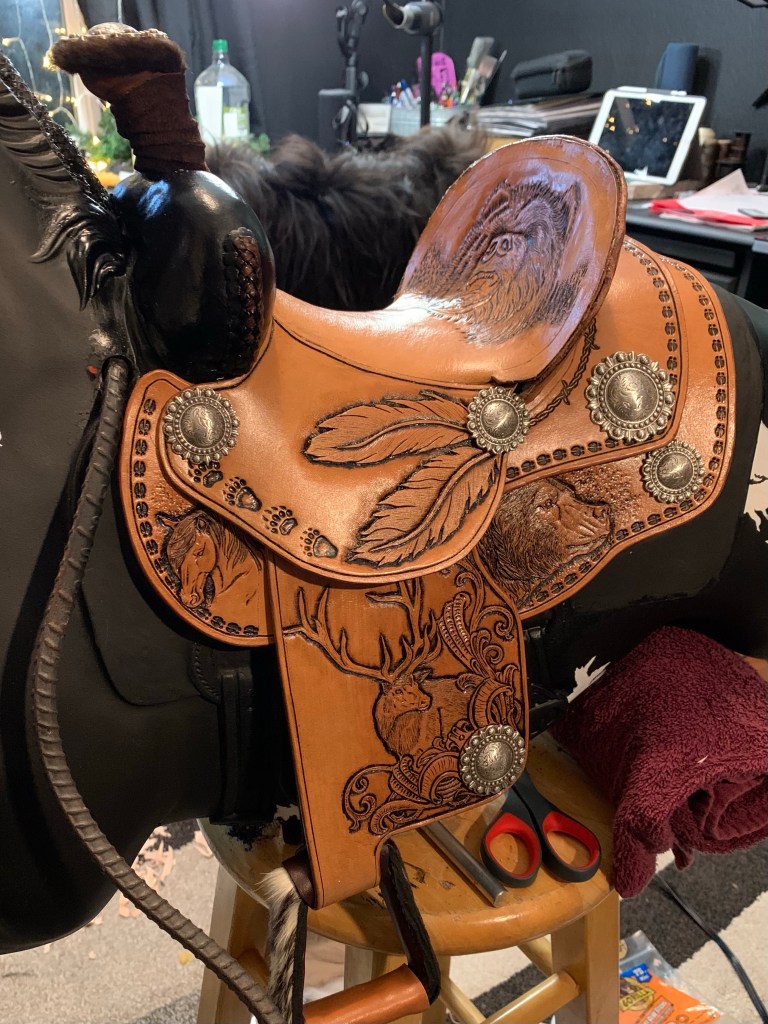
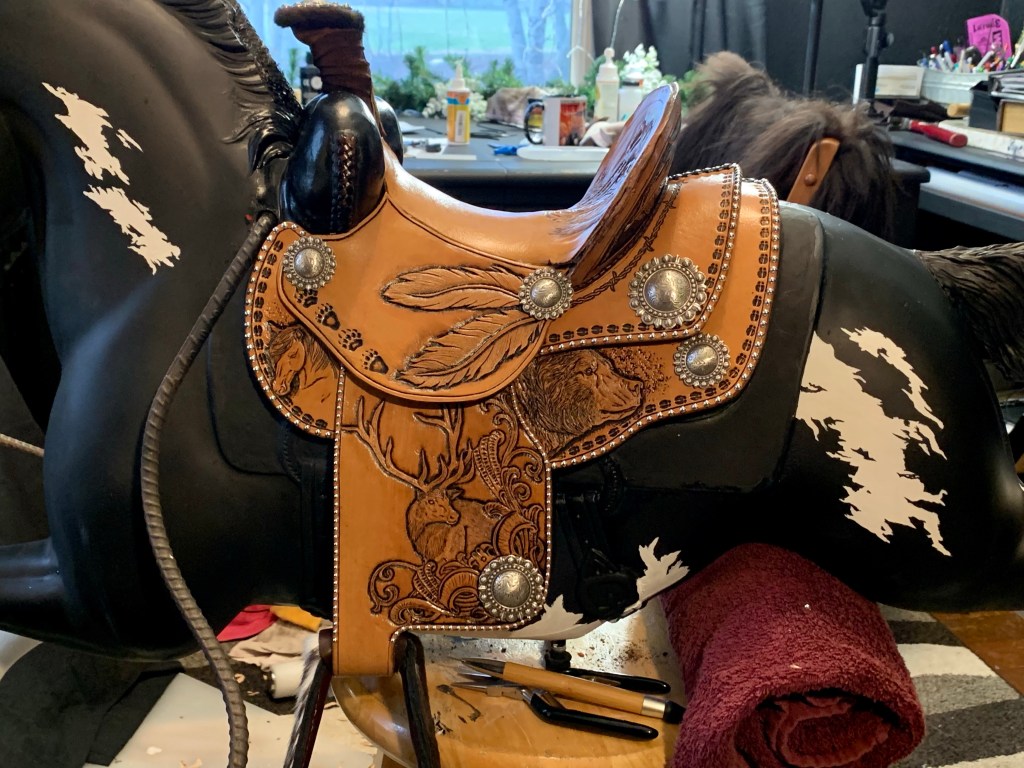
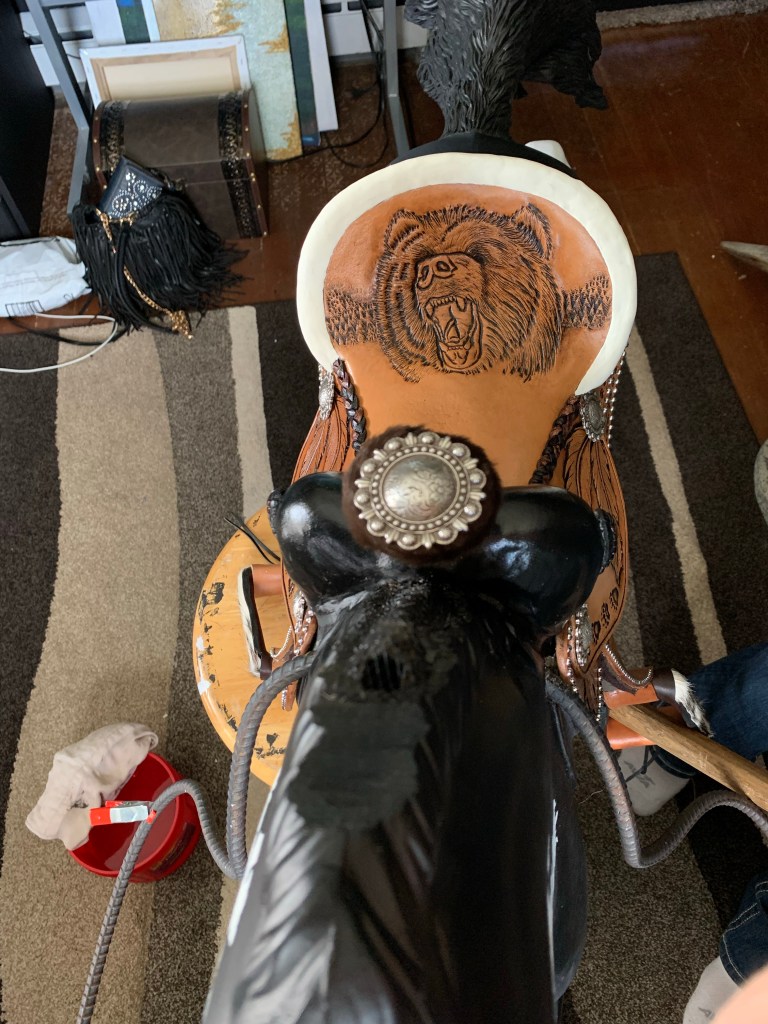
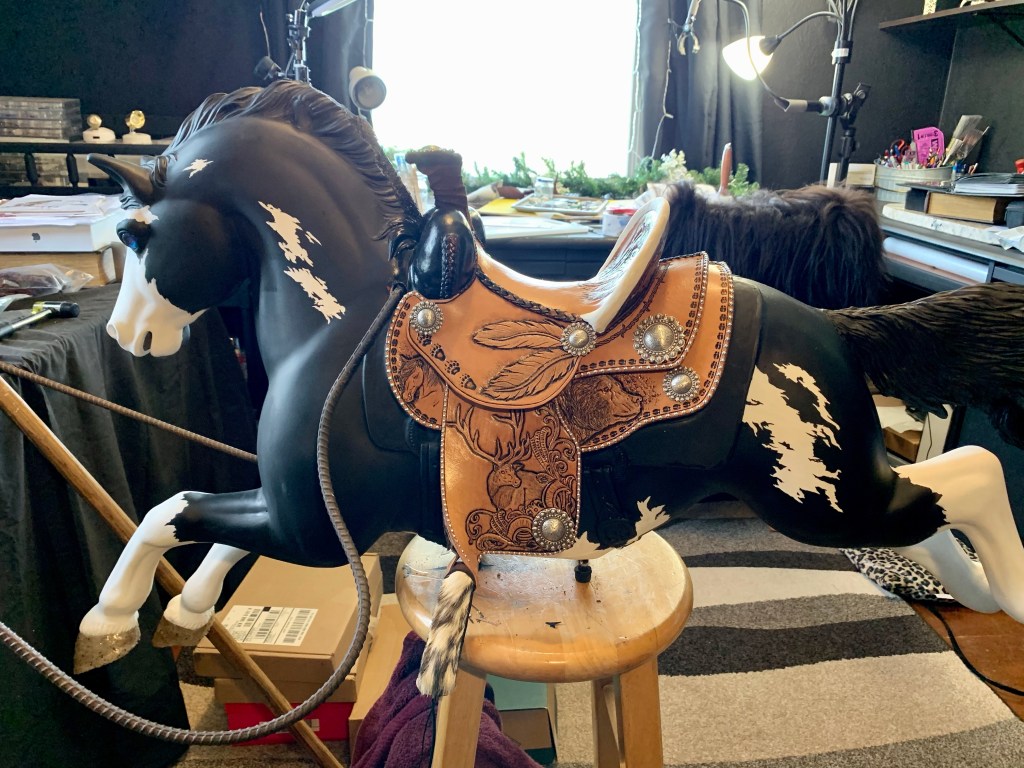
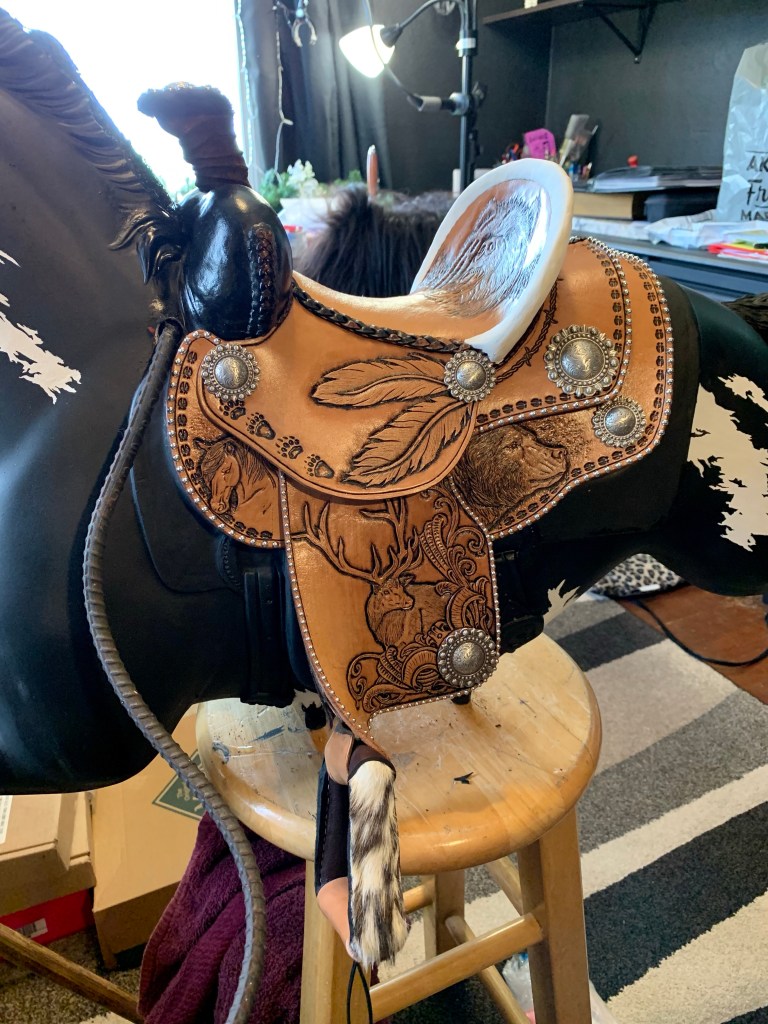
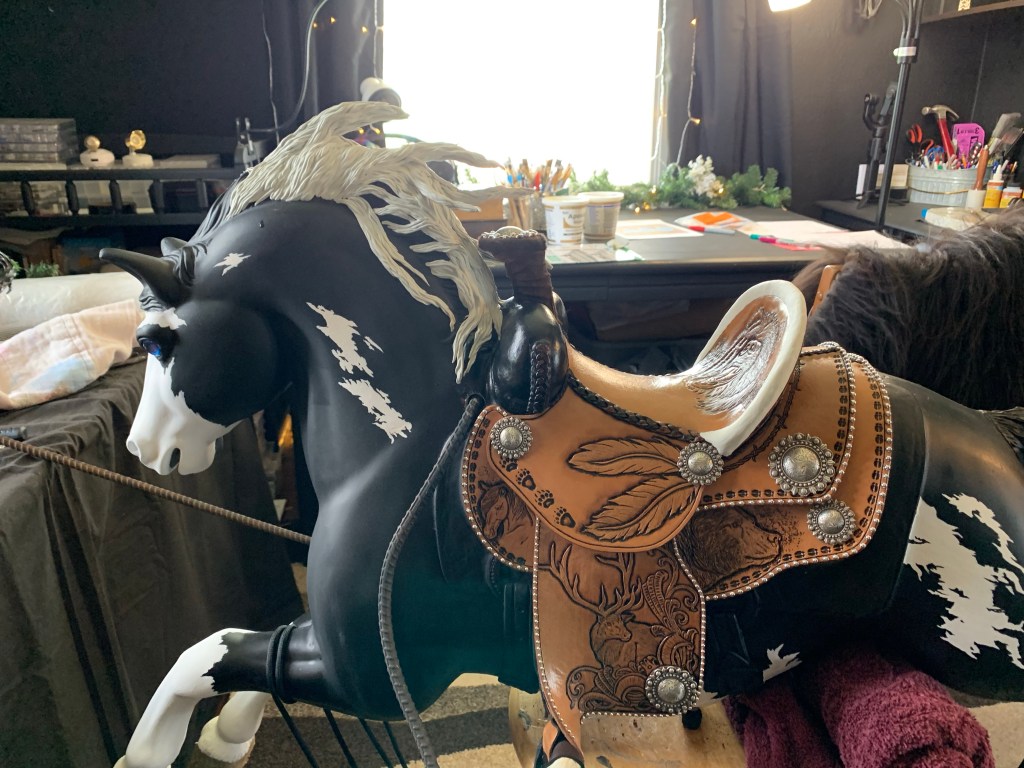
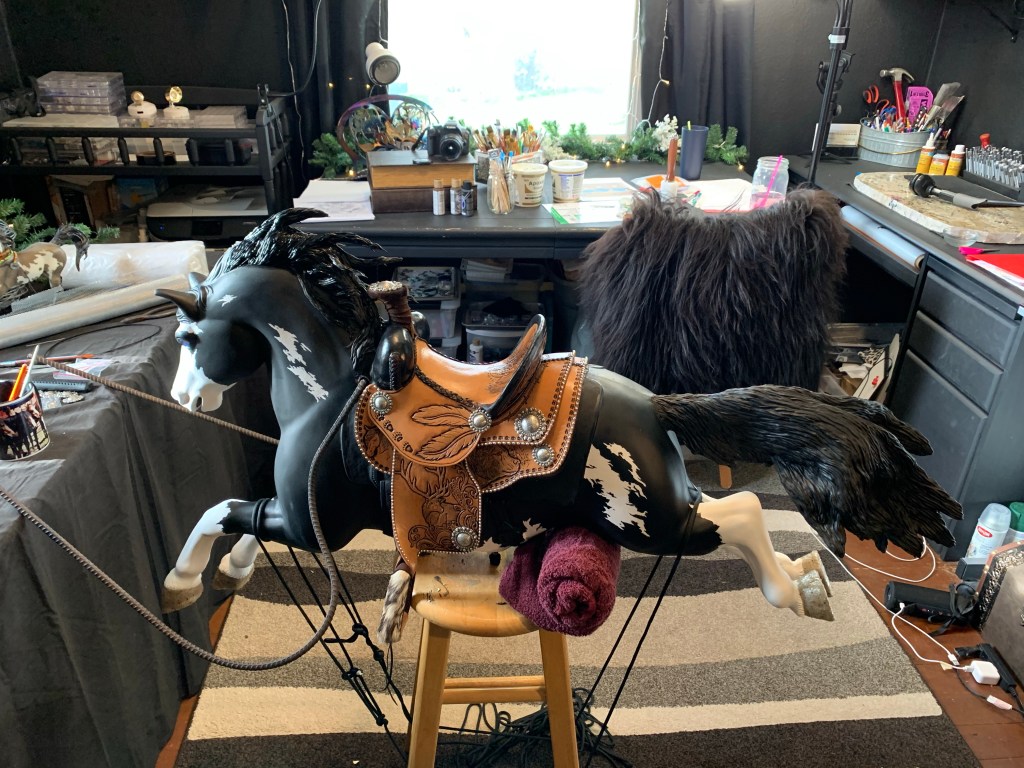
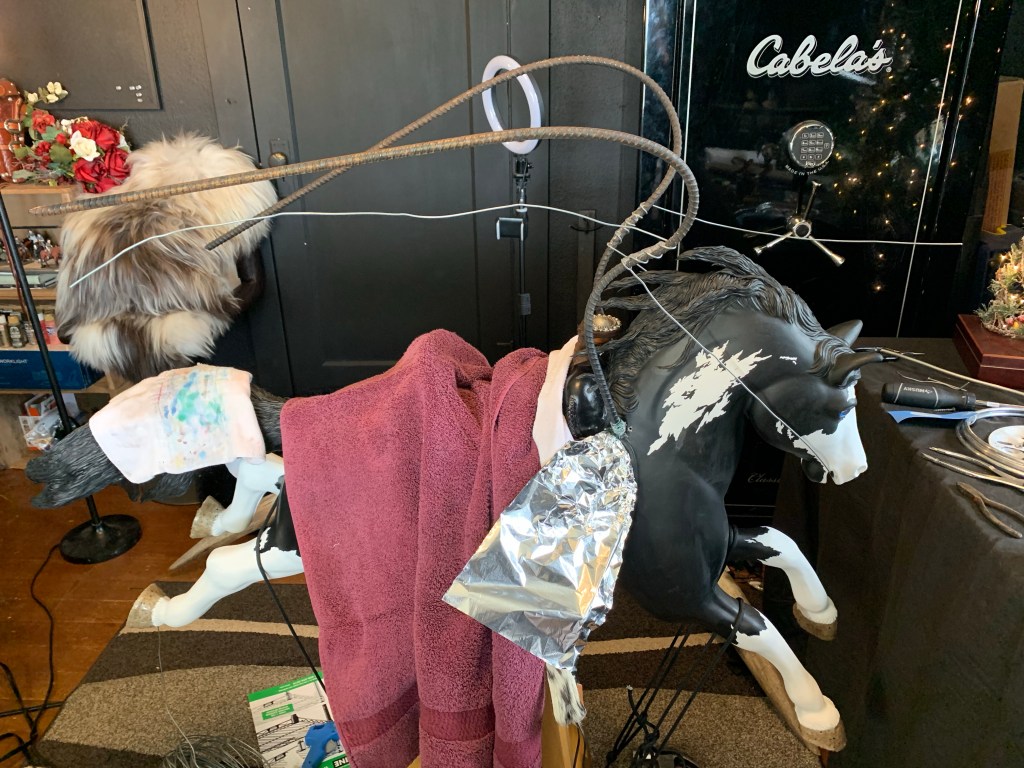
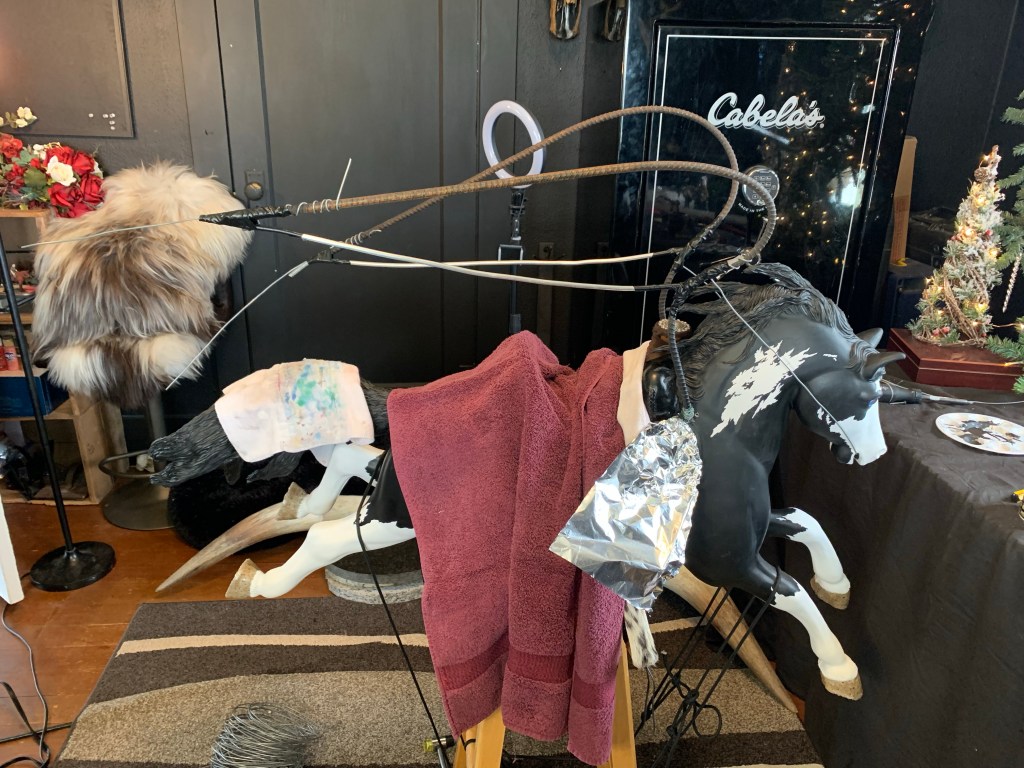
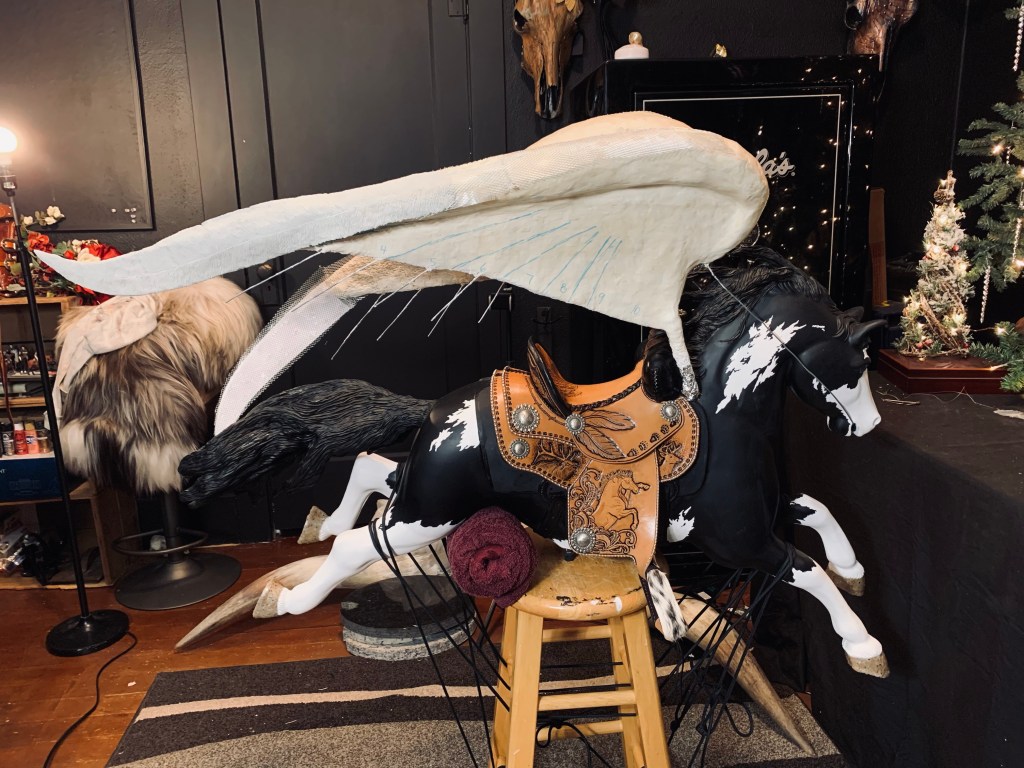
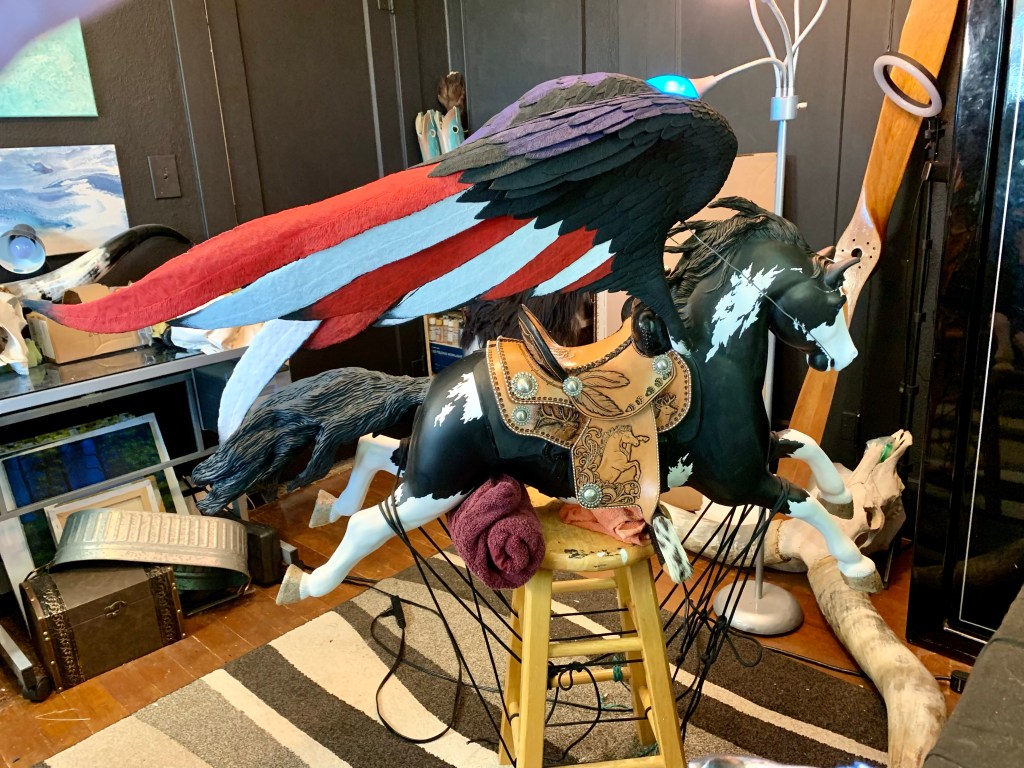
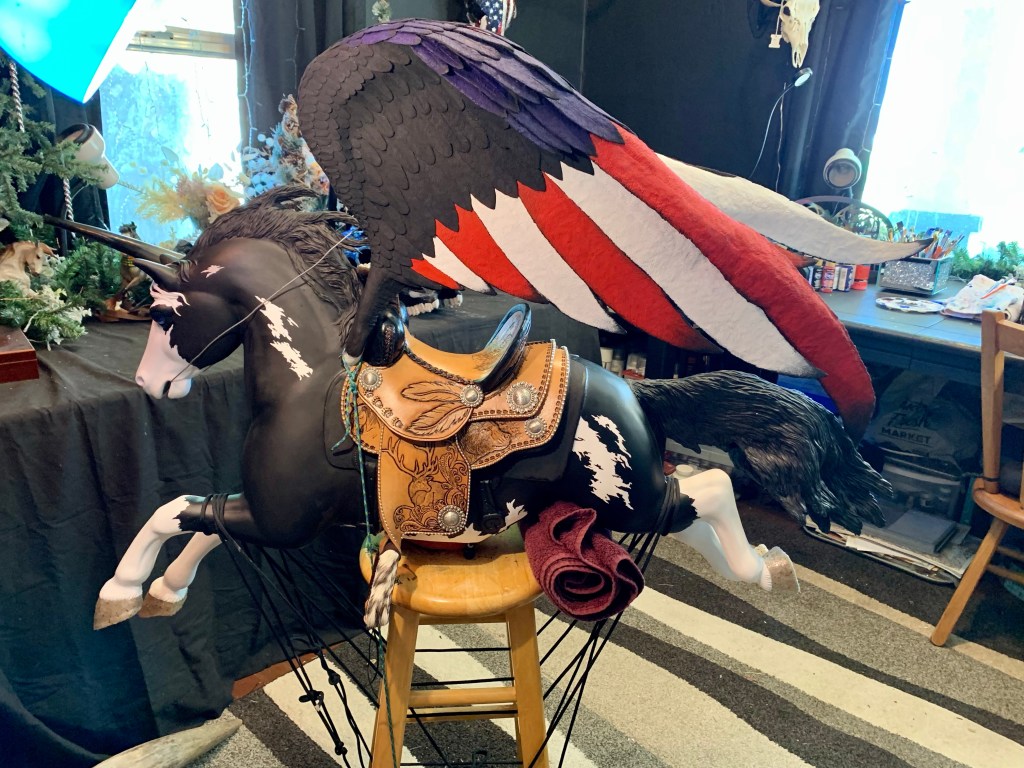
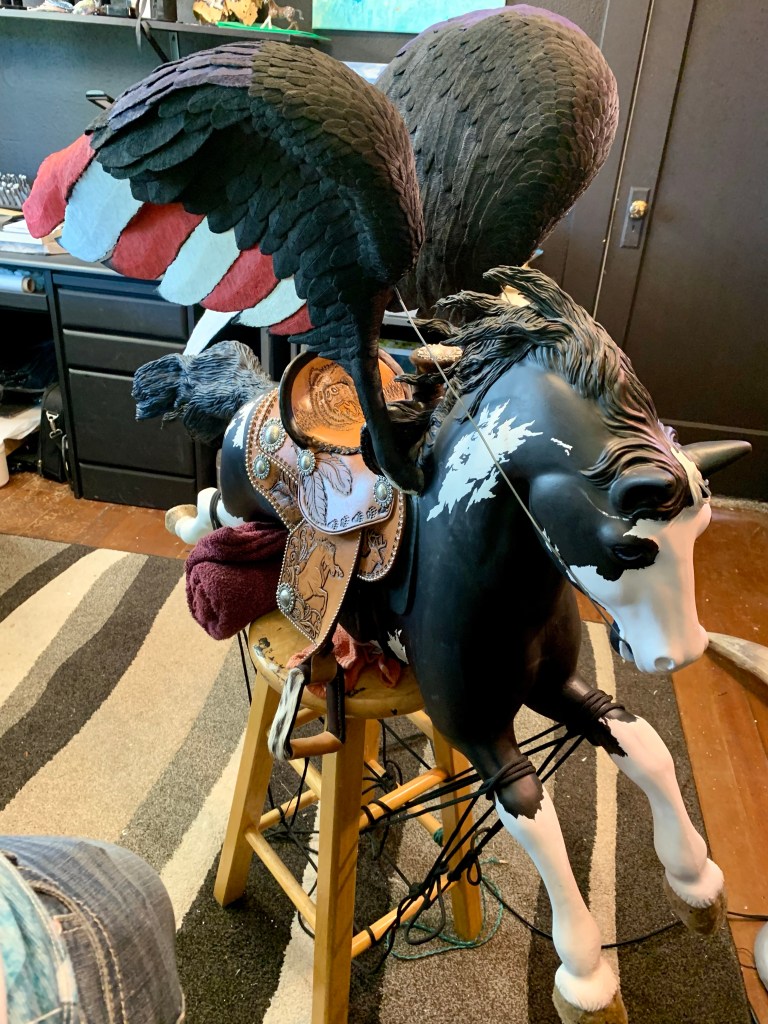
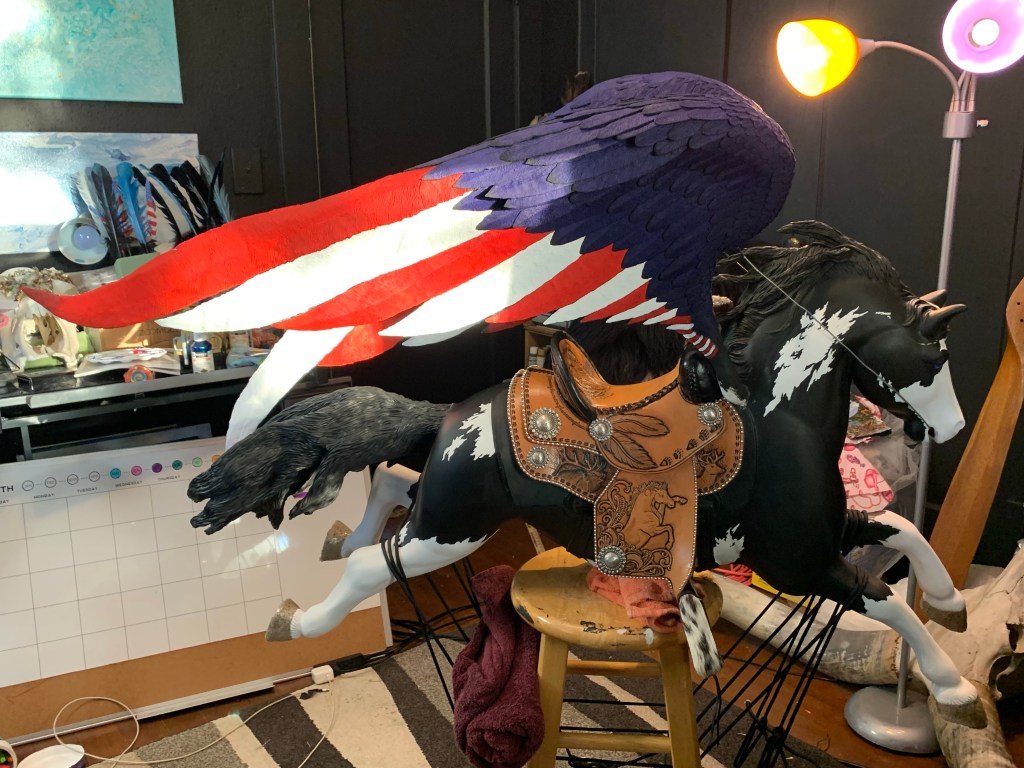
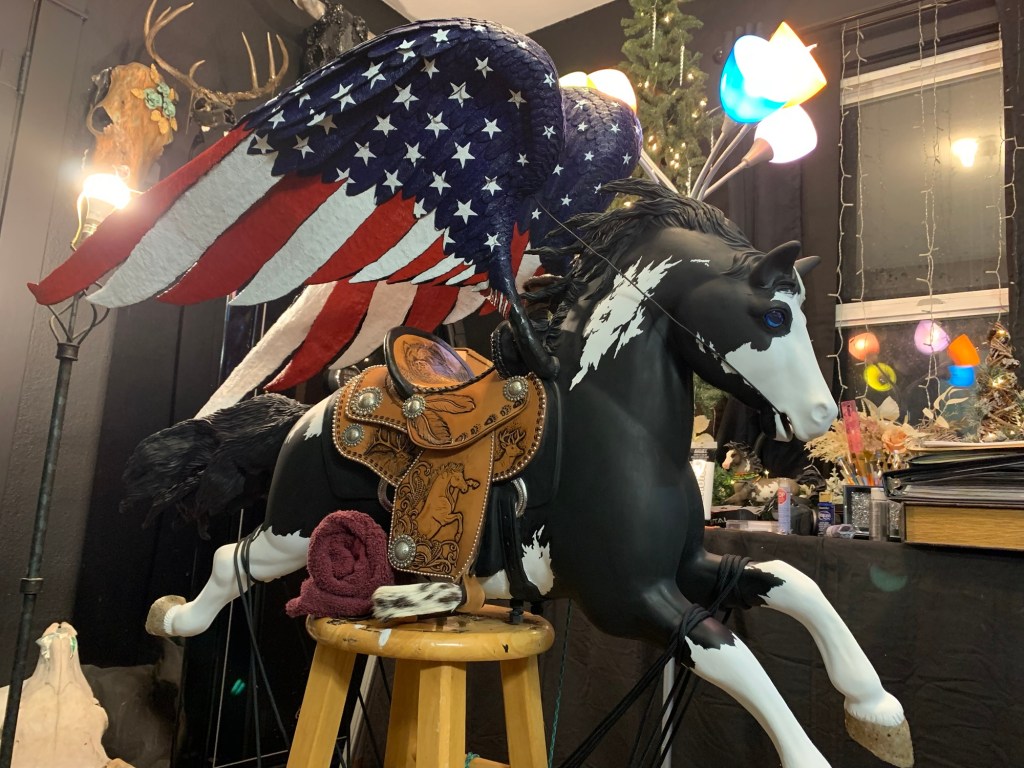
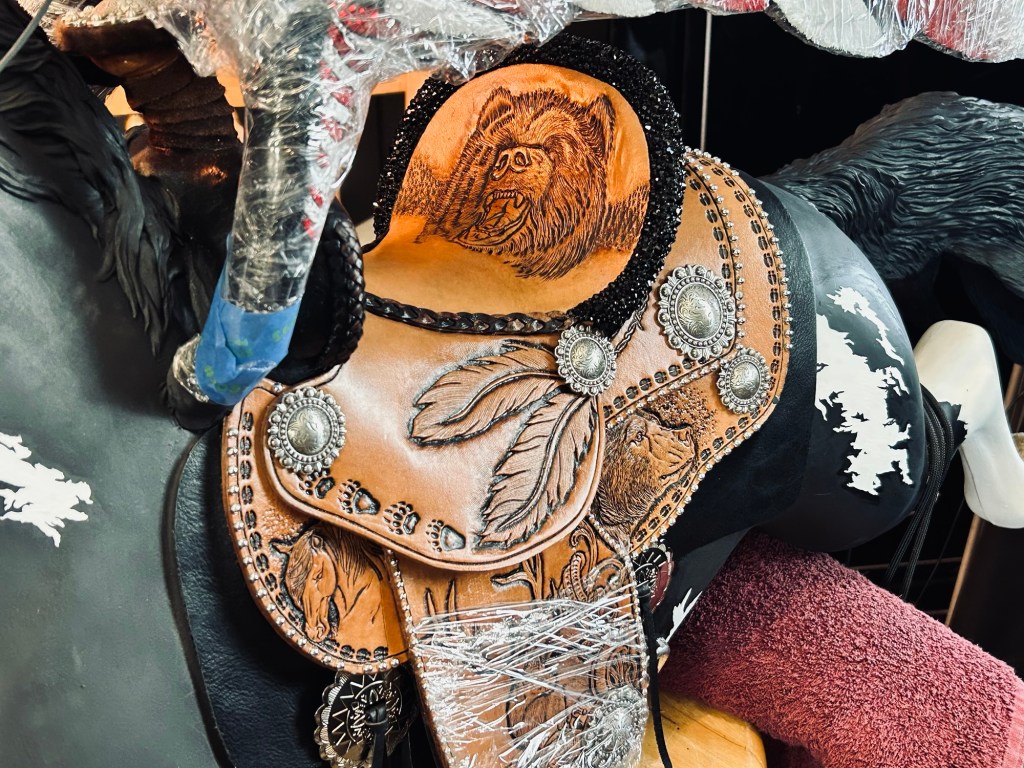
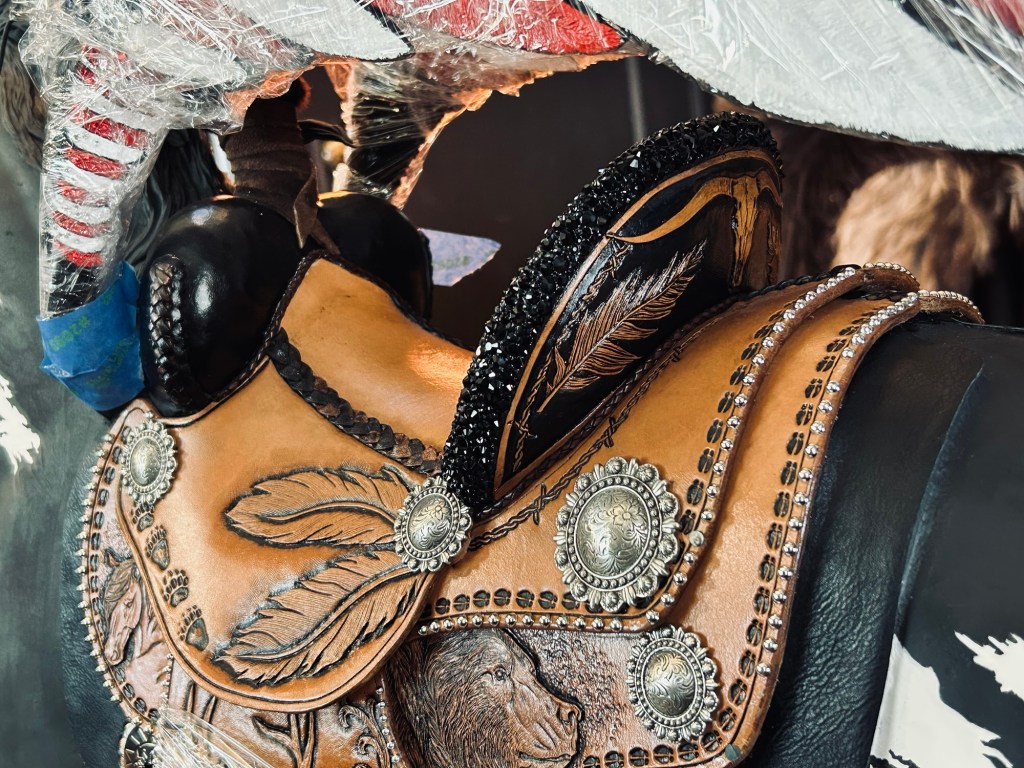
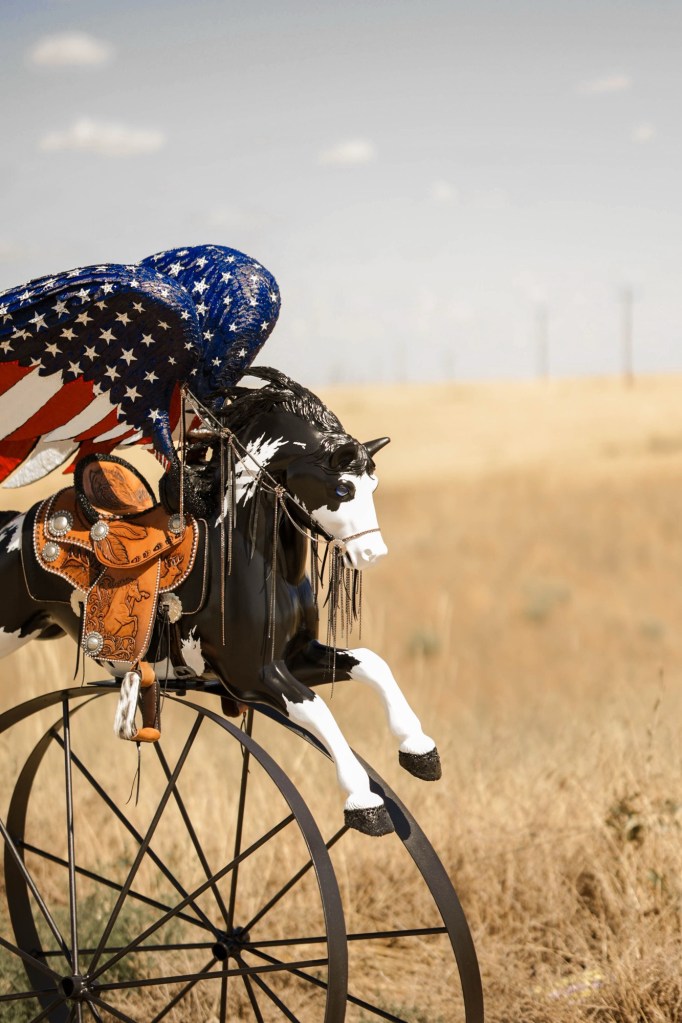
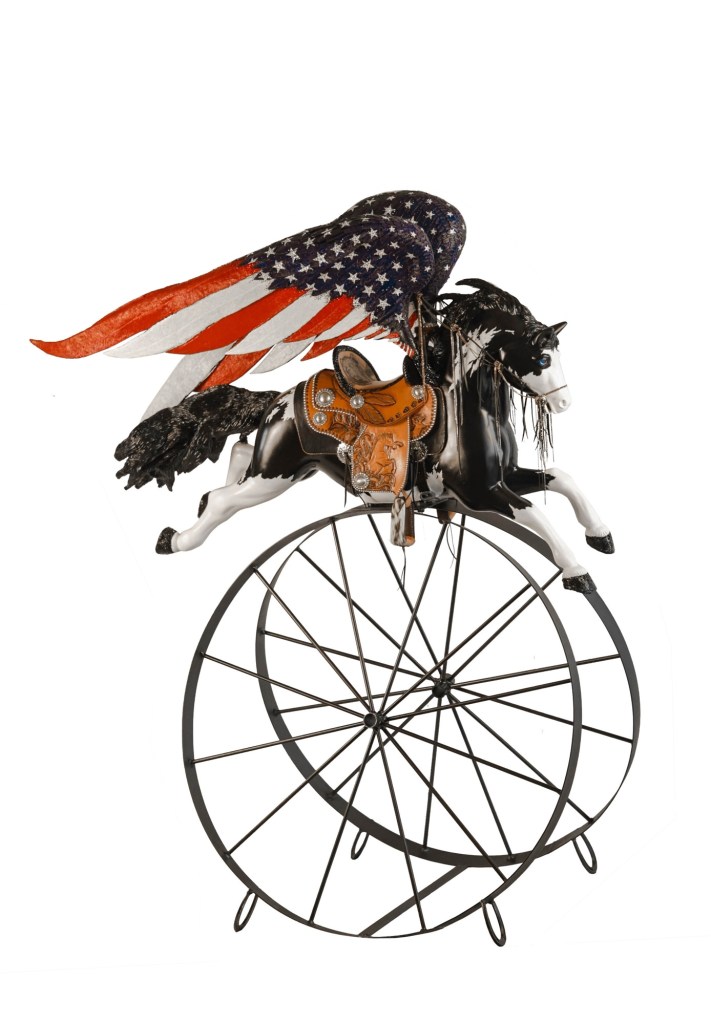
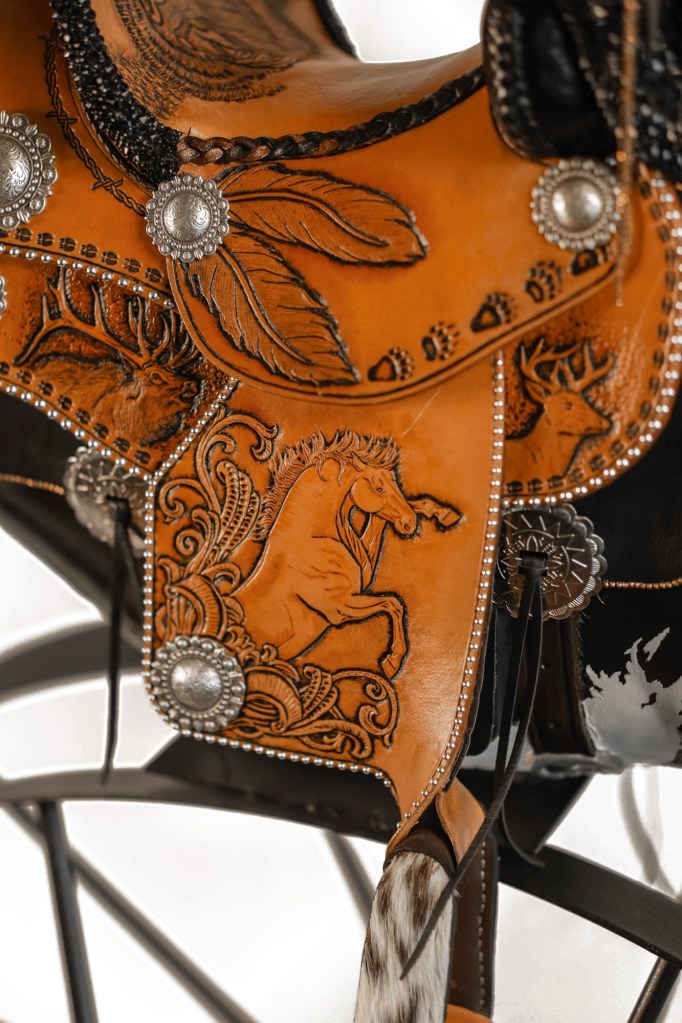
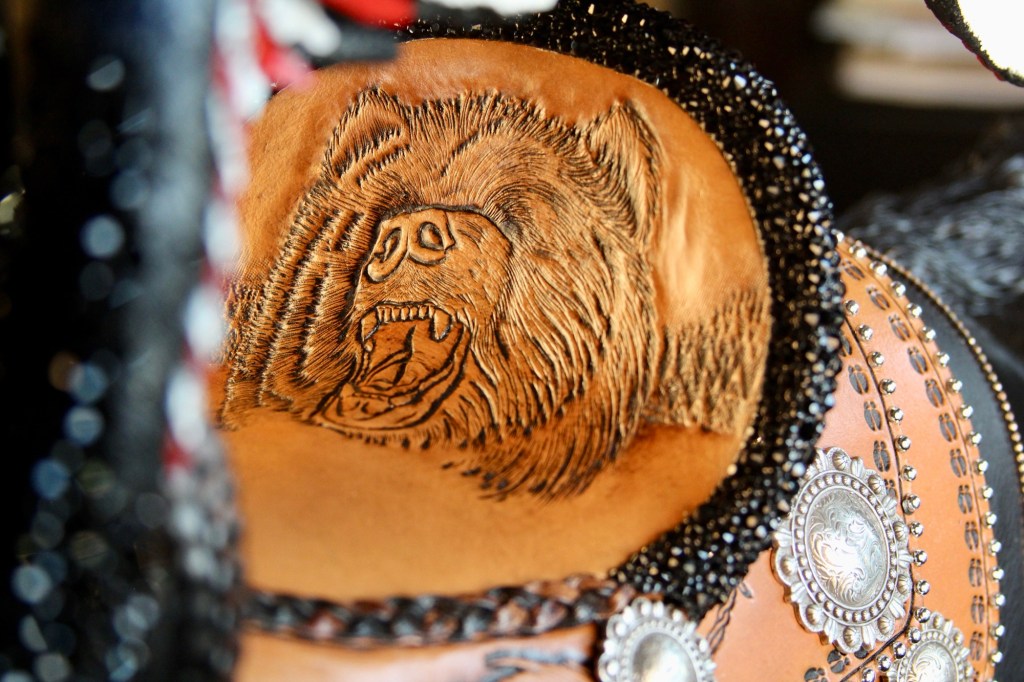
I cut the saddle cantle (back) off in prep for a new one. All of the materials laid out and ready for my vision to begin coming to fruition. White primer- blank slate Measuring for a new saddleFilled the hole on the back Building the cantle (saddle back) base with armature wire and wire mesh to begin the transformation from English saddle to westernSculpting the cantle with an epoxy clayCut off the back of the mane and the horn to make way for what’s to come Sculpted the horn and pommels/swells of the saddle with epoxy clay Another view of the newly added saddle parts Filled in the mane and covered with a mesh wire for the base of a new mane Giving the pony a new tail, using armature wire, foil, and wire mesh for the base Epoxy clay for the tail hairUsing a sculpting tool to blend and form the hairThe tail sculpting completed Drilled a hole through the body of the pony, to add a large piece of rebar, and bent both sides to be the sturdy base for wings The start of covering the horn with leather, just as you would a real, usable saddle Adding the horn capThe horn cap stitched on The base of the tiny stirrups- created from fencing wire, cardboard, and wire mesh…ready to be covered Sketching out and planning for a saddle design and patterns Painted black as a base color Made patterns and cut out my saddle pieces, making sure they will all fit together correctly Before the new eyesBeautiful blue glass eyes Sculpting the eyelids Cutting a bear into the seat of the saddle Bringing it to lifeMy tooling station All done, ready for dye and antiquing The saddle seat and back of the cantle tooled and ready for the next step Seeing how it looksCovered the pommels/swells in leather with the same techniques used in real saddle makingAdding paint markings/socks to the legs Seeing that the pieces are still fitting Decided to add a little extra face paint Cut my design into the saddle fenders, and casing the leather in prep for tooling Adding some more paint markings to his body Fenders are tooled, and ready for dye and antiquingTesting the fit and placement, still deciding on tooling/art placement for the other piecesSeat jockeys tooled and ready for dye and antiquingChecking to see where to add the next tooled pictures, and also stitched the right and left rear jockeys and skirts with leather string, as is done in actual saddle makingDeer and elk cut in, tooling has begun Tooling on the skirt is done for this side, ready for dyeAnother bear tooled in Decided on a horse for the front…all done with tooling, ready to dye everything Adding hair on hide to the horn capSaddle is dyed, antiqued, and ready to assembleA concho topper and a horn wrap to finish. Also decided to go with a black dye on the swells Covered the stirrups with leather and hair-on hide, with the same process used in a saddle shop; then attached them to the fenders Saddle mostly assembled, now for some extra finishing touches. Also here, added finishing leather braided stitching to the swells A look at the other side Silver spots added to the borders My puppy ‘Tink’ keeping me company Adding the cantle binding and leather braided stitching along the seat and jockeys Turned the stirrups, an overnight process Added a finish to the feet, but I’m getting mixed feedback about the results, so contemplating something else…Another look at the turned stirrups Sculpted a new mane to match the tail Black mane, black cantle binding to match the swells
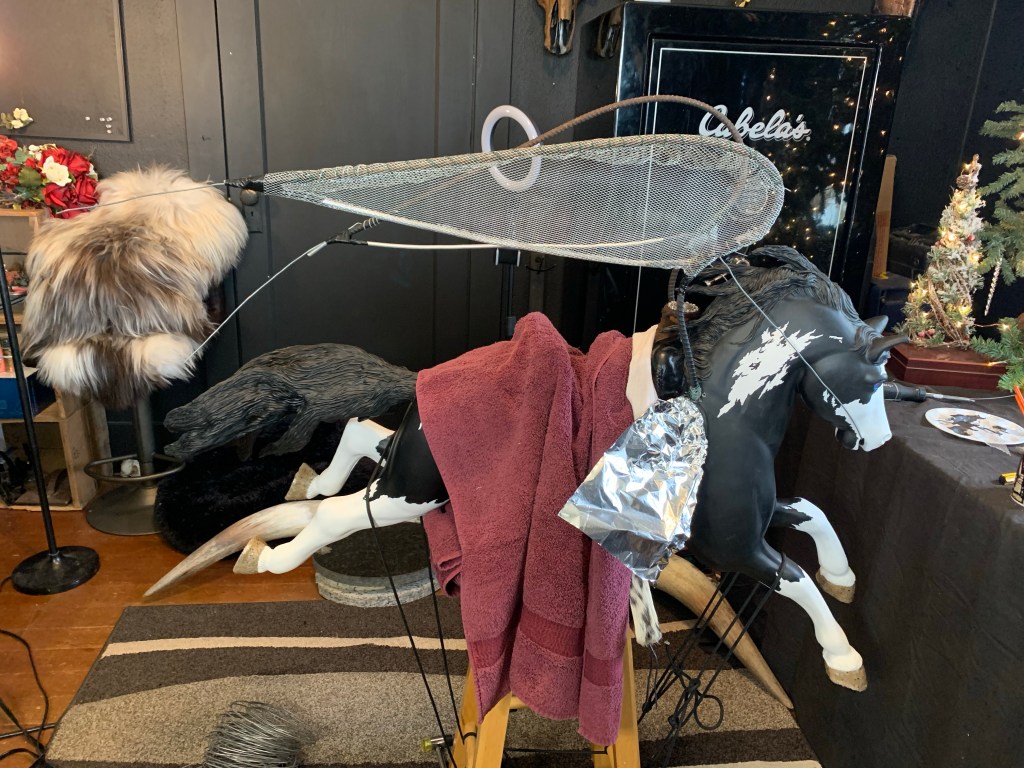
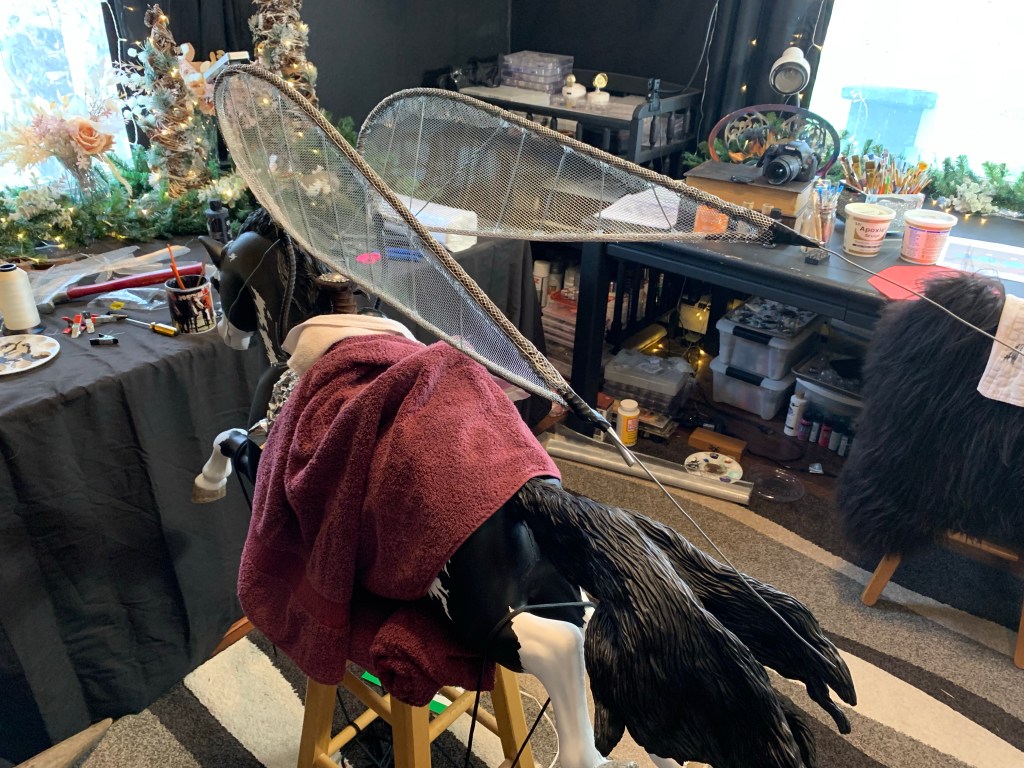
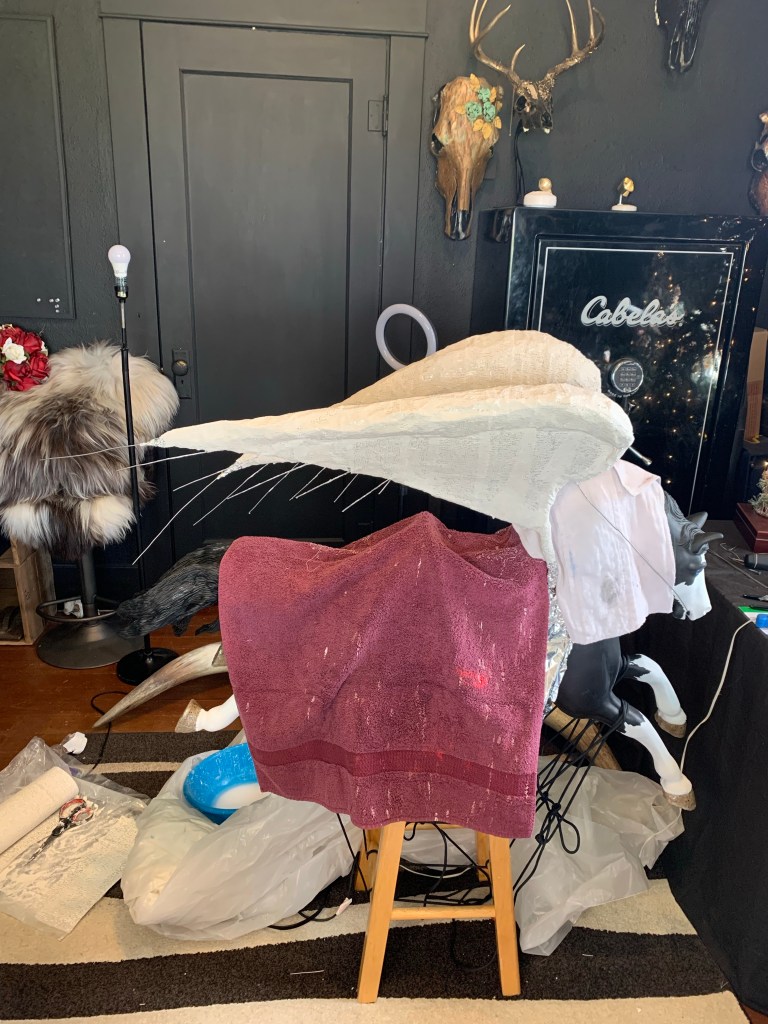
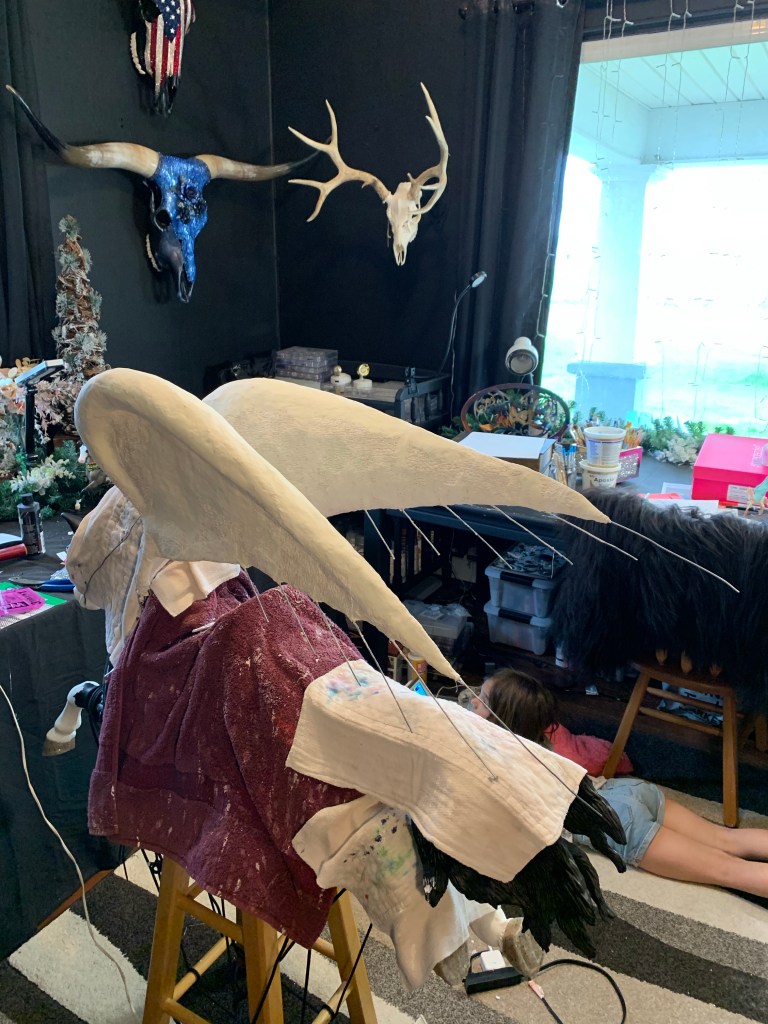
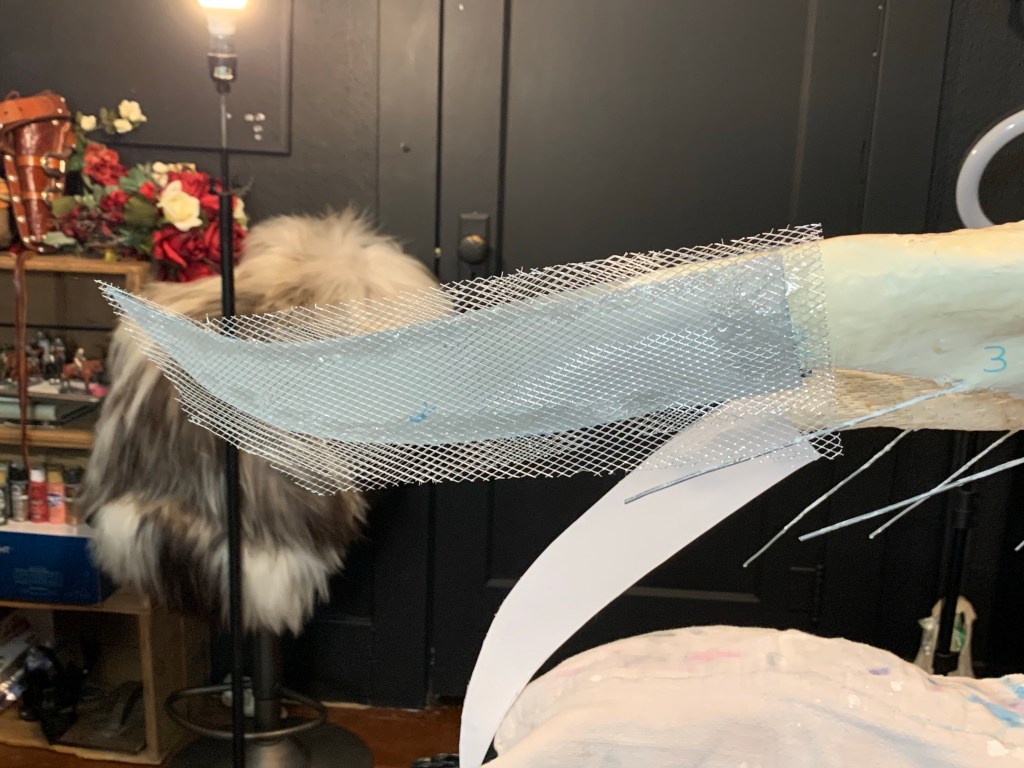
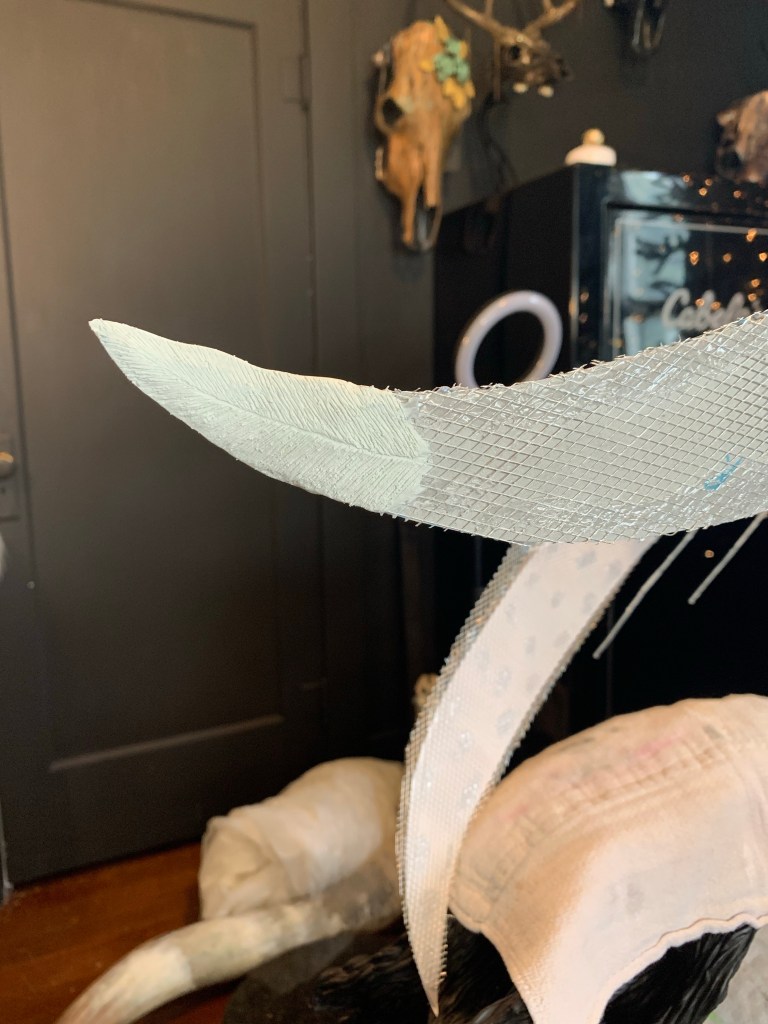
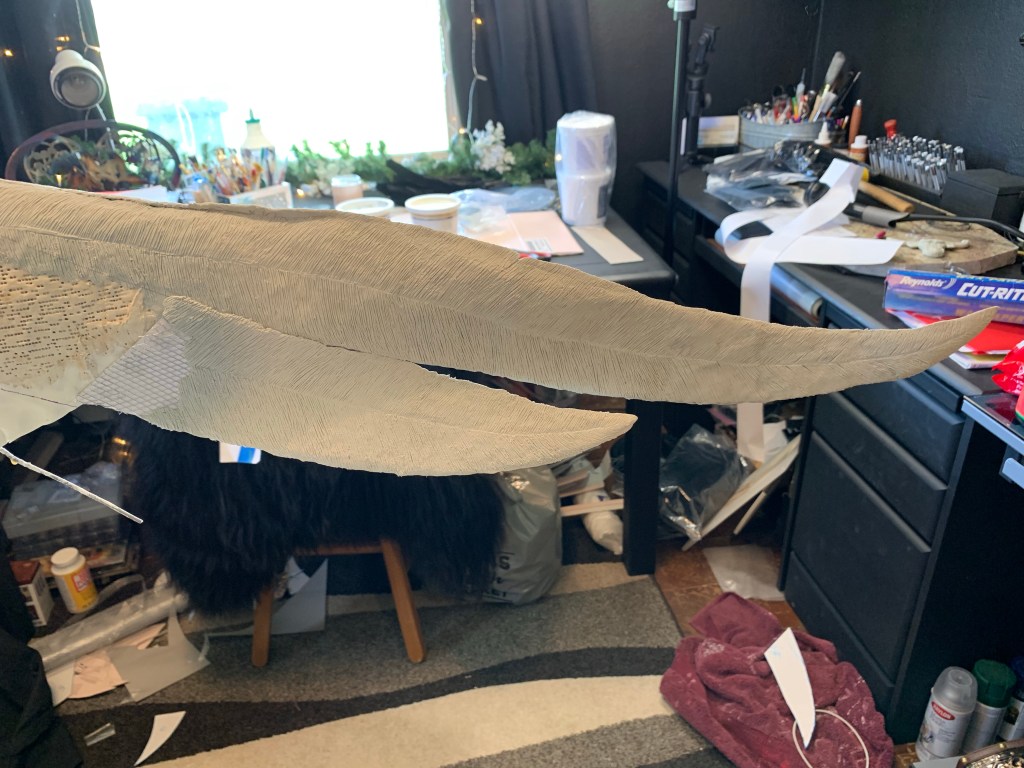
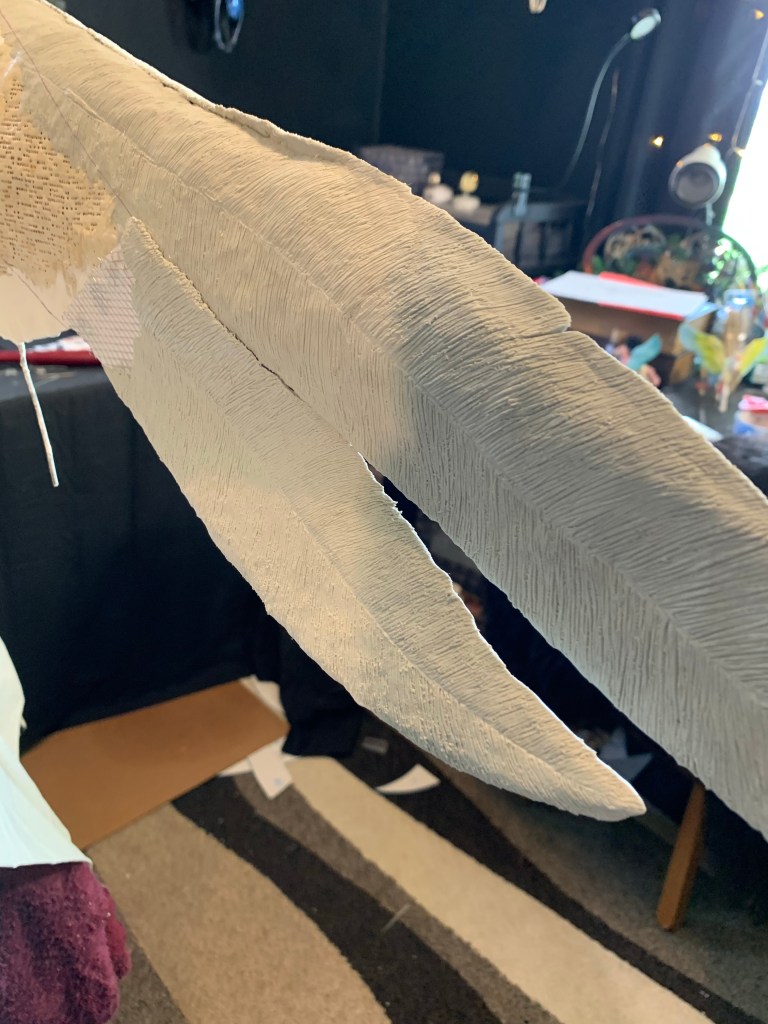
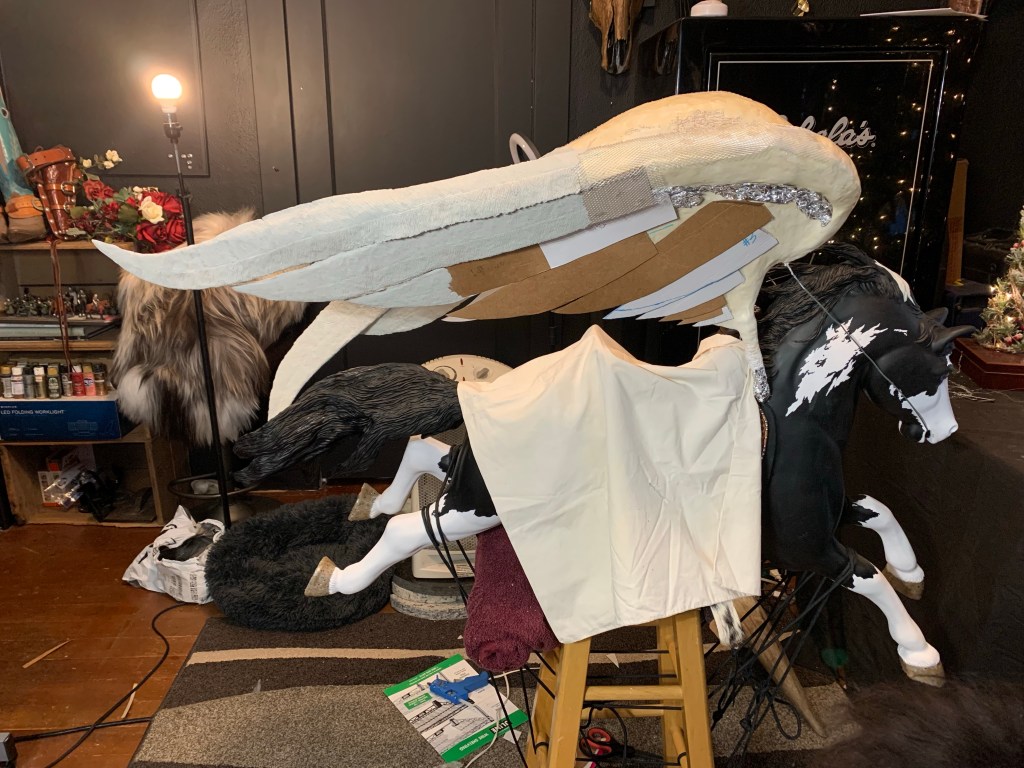
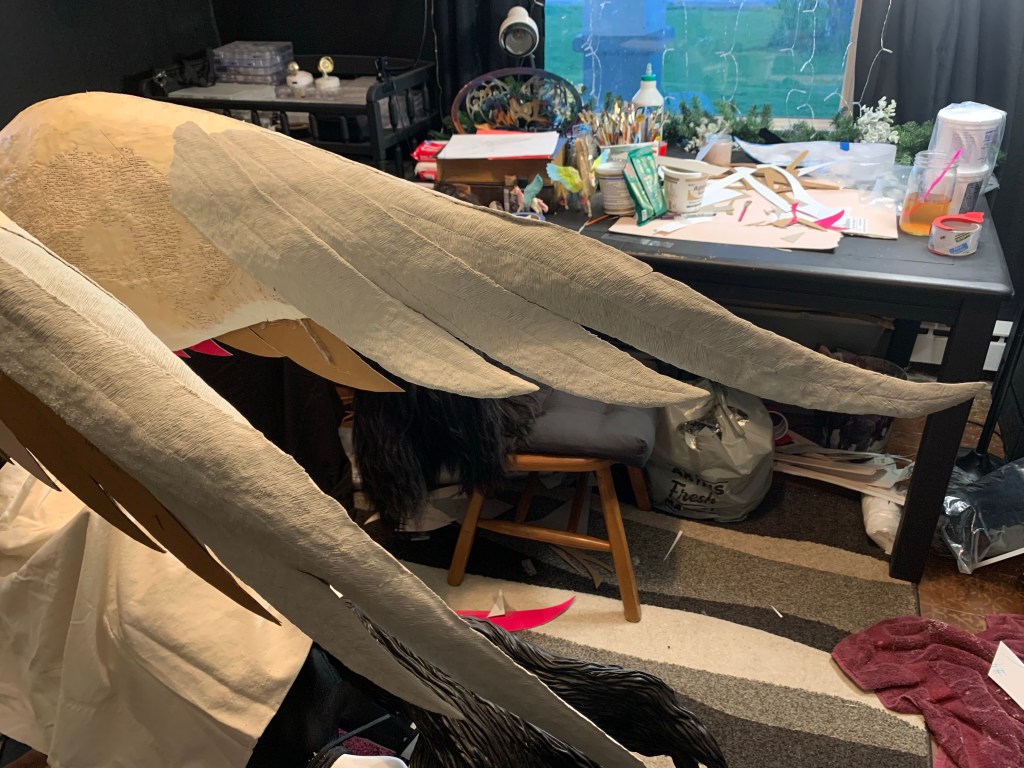
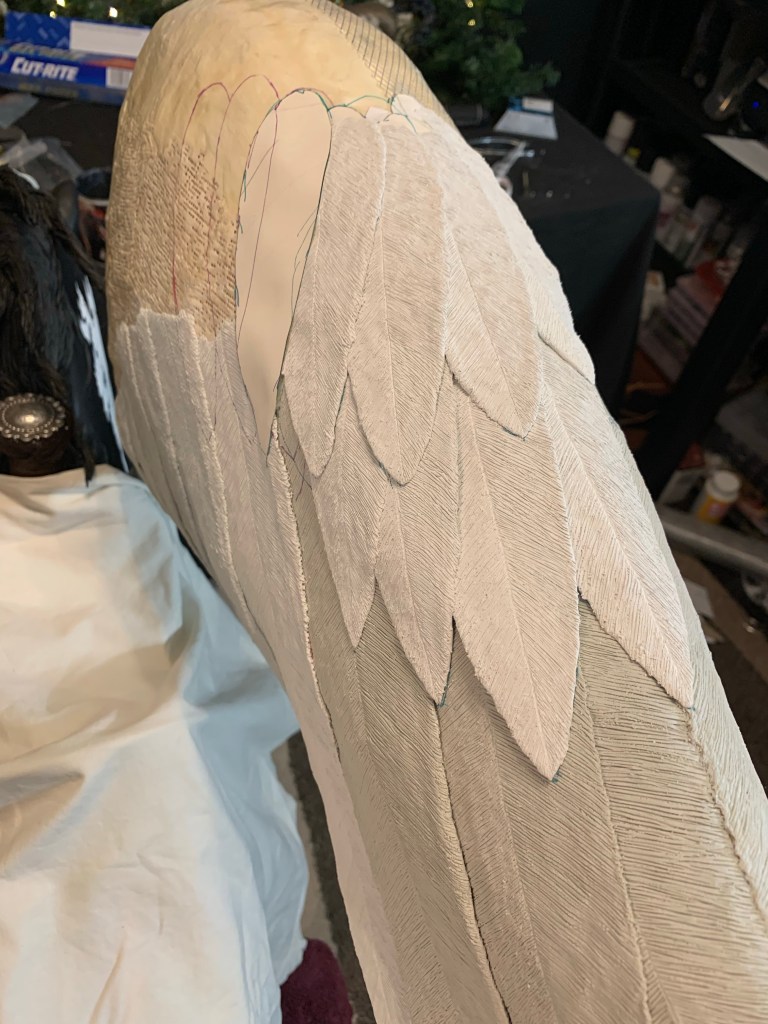
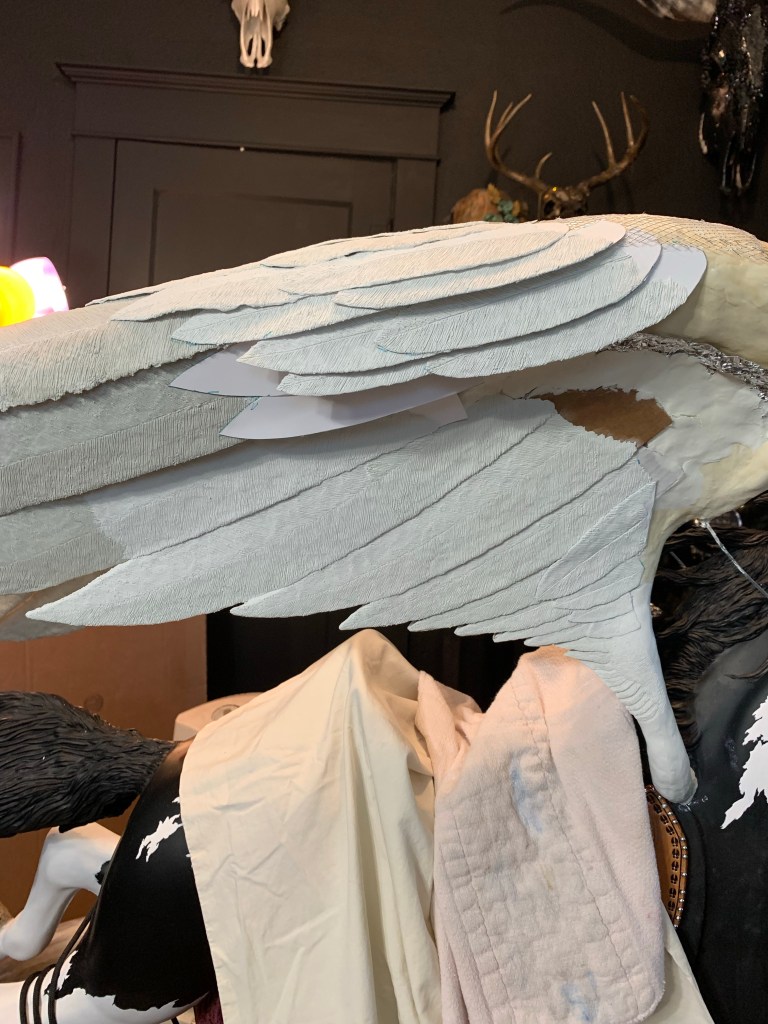
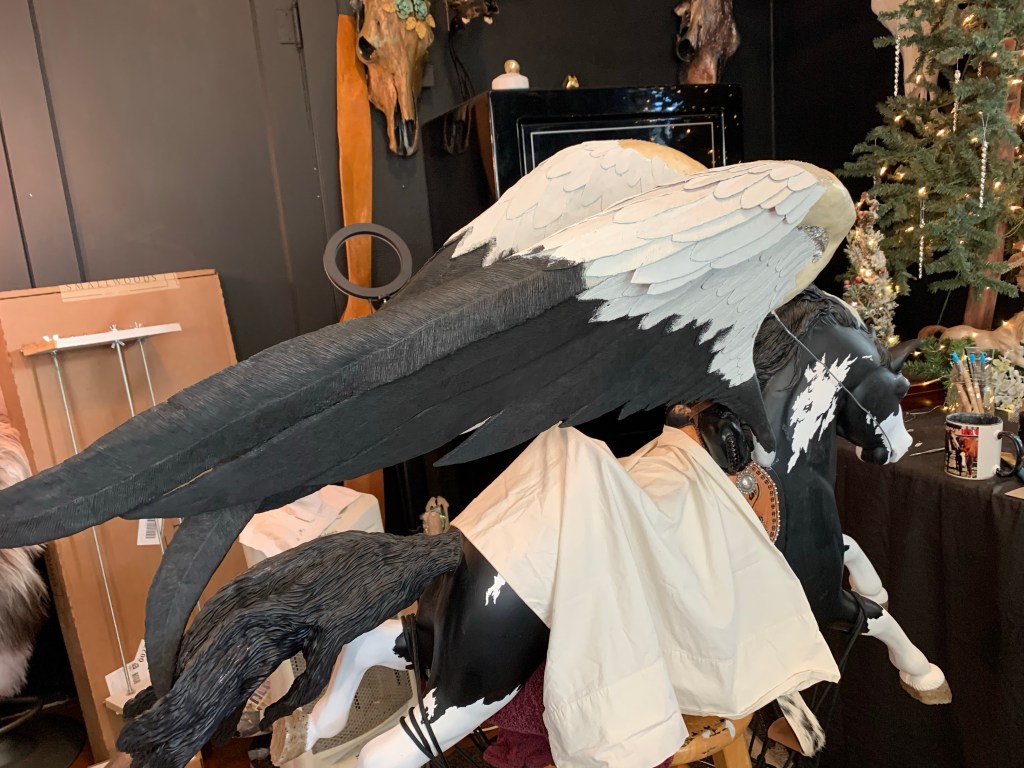
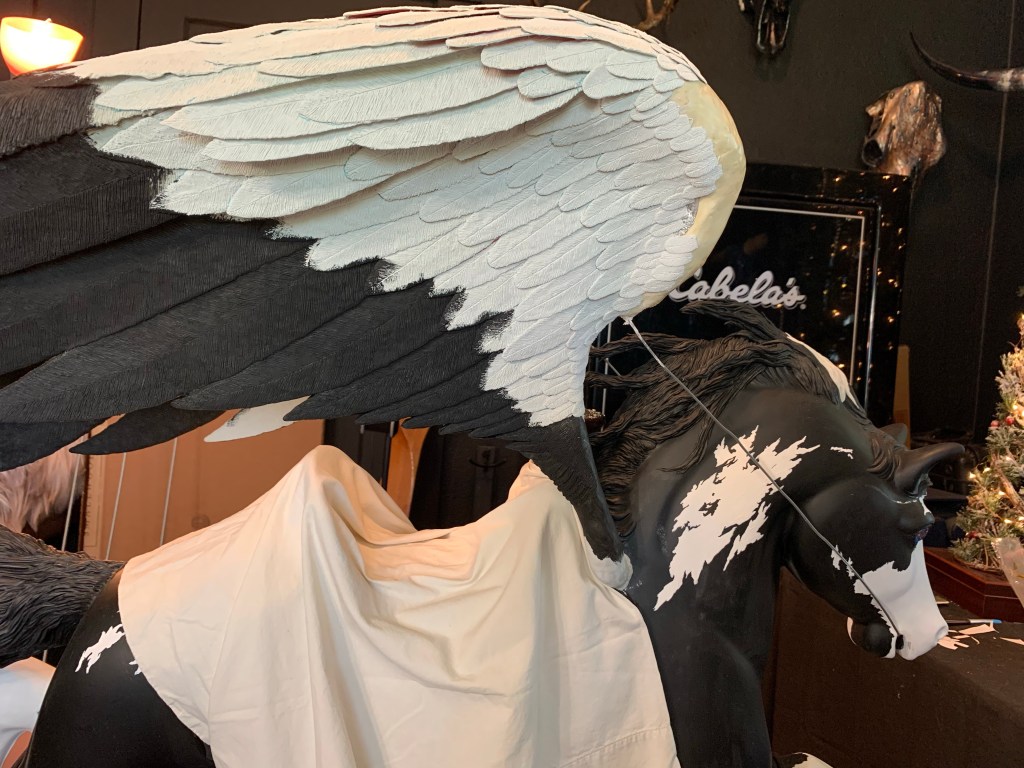
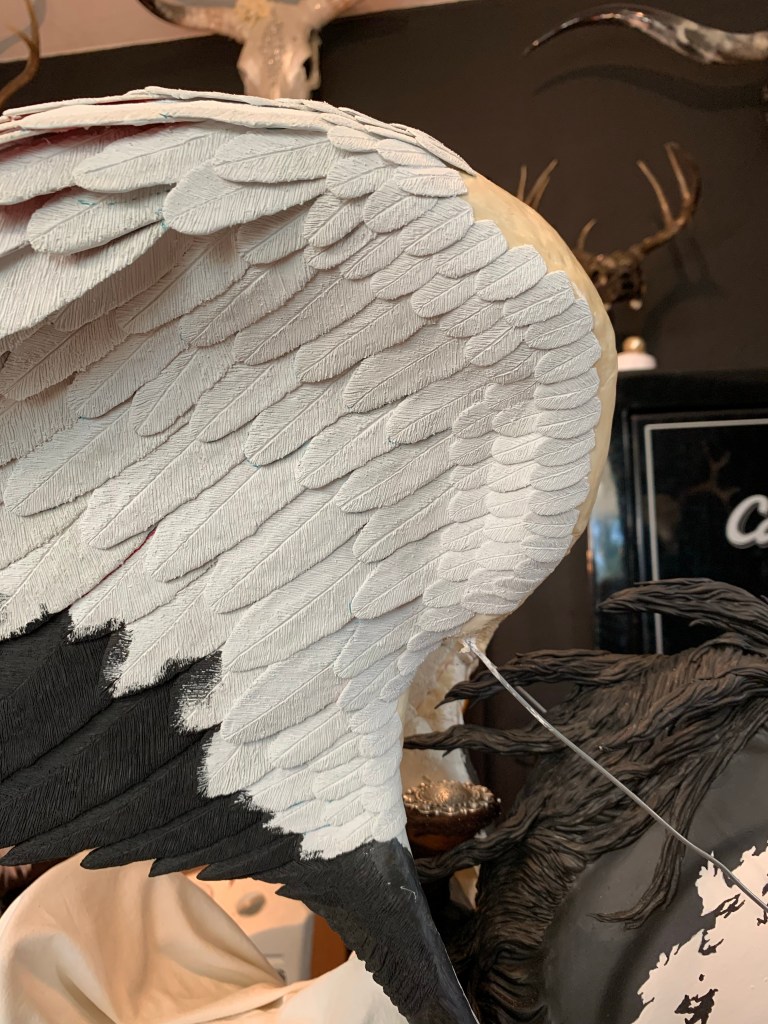
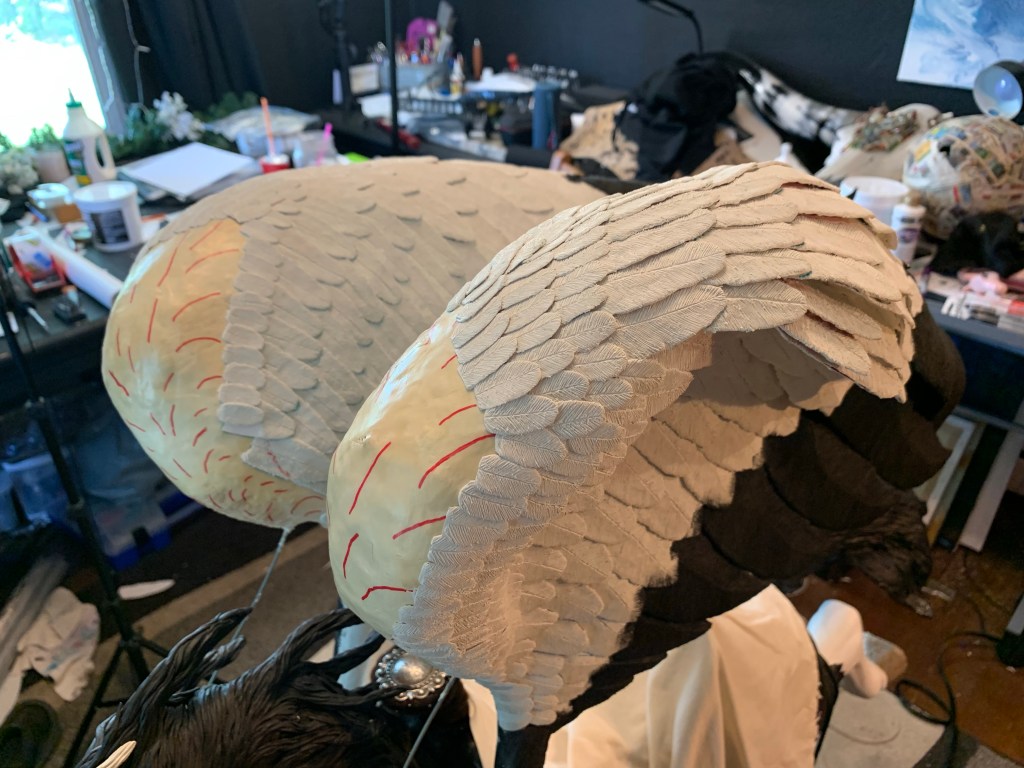
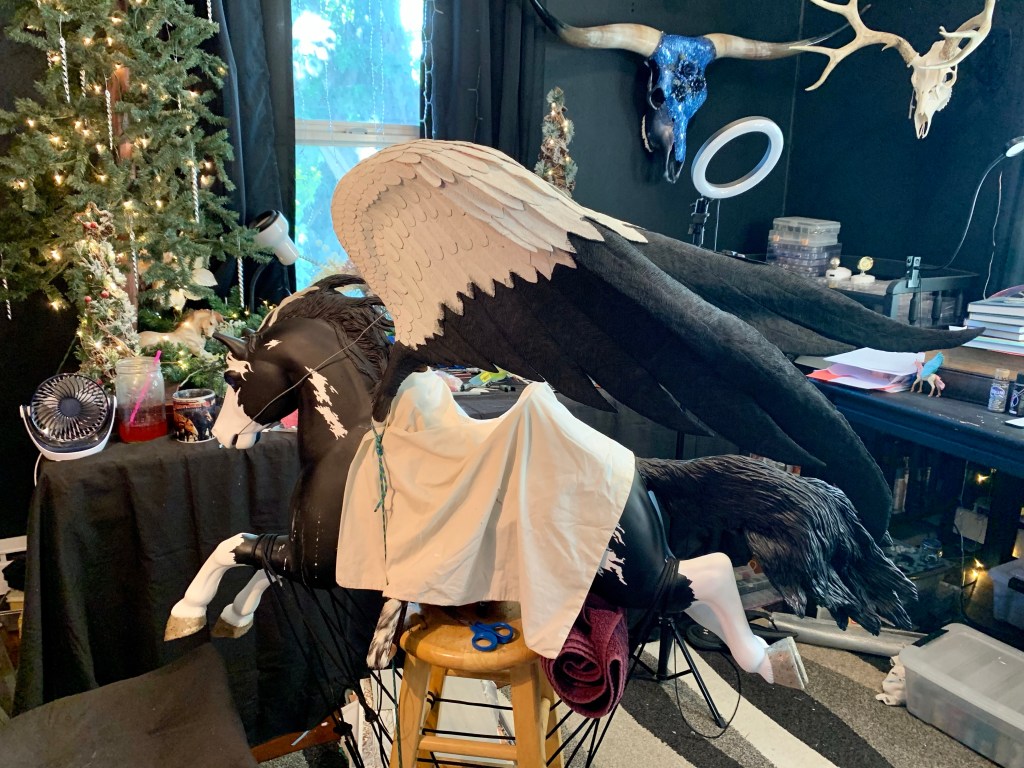
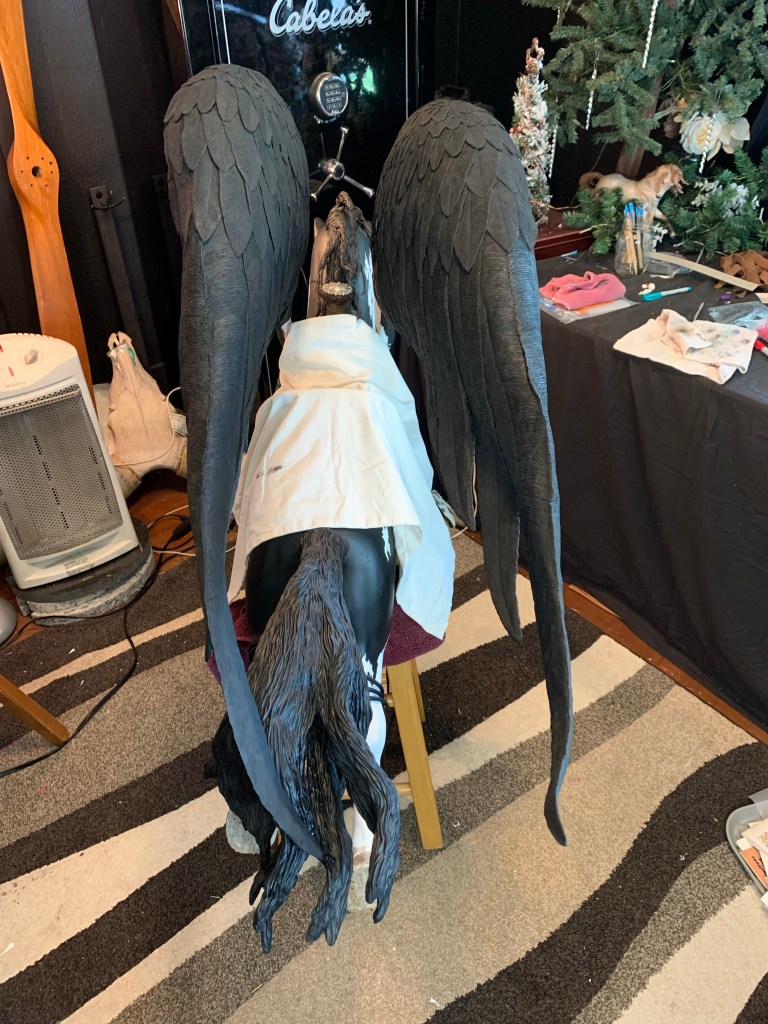
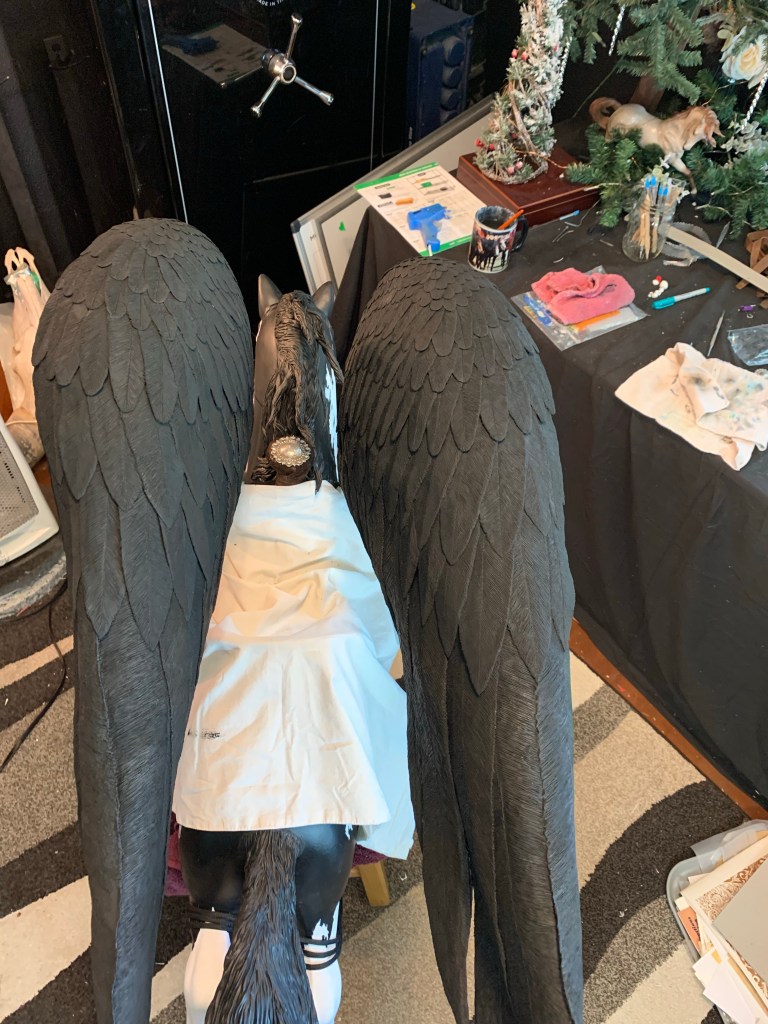
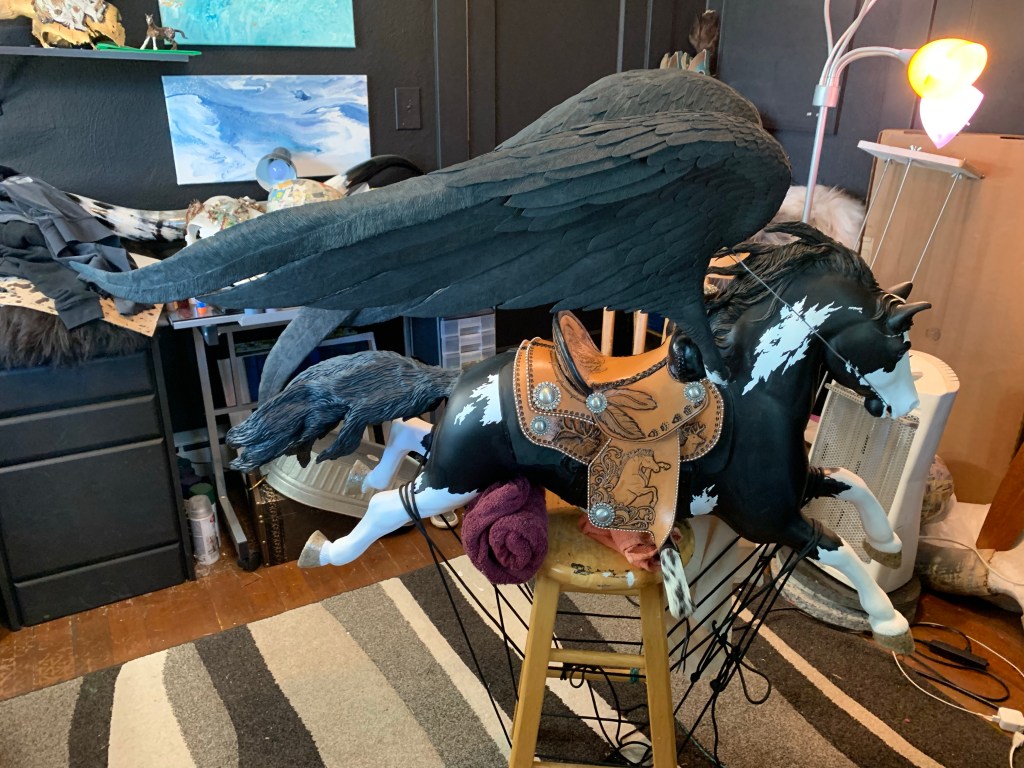
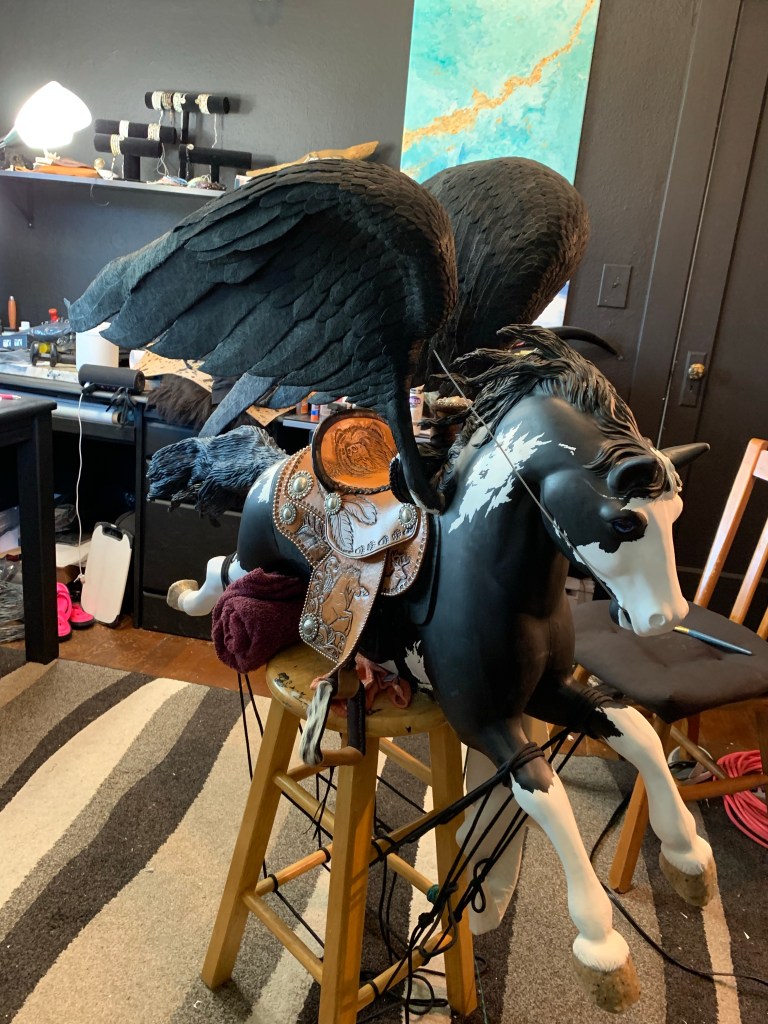
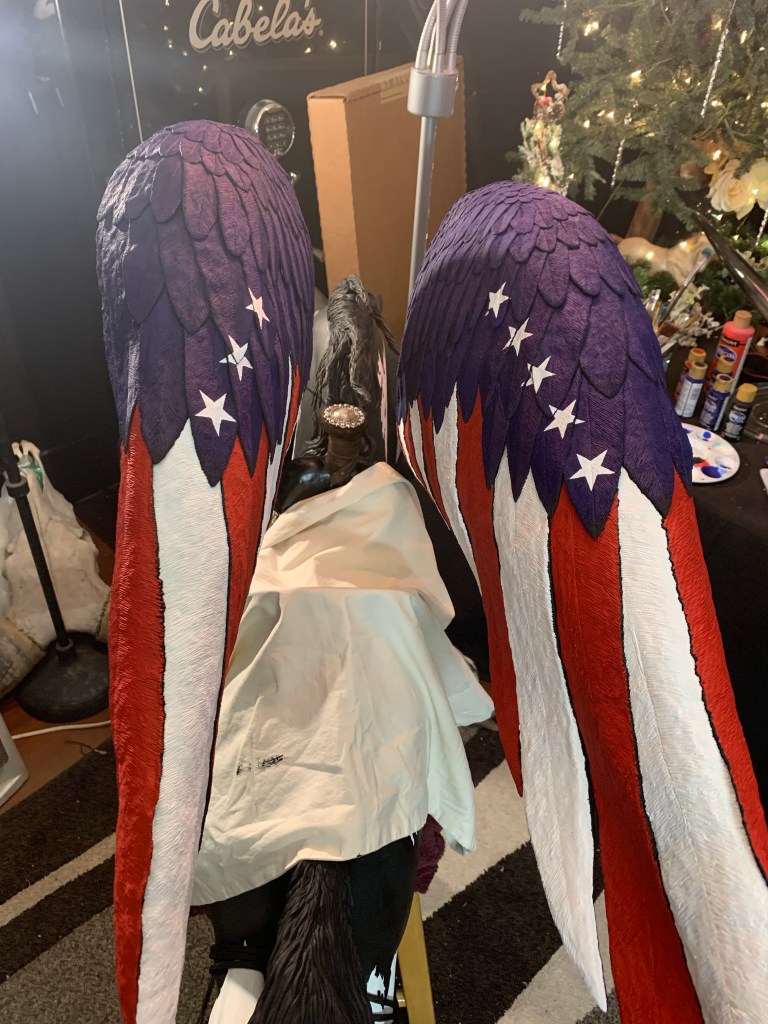
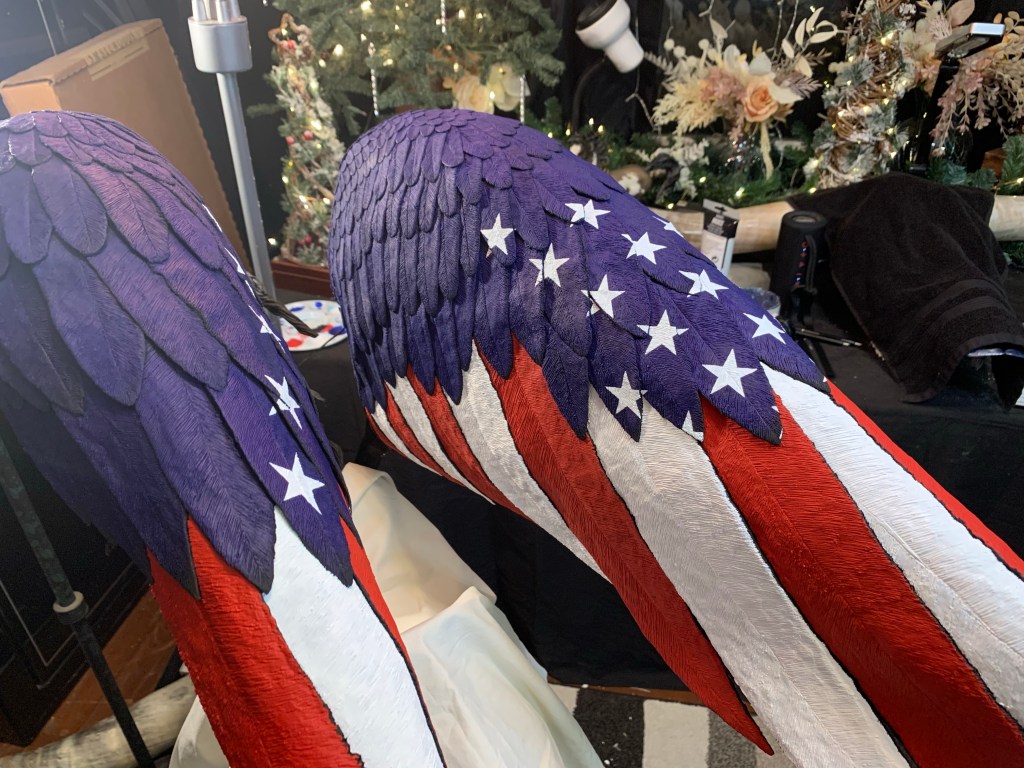
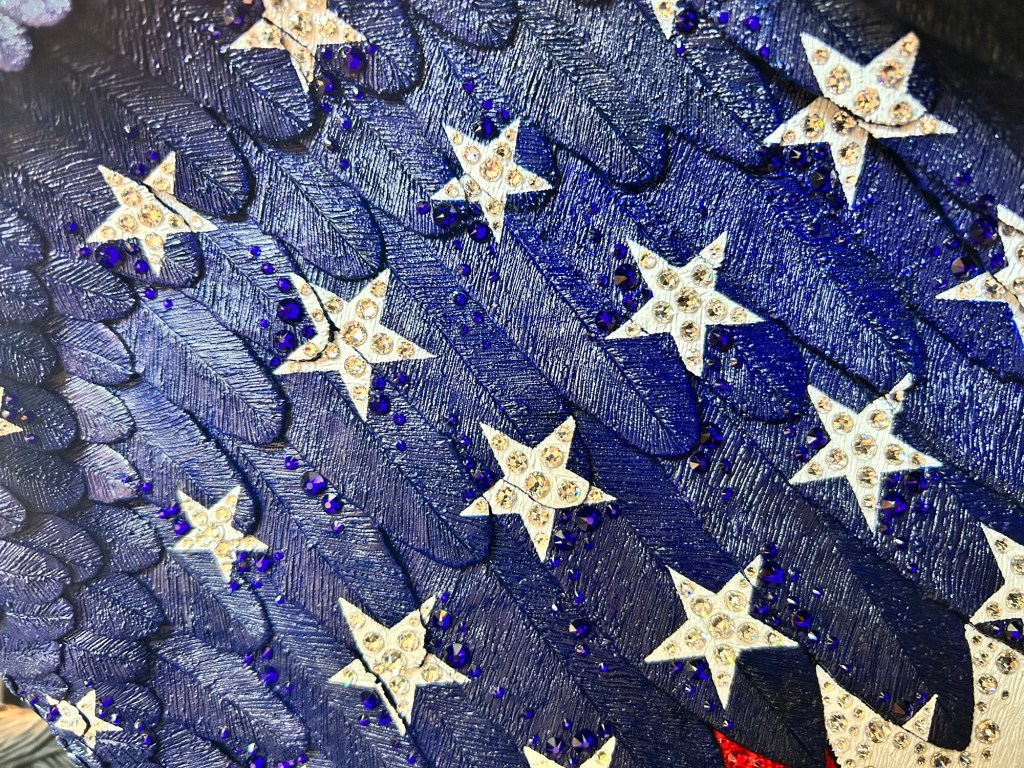
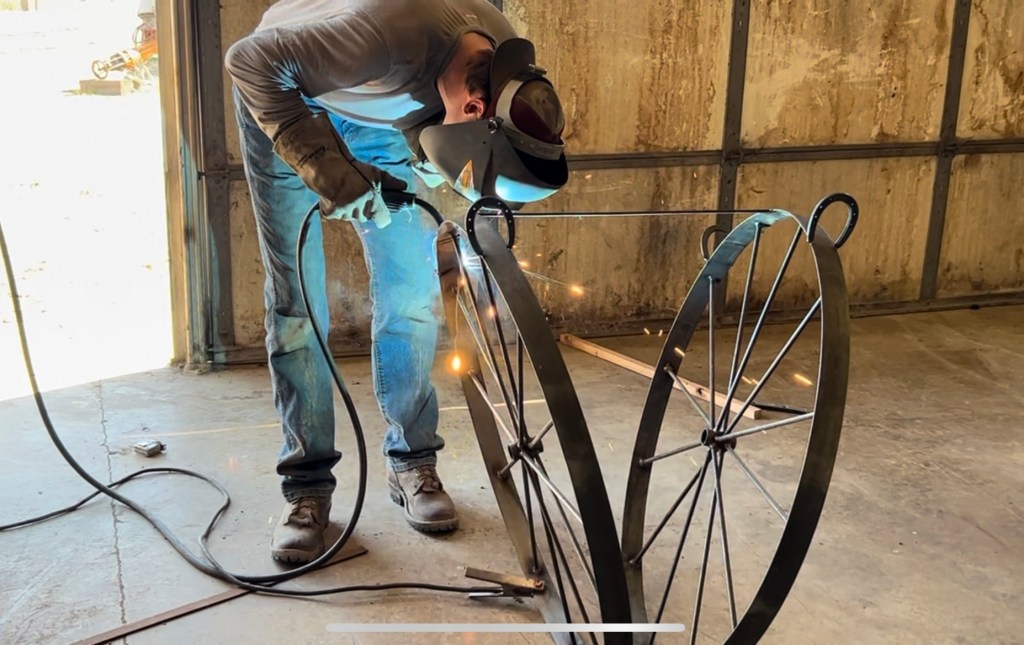
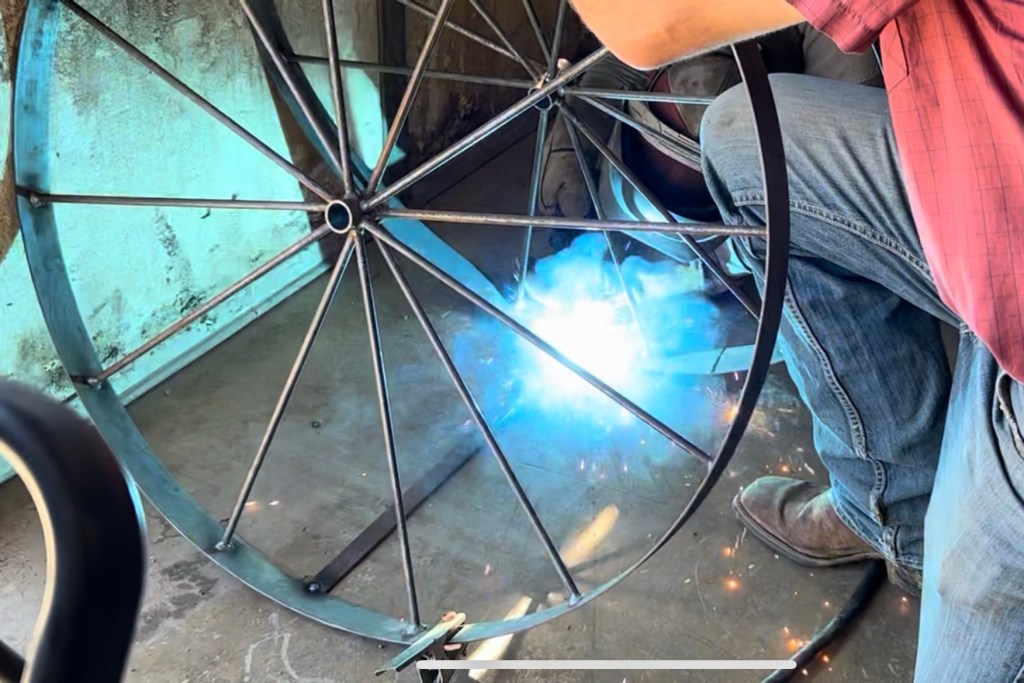
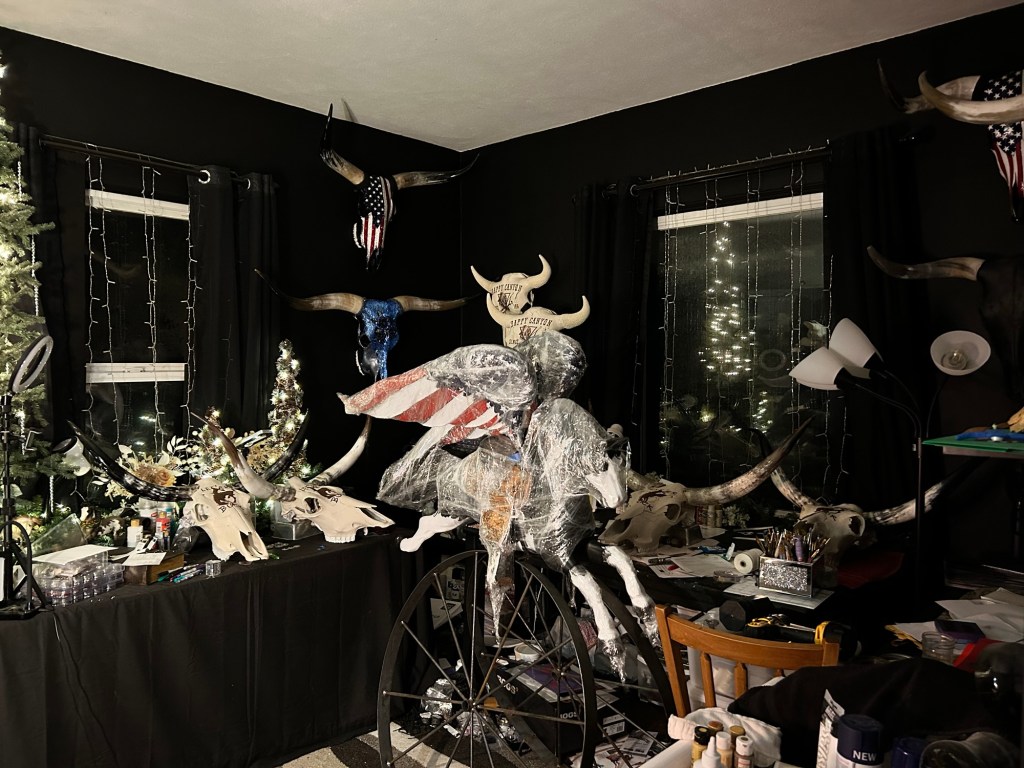
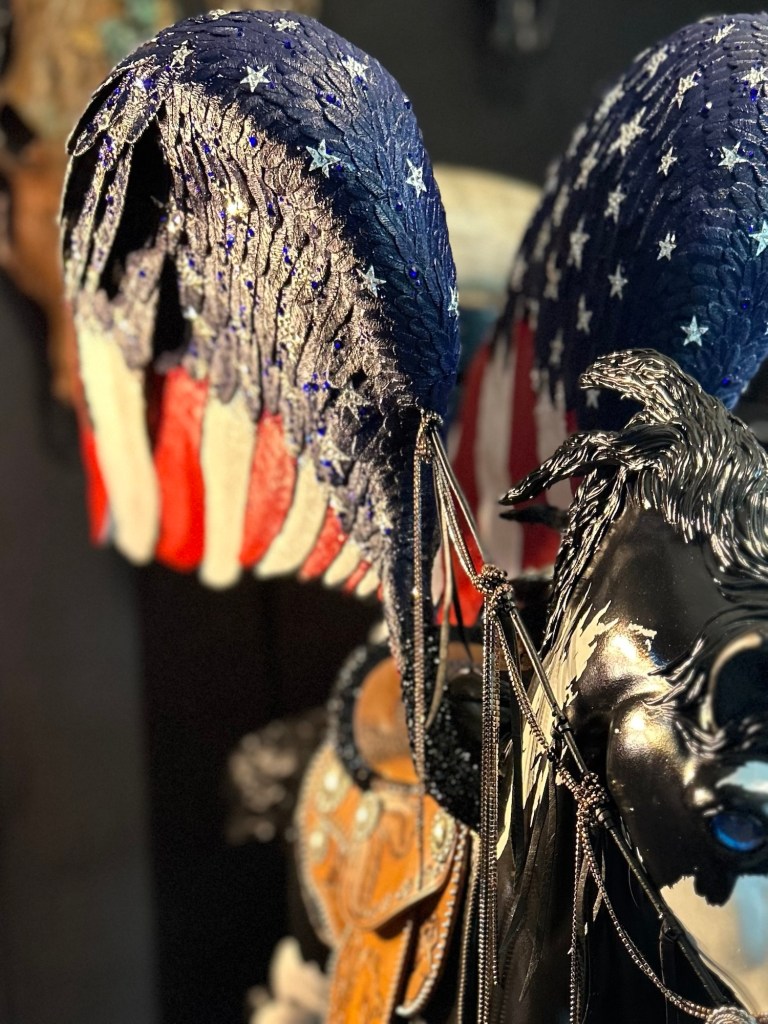
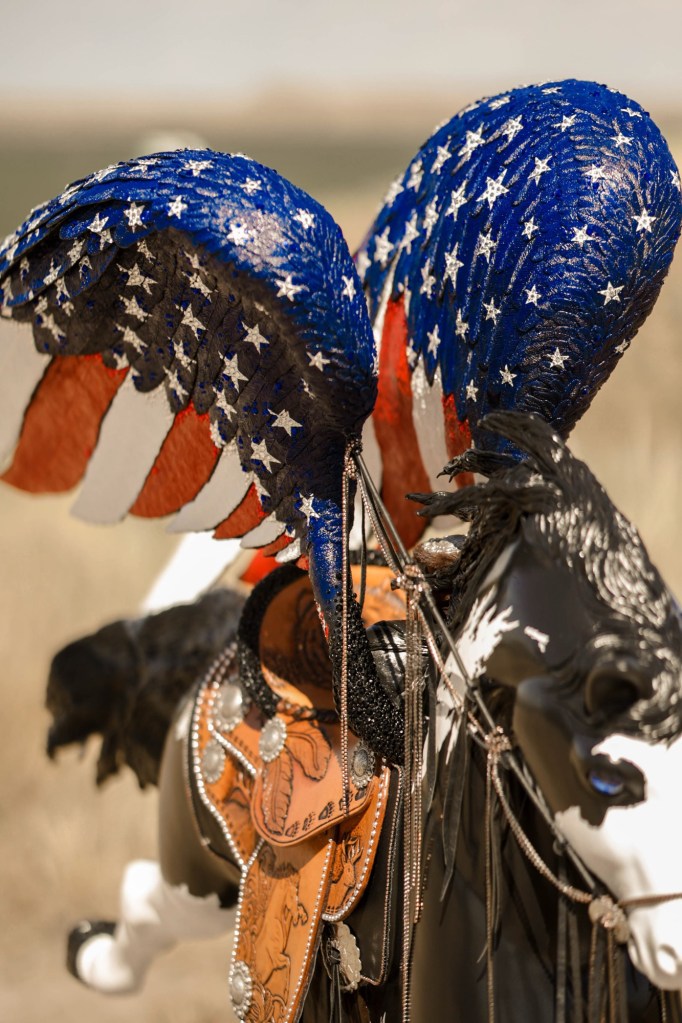
Here’s a look at the process in motion! Starting work on the wings Bones in place, using rebar, high tinsel fencing wire, and wire mesh Using tin foil to add bulk and shape without adding too much weight Quils for longer feathers Added plaster cloth to solidify the shape of the wings and add strength Another view with the plaster cloth Adding feather shape and wire mesh Sculpting feather detail in epoxy clay This detail is incredibly time consuming Painting a little is a welcome break from long days of sculpting feathersClosing in on the end of the feathers. Feels tricky making sure the flow of the feathers stays correct I really like the black wings…pondering whether or not to leave them this way or continue with my original plan for them Decided to take a risk and go with my original plan for the wing color I’ve painted each color on 7-8 times to get the vibrancy I’m looking for Bold Adding those stars…especially tedious to get straight edges with the uneven surfaces and overlappingA close up of the elk on the saddle skirt Everything is wrapped and covered so the wings can be finished with a glossy spray The finish deepens the colors in the wings Adding high quality Austrian crystals to add movement to the wings Adding more to the forelock Encrusted the cantle binding on the back of the seat, completely, and individually, with fine Austrian crystalsI enlisted the guys to help build my wagon wheel stand, so thankful for their help in making this thing happen! They executed my plan perfectly, couldn’t be more happy with their work! The pony’s first sit atop his wagon wheel pedestal
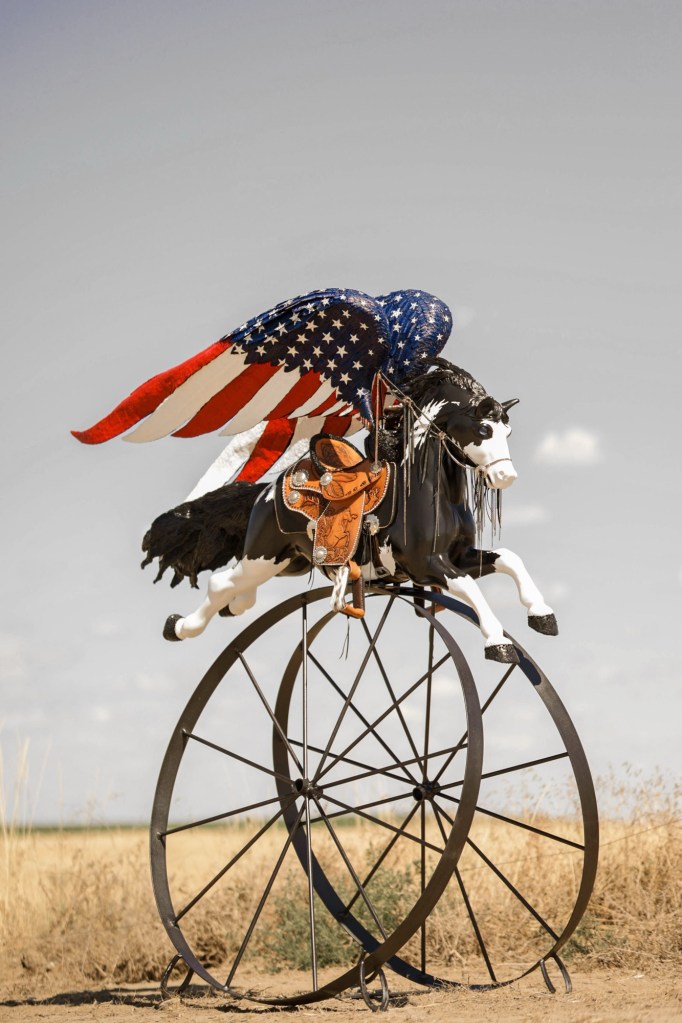
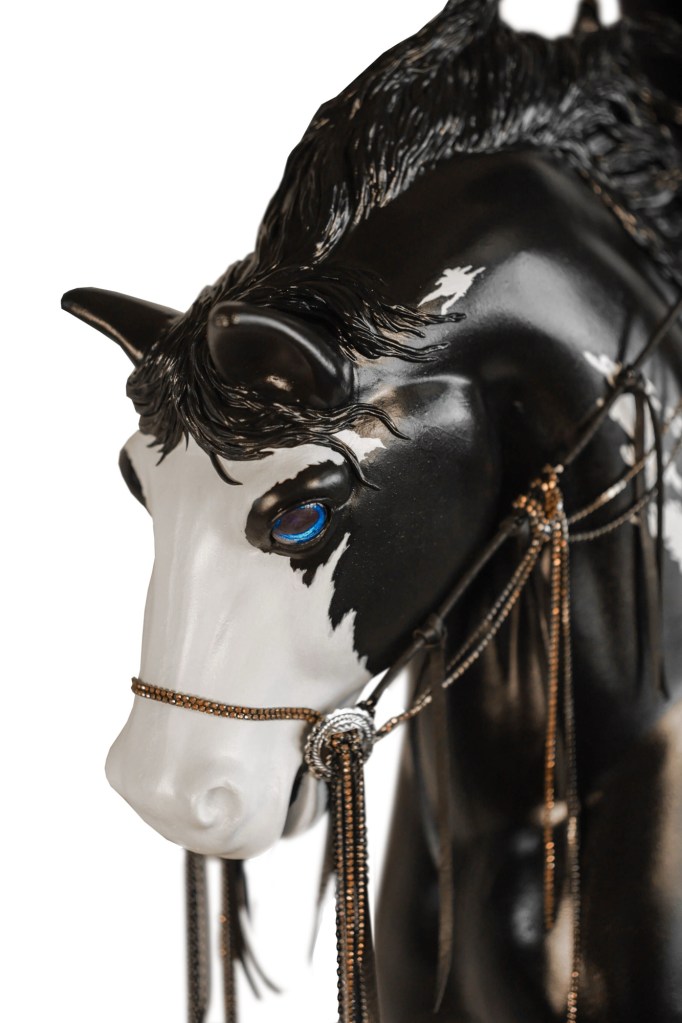
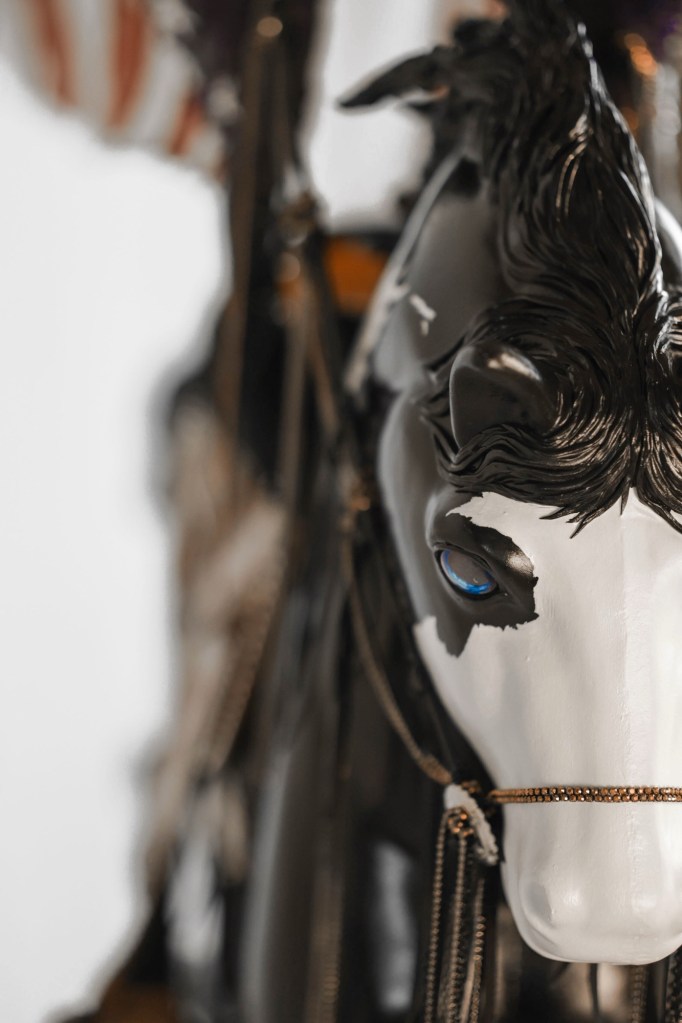
A look at the building of the wings in motion Finally, the reins, and the final pony transformation is revealed